
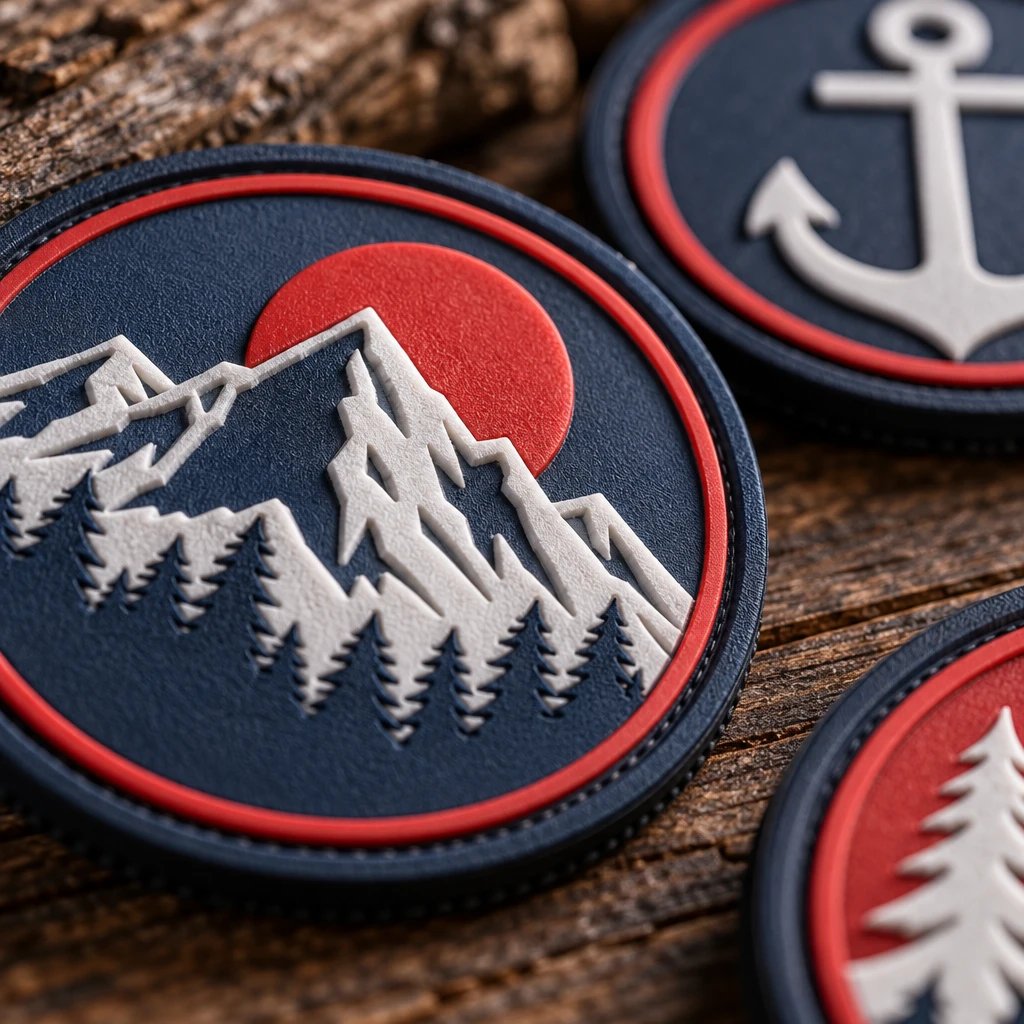
For buyers comparing 3d embroidered vs pvc patches, choose 3D embroidery for bold textile logos on structured caps and jackets, and choose PVC for gear exposed to mud, rain, and frequent wiping. The reasons come down to artwork limits, attachment, cleaning, and the production setup you actually need.
How do 3d embroidered vs pvc patches compare?
The main difference is how they create dimension: embroidery raises thread over foam, while PVC forms the design in molded plastic. Neither material wins every durability test, and neither automatically makes a complicated logo easier to reproduce.
| Buying criterion | 3D embroidered patch | PVC patch | Practical consequence |
|---|---|---|---|
| Construction | Raised stitching over foam on a textile patch base | Flexible molded polyvinyl chloride with raised or recessed design areas | Choose a stitched finish or a molded finish before judging the artwork |
| Durability | Raised thread can snag or abrade; attachment and garment care matter | The face handles wet dirt well; edges, backing, and attachment still wear | Match the material to the exposure rather than treating either as indestructible |
| Detail level | Best with broad lettering and simple shapes; fine details often need flat stitching | Clean molded shapes and separated color areas; fine gaps still have production limits | Review the smallest text and narrowest spaces at finished size |
| Cost drivers | Digitizing, stitch count, foam work, size, coverage, and finishing | Mold setup, size, color layout, relief levels, and finishing | A small quantity can make setup a larger part of the per-piece cost |
| Cleaning | Thread can hold dirt and needs care around raised surfaces | The face can usually be wiped with mild soap and water | PVC is the more practical starting point for muddy equipment |
| Typical uses | Structured caps, varsity-style garments, heavyweight jackets, brand emblems | Outdoor bags, removable gear badges, work equipment, club field gear | Garment weight and patch location can change the recommendation |
| Attachment | Sew-on, hook-and-loop, or compatible heat-applied options | Sew-on through a designed channel or hook-and-loop; adhesive options need confirmation | Select the backing for the actual garment, not just the patch material |
| Surface feel | Textile texture with visibly raised stitched areas | Smooth or textured molded face with defined relief | Physical feel cannot be confirmed by a digital mockup alone |
In our production experience, attachment can decide whether a patch works better than the face material does. A properly sewn textile emblem on a jacket may outlast a poorly attached PVC badge, even though PVC is easier to clean. Compare complete specifications, not just material names.
What creates the raised surface in each patch?
A 3D embroidered patch is a textile emblem that uses foam beneath selected stitches to raise those areas above the base. A PVC patch is a flexible polyvinyl chloride emblem that forms its artwork through molding rather than thread.
With embroidery, the thread needs enough room to cover and contain the foam. Broad satin-stitched letters are a natural fit. Narrow lines, sharp interior corners, and tiny enclosed spaces are harder because the foam still needs a clean edge and the stitching must stay readable.
Not every part of the design has to puff. A large initial can be raised while the surrounding club name stays flat. That mixed approach often makes more sense than forcing small text into dimensional stitching. The 3D embroidered patch options are worth reviewing when the raised letter itself is central to the design.
PVC uses a different kind of depth. Raised letters, recessed backgrounds, and stepped outlines are planned into the molded construction. Rounded, sculpted relief is not necessarily the same specification as a design with several flat height levels, so describe the effect you want instead of requesting only a “3D patch.”
Which material keeps lettering and logo details readable?
PVC is often the better starting point for crisp, separated graphic shapes, while 3D embroidery favors broad letters with open spacing. Neither is the right default for dense text, photographic detail, or gradients.
Start with the smallest element. Not the mascot. Not the outside border. The tiny establishment date, narrow stripe, or line of sponsor names usually determines how much the artwork must change. If that element cannot survive production at the requested size, the whole layout needs a decision.
For example, a 3-inch cap patch with a large block initial and a short team name gives you room to separate raised and flat stitching. Put a long location name, a detailed mascot, and a slogan inside the same example size, and the useful space disappears quickly.
PVC does not remove that problem. Molded lettering still needs sufficient stroke width, gaps between colors, and space around recessed areas. A dramatic shadow in a digital rendering can also make relief look deeper than it will feel. Confirm which shapes are raised and which are recessed in the specifications.
I'd skip both materials for a photographic portrait unless the image can be substantially redrawn. Printed construction is the sensible alternative there. Paying for dimensional production will not rescue artwork whose meaning depends on continuous shading.
When should you choose 3D embroidery?
Choose 3D embroidery if the project needs a textile finish and the main design consists of bold, uncomplicated shapes. It is especially convincing when the raised stitching reinforces the style of the garment rather than competing with it.
Choose 3D embroidery if the raised letter is the point
A broad monogram on a structured cap is a good reason to use foam-backed stitching. The thread texture belongs with the cap, and the dimension gives a simple mark enough presence without adding more artwork. Keep supporting text flat when necessary.
- Choose it for a heavyweight jacket or structured cap when visible stitching is part of the intended look.
- Choose it when the design has substantial letters, open counters, and generous separation between shapes.
- Choose it when the patch will see ordinary garment wear rather than routine scraping against equipment.
- Choose it when the team or brand wants a textile emblem, not a smooth molded badge.
There are limits. A soft, lightweight shirt can sag under a dense patch, and a raised emblem near a backpack strap may receive constant friction. For those placements, reducing the patch size, moving it, or switching to flat embroidery can be a better decision than defending the original specification.
If the logo is close but the lettering feels crowded, request a free digital mockup through our embroidered patch options with raised and flat areas identified. That comparison is more useful than enlarging a screen preview and guessing.
When should you choose PVC?
Choose PVC if the patch face needs to shed dirt and wipe clean, or if the design depends on molded outlines rather than thread texture. Outdoor equipment and removable gear badges are practical applications, not just style choices.
Choose PVC if cleaning matters more than a textile finish
For example, a trail crew ordering badges for equipment bags may value a face that can be wiped after a muddy day. Thread can retain dirt between stitches. PVC gives that crew a simpler cleaning surface, although its hook-and-loop backing can still collect grit.
- Choose it for outdoor bags and gear that regularly encounter wet dirt.
- Choose it when raised and recessed color blocks are central to the design.
- Choose it for removable identification on an existing loop panel, with the correct hook backing specified.
- Choose it when a smooth molded surface fits the product better than visible stitching.
See your artwork as a custom USA patch before you buy. Free digital mockup in 12 hours — 5-piece minimum per design. We do not produce until you approve.
GET A FREE MOCKUPThe PVC patch construction options should be reviewed with the intended mounting surface in mind. A flexible molded patch can still be too thick or broad for a sharply curved cap front. Flexible does not mean weightless, and it does not mean every shape will lie flat.
I'd also avoid treating PVC as a substitute for protective equipment certification. An ordinary decorative badge is not evidence of flame resistance, electrical protection, or suitability for specialized protective clothing. Those garments have their own requirements.
Which patch handles rain, abrasion, and laundry better?
PVC has the clearer advantage for wiping away wet dirt, but abrasion and laundry depend on the entire assembly. Thread, foam, molded edges, adhesive, stitching, and the garment can fail in different ways.
Raised embroidery presents a surface that can catch on rough contact. Repeated rubbing may flatten the appearance or fuzz the thread. That does not make it unsuitable for jackets. It means a chest emblem and a patch directly beneath a shoulder strap are different jobs.
A PVC face resists water absorption better than a textile face, but water can still reach the stitching, backing, and fabric beneath it. Calling the whole garment waterproof because it carries a PVC badge would be misleading. Sewing through a coated shell can also compromise the shell's water barrier.
For laundry, follow the garment instructions and the confirmed patch specification. Avoid assuming that high dryer heat, bleach, or dry-cleaning chemicals are acceptable. If removable badges go on washable workwear, taking them off first can reduce unnecessary wear on both the badge and its attachment.
No honest comparison gives either material a universal lifespan. Frequency of washing, exposure to sunlight, snagging, attachment quality, and storage all matter. Ask how the patch will be used on a normal workday, not how durable the material sounds in isolation.
How should you attach patches to caps, jackets, and bags?
Sew-on is the practical starting point for permanent attachment, while hook-and-loop suits removable badges. Heat application requires confirmation that the patch backing, dimensional face, and garment can all tolerate the process.
Structured caps
Check the usable front panel and its curve before choosing the patch outline. A wide, stiff patch can bridge the curve and lift at the ends. Sewing also needs access inside the cap; a sweatband, center seam, or panel construction can complicate installation.
Denim and work jackets
Heavy fabric generally supports a dimensional emblem better than a thin knit. Still, check pockets, lining, and insulation. A chest patch sewn through every layer can close a pocket or leave visible stitching inside the jacket. Installation should be planned before the patches are made.
Bags with loop panels
A hook-backed patch can attach to an existing compatible loop panel. Confirm the panel's usable dimensions and whether the order includes only the hook backing or a separate loop piece as well. “Hook-and-loop” is not a complete specification by itself.
For example, a bag with a 3-inch-wide loop field should not receive a 4-inch-wide badge simply because the art looks better larger. Overhanging edges catch on things. Measure the actual attachment field, including rounded corners, before approving the finished size.
Which border works with raised thread or molded PVC?
Embroidered patches can use a wrapped thread border or a cut edge, while PVC typically uses a molded perimeter. The outline and attachment method determine which edge treatment makes sense.
A merrowed border is an overlocked thread edge that wraps the perimeter of a textile patch. It works well with many straightforward shapes, but tight inward corners and intricate outlines may call for a cut-edge construction instead. Do not assume the same border can follow every silhouette cleanly.
For PVC, a recessed sewing channel can give the installer a defined path around the design. That channel needs to be planned into the patch, not improvised across raised artwork after delivery. Keep lettering and important outlines clear of the sewing route.
Border width also takes away usable design space. For example, a small cap badge with a heavy outer ring, a sewing channel, and two lines of text may leave less room for the logo than the overall dimensions suggest. Judge the interior artwork area, not just the outside measurement.
What makes one patch cost more than the other?
Setup, quantity, size, and construction determine the price more reliably than the material name alone. PVC is not automatically cheaper, and 3D embroidery is not automatically the premium-priced choice on every quote.
Embroidery requires digitizing that controls the stitch paths. Raised areas add foam handling and stitching considerations, while dense coverage increases production work. A simple design with one raised initial is not equivalent to a crowded badge with several raised elements and extensive flat embroidery.
Ready to spec type, size, backing, and quantity? Open the quote form for a free 12-hour mockup and USA shipping after approval.
GET A FREE MOCKUPPVC requires a mold suited to the design and its relief. On a short run, that setup can represent a substantial part of the per-piece price. More complicated color separation, larger dimensions, and additional finishing can change the quote. Reorders may reuse approved production setup, but confirm that rather than assuming it.
Ask for quotes in USD using matching quantities, finished dimensions, backing, and delivery requirements. Compare the total order cost, including installation if someone else will attach the patches. A lower patch price can lose its advantage when the chosen backing requires more labor on every garment.
For example, a club ordering 40 jacket patches should compare 40 sew-on embroidered patches against 40 sew-on PVC patches at the same finished size. Comparing one option with hook backing and the other without it tells you little about the material difference.
When is flat embroidery the better use of the budget?
Flat embroidery is often the right call when the logo does not benefit from raised surfaces. It removes the need to design around foam and can be the simpler, lower-cost construction for a straightforward textile badge.
For example, a volunteer club ordering simple name-and-symbol patches for denim overshirts may not gain anything from puff lettering or molded relief. A readable name, stable border, and dependable sew-on attachment do the work. Spend the attention on those details.
Flat stitching also avoids some of the spacing compromises needed for foam-backed lettering. It still has thread-based limits, so it will not reproduce every tiny line. But when the only argument for dimension is that it sounds more impressive, I'd skip it.
The cheaper option is right when it meets the actual requirement without creating a new problem. If the badge lives on clean indoor uniforms, PVC's wipe-clean advantage may have little value. If nobody needs a raised monogram, paying for foam work has little value either.
What should the mockup and order specifications confirm?
The mockup should confirm the layout, while the written order specifications confirm how the patch will be built. A digital image is not a physical sample and cannot prove thickness, softness, stitch texture, or exact color under every light.
- State the application. Identify the garment or equipment by construction, such as a structured cap, lined denim jacket, or nylon bag with a loop panel.
- Set the finished dimensions in inches. Include the full outer edge, not just the logo area, and check the available mounting space.
- Mark the dimensional areas. For embroidery, distinguish raised foam-backed stitching from flat stitching. For PVC, identify raised and recessed areas.
- Check text at finished size. Review spelling, spacing, enclosed letter shapes, and the smallest required details without relying on a zoomed-in preview.
- Specify attachment and border. Name sew-on, hook backing, or a confirmed heat-applied backing, and identify the textile border or PVC sewing channel.
- Confirm quantity, timing, and delivery. Keep the approved art and written specifications together so there is one reference for production.
USA Customized Patches has a 10-piece minimum. We provide a free digital mockup before production, usually in about 12 hours. Production starts only after written approval, so requested changes should be resolved before that approval is given.
Typical production takes 7–12 business days after approval; confirm the schedule for the actual order. Shipping is a separate part of deadline planning. We ship nationwide from Corona, California, to all 50 states in the United States, and the shipping information belongs in the planning conversation before an event date is promised.
Quote requests are welcome 24 hours a day, 7 days a week. If the artwork could suit either material, send the garment details and request a free digital mockup through the patch project contact form, noting which areas you want raised.
What is this advice based on?
This advice rests on the production process, the mockup review, and the order specifications that control the finished patch. It is not based on invented customer reviews or a universal laboratory durability ranking.
In our production experience, the recurring decision points are artwork spacing, foam coverage, molded relief, perimeter construction, and attachment access. Those factors explain why the same logo can work well on one garment and need changes on another.
The mockup helps expose layout problems before production. The written specifications establish what that image means in material, size, color layout, and backing. Neither should be used to claim a physical property that has not been confirmed, particularly on specialized workwear or coated fabrics.
Which option should you approve for your project?
Approve 3D embroidery when bold raised thread is an intentional part of the garment's look. Approve PVC when molded detail and easier cleaning solve an actual use problem.
If both versions require shrinking important text or crowding the border, approve neither yet. Simplify the art, increase the size if the garment allows it, or choose flat embroidery. The final check is practical: place a finished-size paper outline on the actual cap, jacket, or bag and make sure the patch has room to belong there.