
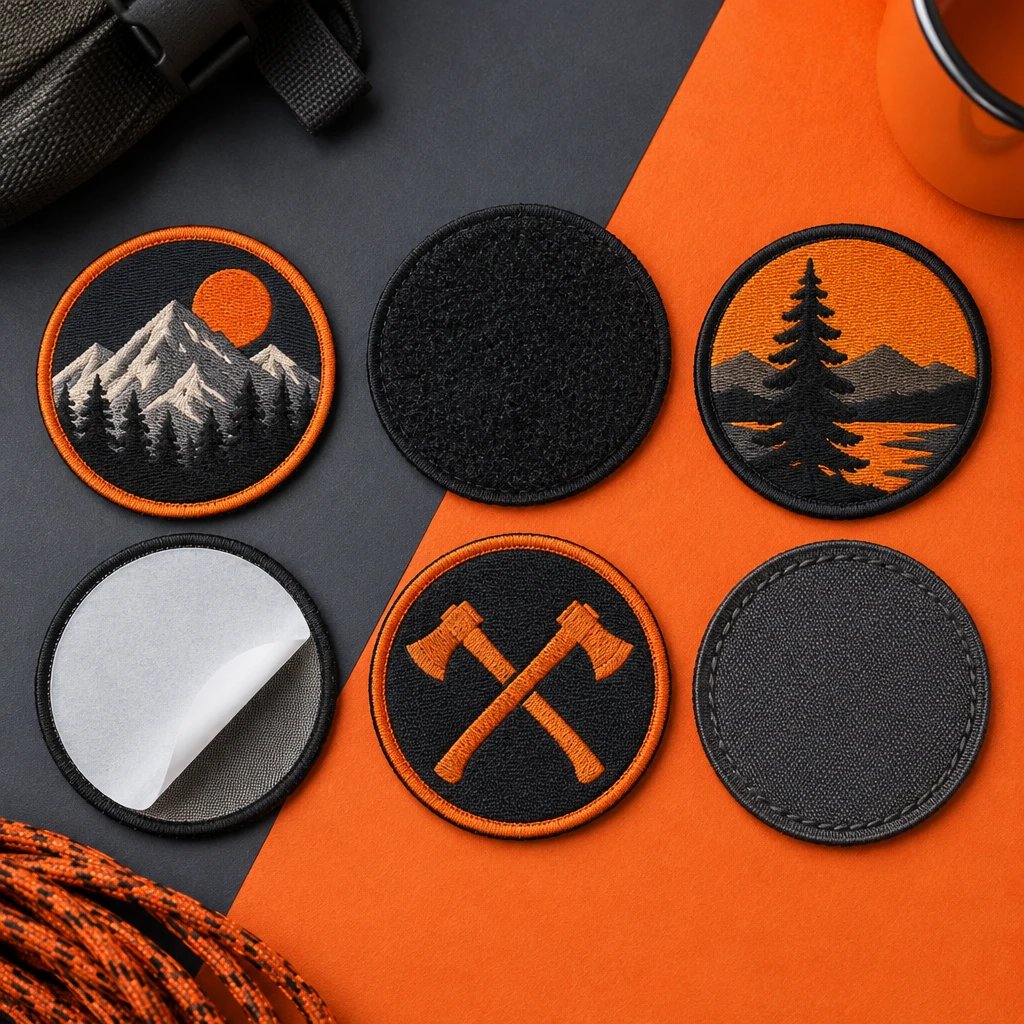
For adhesive vs heat seal patch backing, choose adhesive for temporary placement and heat seal for longer-term attachment to garments that can safely take the application heat. Standard peel-and-stick backing is not a substitute for a washable bond, and heat seal is not safe for every jacket or cap. The reasons come down to fabric, pressure, laundering, and how much application work your team can handle.
What is the difference between adhesive vs heat seal patch backing?
Adhesive backing is a pressure-sensitive layer that attaches when you remove its release liner and press the patch onto a suitable surface. Heat seal backing is a heat-activated layer that bonds to compatible fabric under specified heat, pressure, and time.
The terminology causes trouble. Both systems use adhesive chemistry, but patch quotes commonly use “adhesive” to mean peel-and-stick and “heat seal” to mean iron-on or press-applied backing. Write the application method into the order instead of relying on the word adhesive alone.
This comparison covers standard temporary peel-and-stick backing, not a specialty pressure-sensitive system specifically rated for laundering. If someone offers a washable self-adhesive patch, ask for the actual substrate and care requirements. A stronger-sounding product name is not a wash specification.
Neither backing changes the embroidered face into a different patch type. Polyester embroidery thread, the fabric base, and a merrowed or cut border still determine much of the appearance. The backing determines how that finished patch attaches. Keep those decisions separate.
How do the two backings compare on real garments?
Heat seal usually offers the better route to lasting garment attachment, while peel-and-stick offers the simpler temporary application. Neither wins every category, especially when the garment is coated, stretchy, curved, or sensitive to heat.
| Criterion | Standard adhesive backing | Heat seal backing | Practical buying decision |
|---|---|---|---|
| Durability | Usually temporary on clothing; movement, lint, and edge snagging can loosen it. | Intended for longer-term attachment when the fabric and application process are compatible. | Choose heat seal for repeat wear only after confirming compatibility; consider sewing for demanding use. |
| Detail level | Does not improve lettering, thread coverage, or fine lines on the patch face. | Does not improve face detail either; it may affect stiffness and how the patch sits. | Choose embroidered, woven, or printed construction for the artwork, then choose backing for attachment. |
| Cost drivers | Often avoids press setup, but hand placement and replacement patches still take time. | Adds controlled application work, equipment access, testing, and possible sewing reinforcement. | Compare the patch quote plus installation and garment risk, not just backing cost. |
| Typical uses | Short events, temporary club identification, and approved display surfaces. | Compatible uniform shirts, cotton workwear, and suitable jacket panels. | Match the backing to how long the patch must stay attached and what happens afterward. |
| Washing | Do not assume it can go through a washer or dryer. | May support laundering within the backing and garment care limits after correct application. | Get written care instructions before choosing backing for regularly washed uniforms. |
| Application | Peel the liner, position, and press firmly onto a suitable clean surface. | Use specified temperature, pressure, dwell time, and cooling instructions. | Heat seal needs a controlled process; extra heat is not a universal fix. |
| Removal | Often removable, but residue or surface damage is possible. | Not intended for easy removal; lifting it may damage fabric or leave adhesive. | Avoid either option on borrowed or valuable garments without permission and testing. |
| Curved or uneven areas | Can lift where the patch cannot maintain full contact. | Can bond unevenly if seams or curvature prevent uniform pressure. | A cap press, another placement, or sewing may be more suitable than a flat application. |
Notice the detail row. In our production experience, buyers sometimes choose a backing hoping it will make a small logo look cleaner. It won't. If the lettering is crowded, changing the attachment method leaves the same crowded lettering on the front.
Choose adhesive if the patch only needs to stay for an event
Choose peel-and-stick backing when temporary placement is the actual requirement and the surface can accept adhesive. It's the right call when avoiding application equipment matters more than surviving repeated wear and washing.
For example, say a run club orders 40 patches for volunteers at a check-in table. If the patches identify people for that event and come off before laundry, paying for a lasting heat application solves the wrong problem. Test the intended volunteer shirt first, especially if it has a slick finish or loose knit.
- Choose adhesive if staff need to apply patches without an iron, press, or sewing machine.
- Choose adhesive if the patch is a temporary marker rather than a permanent part of the uniform.
- Choose adhesive if a tested display surface accepts the backing and removal requirements are understood.
- Skip adhesive if the buyer expects ordinary wash-and-wear performance without further attachment.
Simple can be better. For an event handout placed on an approved display card, peel-and-stick may be all the product needs. Don't add heat seal just because it sounds more durable. Durability has no value if the patch never gets installed on clothing.
The limitation is contact. Fuzzy fleece, textured fabric, accumulated lint, and garment movement can keep the adhesive from holding evenly. A patch that stays put on a clean display board may behave very differently on a moving jacket sleeve.
Choose heat seal if the patch belongs on the garment
Choose heat seal for longer-term attachment when the garment tolerates the required process and you can apply consistent pressure. It makes sense for repeat-use apparel, but only after the backing instructions and garment restrictions agree.
A cotton work shirt with a flat chest placement is a more straightforward candidate than a coated rain jacket. Even then, fabric content alone isn't enough. Finishes, existing graphics, nearby buttons, and pocket seams can change what the press can safely accomplish.
- Choose heat seal if the patch is intended to remain on an approved uniform through repeated use.
- Choose heat seal if a suitable heat press can reach the placement without seams taking the pressure.
- Choose heat seal if your decorator can test the garment and follow the exact backing instructions.
- Skip heat seal if the care label prohibits the necessary heat or the garment supplier cannot confirm suitability.
For example, a shop adding a 3-inch embroidered logo to a cotton twill overshirt has a different problem from a club decorating lightweight running shirts. The overshirt may provide a stable application area. The running shirt may stretch, mark under pressure, or react poorly to heat.
I'd skip temporary adhesive for a daily uniform. I'd also skip an untested heat application on an expensive performance jacket. Those aren't contradictory positions. They are the same rule: don't make the garment carry a process it wasn't built to tolerate.
Which backing costs less after installation?
Peel-and-stick often costs less to put into service because it avoids heat-press setup, but the backing price itself needs a quote. Heat seal can be the better total-cost choice when the patch must stay attached and repeated replacement would create extra work.
See your artwork as a custom USA patch before you buy. Free digital mockup in 12 hours — 5-piece minimum per design. We do not produce until you approve.
GET A FREE MOCKUPAsk for a quote in dollars that separates patch production from any garment application service. Don't assume the factory attaches patches to your shirts unless that service is explicitly included. A box of finished patches and a box of decorated uniforms are different orders.
Patch size, embroidery coverage, shape, quantity, border construction, and backing specification affect the quote. Bigger and denser generally means more material or production work. Installation adds another layer: equipment access, operator time, placement checks, and testing.
The cheaper or simpler option is right when it meets the actual use. A temporary event marker doesn't need a permanent bond. On the other hand, saving on attachment for a washable work shirt can disappear quickly if staff have to reapply patches or replace damaged garments. Compare the whole job, not a single line on the estimate.
Will either backing work on caps, fleece, and coated jackets?
Not automatically. Caps need suitable support and pressure, fleece can be a poor adhesive surface, and coated jackets may reject adhesive or suffer heat damage.
Caps: curvature changes the application
A structured cap front isn't a flat shirt panel. The center seam can hold the patch away from the fabric, and an unsupported crown can lose shape under pressure. For example, a 2.5-inch patch crossing a cap seam needs evaluation of both the patch footprint and the crown structure. A suitable cap press or sewing may be necessary; a household iron is not an equivalent setup.
Fleece and knits: surface and stretch matter
Peel-and-stick backing may grab the outer fibers of fleece without making reliable contact with the underlying fabric. Heat application can flatten pile or leave a visible press mark. Stretch knits add another issue: a relatively stiff patch can restrict a moving area. Test the complete construction, not just a loose piece of the same fiber.
Coated outerwear: ask before attaching
Water-repellent finishes can interfere with adhesion, and some synthetic shells cannot tolerate the required heat. Sewing isn't a consequence-free fallback either, because needle holes can affect weather protection. For technical outerwear, ask the garment supplier which decoration methods are permitted before ordering a backing.
Does backing change patch detail, borders, or feel?
Backing can change stiffness and handling, but face construction determines visible detail. A border also needs to suit the shape and placement rather than merely look finished in the digital artwork.
Embroidered patches use stitched thread to create raised texture. Woven patches use finer interlaced yarns that can accommodate detail differently. If a small club badge contains a long name, compare the artwork at actual size before deciding that embroidery is the only route. The woven patch construction guide is useful for that decision.
A merrowed border is an overlocked thread edge that wraps around the patch perimeter. It suits many conventional shapes, but it adds edge bulk. A cut border follows the selected outline more closely. Neither edge guarantees attachment; unsupported corners and uneven pressure can still cause lifting.
If you're comparing shapes, request a free digital mockup through the embroidered patch options with the intended garment and backing noted. Review the outline, dimensions, lettering, thread colors, and border together. The mockup can expose a crowded design before production, but it cannot prove adhesion on your fabric.
How should you test and apply each backing?
Test the actual patch and garment combination before applying the full order. Use the backing supplier's instructions rather than a generic temperature or pressing time found online.
- Identify the garment. Record fabric content, care-label restrictions, coatings, stretch, and the exact placement. Include the garment model when available, because similar-looking shirts can behave differently.
- Check the patch specification. Confirm pressure-sensitive adhesive or heat seal, along with the patch dimensions, border, and intended attachment method. Don't approve a quote that only says “backed.”
- Prepare a suitable test area. Use a clean, dry garment free from lint and surface contamination. Avoid adding solvents or treatments unless the garment and backing instructions expressly allow them.
- For peel-and-stick, follow the backing instructions for placement and pressure. Avoid touching the adhesive unnecessarily. Check whether the edges maintain contact when the garment moves, not just while it lies on a table.
- For heat seal, use the specified temperature, dwell time, pressure, protective materials, and cooling procedure. Support the garment correctly so seams, pockets, and buttons do not prevent full contact.
- Inspect after the required cooling or setting period. Look for edge lift, puckering, discoloration, flattened fabric, and adhesive migration. A hot patch that appears attached is not a completed durability check.
- Evaluate the intended use. For temporary patches, check movement and removal. For washable heat-sealed garments, follow the required waiting period and test care conditions consistent with the garment and backing limits.
- Record the approved setup before repeating it. Keep the garment identity, placement, equipment settings, and care instructions with the order so another operator can follow the same process.
More heat is not troubleshooting. If an edge lifts, stop and check compatibility, pressure, and support before pressing again. Repeated heating can damage a garment without fixing the reason the bond failed.
Ready to spec type, size, backing, and quantity? Open the quote form for a free 12-hour mockup and USA shipping after approval.
GET A FREE MOCKUPWhen is sewing better than either backing alone?
Sewing is often the more dependable attachment choice for heavy wear, awkward placements, and garments that cannot take heat. It creates a mechanical attachment, though the fabric must tolerate needle holes and stitching.
Think about a club patch on a denim vest, a work jacket sleeve that rubs against equipment, or a cap whose seams prevent even pressing. In our production experience, edge security deserves more attention on those placements than ease of initial application.
Heat seal with perimeter stitching can be appropriate when the backing and garment allow it. A plain sew-on construction may be simpler if stitching is already planned. Tell the supplier before ordering so the backing isn't selected for a heat process nobody intends to use.
I'd avoid choosing temporary adhesive just to hold a patch during sewing unless the decorator approves that backing for the job. Some adhesives can gum up a needle or complicate handling. Basting, suitable temporary positioning methods, or a different backing may be more sensible.
What should the quote and approval include?
The quote should identify the patch construction, backing, garment use, and delivery requirements. The approval should confirm the design and specifications before production starts.
USA Customized Patches has a 10-piece minimum. We provide a free digital mockup before production, generally in about 12 hours, and production starts only after written approval. Typical production takes 7–12 business days; confirm the current schedule for your order rather than treating that window as a delivered-by date.
We ship from Corona, CA, to all 50 states in the United States. Quotes are available 24 hours a day, 7 days a week. Check the shipping information when planning your event date, since transit time is separate from production.
- Specify finished dimensions in inches and the total quantity.
- Name the face construction, such as embroidered polyester thread on a fabric base.
- State peel-and-stick adhesive, heat seal, or sew-on rather than leaving backing open.
- Identify the garment and placement, including seams, coatings, or stretch near the patch.
- Confirm the border, artwork, lettering, thread colors, and any restrictions shown on the mockup.
- Include the needed delivery date and destination so scheduling accounts for approval, production, and transit.
For a free digital mockup, send those details through the patch quote and artwork contact form. Include the garment model or a care-label photo if heat seal is under consideration. That is more useful than asking for the strongest glue without describing the surface.
What is this comparison based on?
This advice rests on the patch production process, the digital mockup review, and the order specifications that determine attachment requirements. It is practical selection guidance, not a claim that one adhesive performs identically on every garment.
In our production experience, the useful questions are consistent: What is the surface? How will the patch be applied? Will it be washed? What happens if an edge lifts? Those answers are more reliable than calling a backing permanent without explaining the conditions.
A digital mockup checks the planned appearance and documented specifications. It does not measure wash resistance, verify a press operator's settings, or test a garment finish. Final application decisions should follow the supplied backing instructions, garment guidance, and testing of the actual combination.
Which backing should you put on the order?
The verdict is adhesive for temporary, tested placement and heat seal for longer-term use on compatible garments. Choose sewing instead when heat, heavy wear, or uneven contact makes a bonded attachment the wrong compromise.
Before approving the order, finish this sentence in the specification: “This patch goes on ___, is applied by ___, and needs to withstand ___.” If those blanks aren't settled, keep the backing decision open.