
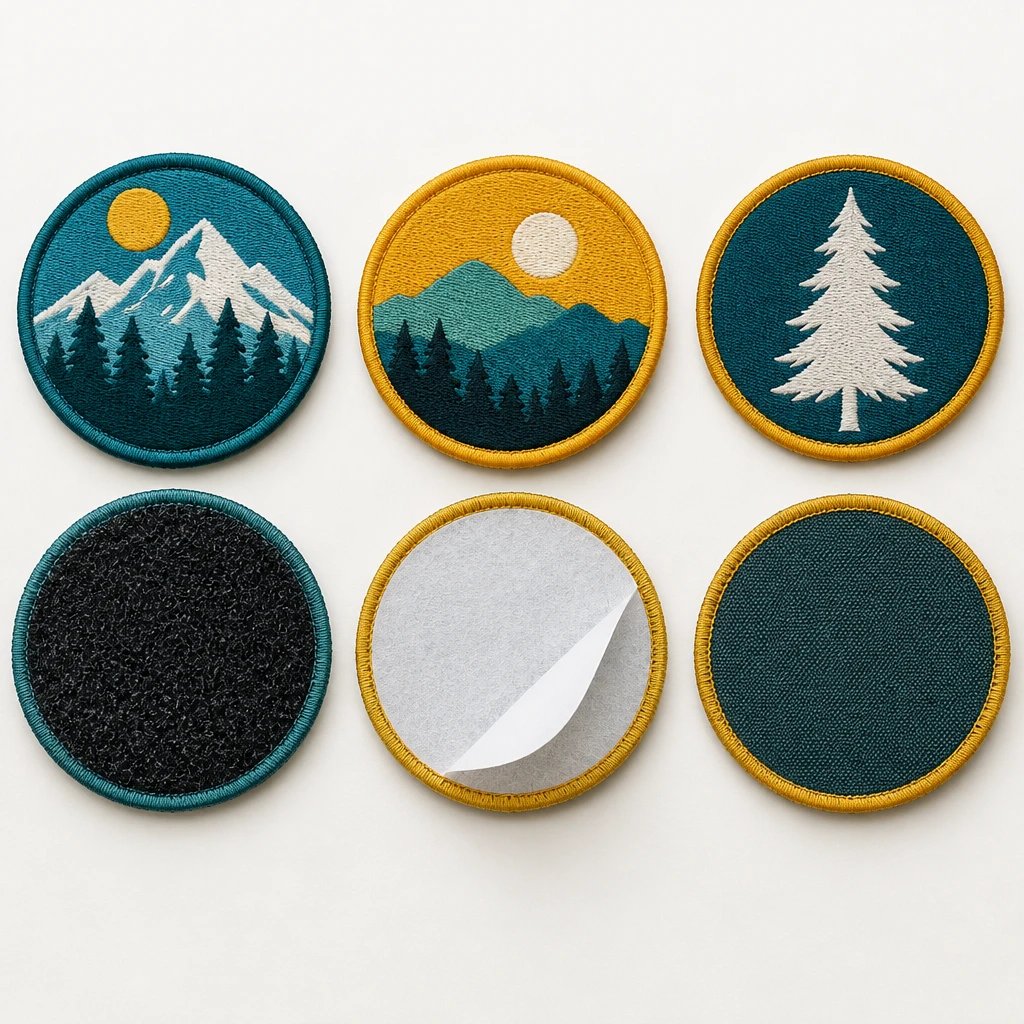
A flexible sew-on backing is the best backing beanie patches can use for most stretchy knits, while iron-on is a conditional choice for compatible, tested fabric. Stitching avoids adhesive lift and the heat needed to activate a glue layer. The reasons come down to cuff stretch, fabric tolerance, comfort, and the real cost of installing the patch.
Which is the best backing beanie patches can use on stretchy knits?
Choose a sew-on construction without an unnecessary adhesive layer for most rib-knit beanies. It lets you secure the patch mechanically while keeping the patch itself as flexible as its face material and construction allow.
A sew-on backing is a patch construction intended for stitched attachment rather than adhesive bonding. It does not necessarily mean the back contains no stabilizer. Embroidery still needs support, but you can usually skip an added heat-seal layer when the patch will be sewn on anyway.
An iron-on backing is a heat-activated adhesive layer that bonds a patch to compatible fabric under specified application conditions. That last part matters. A backing that bonds well to a flat woven jacket panel may behave differently on a deeply ribbed acrylic cuff.
The patch and the beanie move differently. Knit stretches around the head; a dense embroidered badge stretches very little. Sewing does not make that mismatch disappear, but it gives the installer control over placement and attachment without asking glue to hold across moving ridges and valleys.
For United States work crews, school clubs, outdoor teams, and merchandise brands, I'd start with sew-on and require a reason to change it. A removable identification system or a tested heat-application program can be that reason. Avoiding a sewing step, by itself, is not enough.
How do sew-on, iron-on, and removable backings compare?
Sew-on offers the most dependable general-purpose attachment for beanies. Iron-on may simplify installation on a verified fabric, while hook-and-loop makes sense only when changing patches is part of the garment's job.
| Criterion | Flexible sew-on | Iron-on adhesive | Hook-and-loop |
|---|---|---|---|
| Attachment durability | Generally dependable when stitched correctly; inspect thread and knit around the perimeter. | Depends on fabric compatibility, adhesive, pressure, heat, and care; flexing can expose weak bonds. | Patch is removable; long-term security depends on both the fastener and how its receiver is attached. |
| Behavior on stretchy knit | Works well when attached with the cuff relaxed; the patch area still stretches less than bare knit. | Bonded area can restrict stretch, and ribbing can reduce adhesive contact. | Adds a relatively firm panel that can make a soft cuff feel bulky. |
| Artwork detail level | Determined by the patch face, not the backing; supports embroidered, woven, and other sewable constructions. | Determined by the patch face, not the glue layer; adhesive does not improve small lettering. | Determined by the patch face; fastening layers can add thickness without adding detail. |
| Cost drivers | Patch construction plus sewing labor, cuff access, placement, and stitch path. | Adhesive layer, application labor, equipment, testing, and possible rework. | Hook backing, matching loop receiver, receiver installation, and any replacement patches. |
| Heat exposure | No heat activation required. | Requires a compatible application temperature, dwell time, and pressure. | No heat required when the receiver is sewn on. |
| Typical uses | Permanent logos on work beanies, club merchandise, staff caps, and outdoor-team cuffs. | Tested production programs using compatible fabric and controlled application equipment. | Changeable role labels, identification panels, and replaceable branding on purpose-built beanies. |
| Simpler or lower-cost choice | Often the simplest patch specification if sewing is already planned. | Potential labor savings only when the application method works reliably for the chosen blank. | Usually unnecessary for a permanent logo that will never be swapped. |
Pressure-sensitive sticker backing sits outside this main comparison because it is not a dependable default for a washable knit beanie. It can hold a patch temporarily for a display or placement check, but a peel-and-stick label should not be treated as permanent attachment unless its exact specification supports that use.
Choose sew-on if the beanie will stretch, wash, and work
Choose sew-on if the logo is permanent and the beanie will see regular wear. It is also the right call when the garment supplier cannot approve a heat-application process.
Think about a cuffed acrylic work beanie pulled on with cold hands, stuffed into a jacket pocket, then stretched again the next morning. The attachment needs to tolerate repeated movement. A stitched perimeter gives you an inspectable connection rather than a bond hidden under the patch.
Example: say a run club orders 40 patches for rib-knit beanies. A small embroidered logo with a sew-on construction is a sensible starting point. If volunteers are attaching them, placement consistency and suitable sewing technique deserve more attention than adding another backing feature.
- Use sew-on for permanent branding on acrylic, wool, cotton, or blended-knit beanies, with sewing suitability confirmed for the actual garment.
- Favor a flexible patch when the cuff is soft or the wearer will fold it repeatedly.
- Have the installer assess needle, thread, stitch tension, and access to the intended cuff layers.
- Avoid adding hook-and-loop unless the wearer actually needs to remove or replace the patch.
The cheaper, simpler option can be the better specification here. If every patch will be sewn, an extra adhesive layer may buy nothing useful and can make the badge less forgiving against the cuff. Spend the effort on readable artwork and a clean stitch path instead.
Choose iron-on if the exact beanie passes an application test
Choose iron-on only if the beanie supplier and patch specification support heat application, and a test on the actual blank confirms acceptable results. A fiber label alone does not establish compatibility.
Cotton may tolerate heat differently from acrylic, but fiber content is only part of the decision. Knit structure, dyes, finishes, lining, existing decoration, and the adhesive's application requirements all matter. Some acrylic fabrics can distort or develop unwanted surface changes under heat and pressure; wool can also be affected by unsuitable heat, moisture, and handling.
An even bond needs contact. Deep ribs create an uneven surface, and pressing harder is not automatically the answer. You may flatten the cuff, mark its surface, or still leave poorly bonded areas between raised knit columns.
Where is iron-on the right call? A brand using a consistent blank, compatible adhesive, suitable equipment, and a repeatable tested process may reasonably choose it. If that process reduces handling without damaging the knit or sacrificing attachment, the simpler installation is worth considering.
I'd skip an iron-only plan for an untested mix of donated winter hats. Their materials and finishes are too variable. Also, sewing around an iron-on patch afterward does not undo heat damage or remove the stiffness of the adhesive layer.
When does hook-and-loop earn its extra bulk?
Hook-and-loop earns its place when patches need to change. For a permanent brand logo, it usually adds layers and installation work without solving a useful problem.
Hook-and-loop backing is a removable fastening system that connects a hooked patch surface to a matching loop receiver. The beanie needs that receiver attached securely, commonly by sewing. Ordering a hook-backed patch alone does not turn an ordinary knit cuff into a compatible mounting surface.
See your artwork as a custom USA patch before you buy. Free digital mockup in 12 hours — 5-piece minimum per design. We do not produce until you approve.
GET A FREE MOCKUPExample: an event crew might use the same beanies with different role identifiers at different assignments. A sewn loop panel could make sense. The receiver stays on the cuff while the labeled patches change.
There are trade-offs. A stacked patch and receiver can feel stiff on a shallow cuff. Exposed hooks can catch knit fibers during handling, and repeated removal puts force on the receiver's attachment. Keep the system away from skin contact and check how the cuff feels with the patch removed.
Does embroidery or woven construction change the backing choice?
The patch face changes thickness, texture, and detail, but it does not replace the need for a suitable attachment. Both embroidered and woven patches can be good sew-on choices for beanies.
An embroidered patch is a fabric-based badge that forms its design with stitched thread. It suits bold club initials, simple mountain outlines, trade logos, and other artwork that benefits from visible texture. Dense fill and heavy outlines can make a small badge feel firmer, especially against a fine-gauge knit.
A woven patch is a textile badge that forms its design with interlaced yarns. It is often worth considering when a narrow cuff needs finer lettering or a flatter surface. Compare woven patch construction if embroidery requires deleting details that matter to the logo.
Neither method makes tiny text automatically readable. Example: a 2.5-inch-wide cuff patch carrying a business name, slogan, phone number, and detailed mascot is asking a small surface to do too much. Keep the business name and main mark; put contact information on the packaging or garment label.
For custom embroidered patches, you can request a free digital mockup with the intended beanie material and cuff dimensions. Use it to check the artwork, border, and proposed size before committing to the construction.
Which border keeps a beanie patch comfortable and tidy?
Choose a border that gives the installer a clear stitch path without making the patch unnecessarily bulky. Rounded shapes and uncomplicated outlines are usually easier to position on a soft cuff.
A merrowed border is an overlocked thread edge that wraps around a patch's perimeter. It gives conventional circles, ovals, and rectangles a distinct finished rim. That rim also adds thickness, so judge it against the beanie rather than approving it only from a flat artwork view.
A cut edge follows a trimmed patch outline rather than a wrapped overlock border. Depending on the material and construction, it can suit more detailed shapes or a lower-profile finish. Ask how the edge will be finished and where the attachment stitches should run; not every narrow projection gives a sewer useful working room.
In our production experience, small points and deep notches add attachment difficulty without necessarily improving the logo on a beanie. A simple oval may be the right call over a complex contour. Easier sewing. Fewer awkward corners. More room for the design people actually need to recognize.
How large should the patch be on a folded cuff?
Size the patch to the usable cuff area, not the beanie's total height. Keep it clear of the fold and check its appearance both flat and on a head form or wearer.
Measure the visible cuff with the beanie relaxed. Note the fold line, lower edge, side seams, and any existing label. A patch can fit inside that rectangle and still be too stiff or wide once the knit curves around the forehead.
Example: on a cuff with 3 inches of visible height, a patch 1.5 inches tall gives more placement room than one nearly as tall as the cuff. Those are example dimensions, not a universal specification. Deep cuffs, shallow cuffs, children's beanies, and fleece-lined styles need their own checks.
A paper cutout helps. Position it where the patch will sit, then gently stretch the hat as it would be worn. Paper will not reproduce textile flexibility, but it quickly exposes a logo that overwhelms the cuff or crosses a fold.
Wide horizontal badges deserve particular attention. They can pull the eye toward ripples at the sides or keep a large area from stretching normally. Sometimes shrinking the patch slightly does more for appearance than upgrading the backing.
How do you sew a patch without puckering the beanie?
Attach the patch with the cuff relaxed, then check for puckering and restricted movement before repeating the process. Do not stretch the knit flat and lock that stretched shape under a rigid badge.
- Confirm the wearing position. Fold the cuff as intended and identify which surface should carry the patch.
- Lay out the patch on relaxed knit. Use consistent reference points such as the cuff fold and centerline rather than pulling the fabric taut.
- Decide which layers will be stitched. Sewing only the outer cuff layer can preserve fold adjustment, while sewing through multiple layers can fix the cuff in place.
- Secure the position with a method suitable for the garment. Avoid untested temporary products that may stain, leave residue, or interfere with sewing.
- Have the installer select a needle, thread, stitch path, and tension for the patch and knit combination. The goal is secure attachment without cutting yarns or gathering the cuff.
- Inspect the inside and outside. Look for loose loops, trapped lining, puckering, exposed rough edges, and a cuff that no longer folds as intended.
- Check the finished hat relaxed and worn. If the patch pulls or the knit distorts, correct the setup before attaching the rest.
Layer access is easy to overlook in a quote. A shallow folded cuff may be straightforward to handle; a thick fleece-lined beanie can be less accessible. Tell the installer about the lining before agreeing on labor, not when the boxes arrive.
Which backing costs less once installation is included?
A plain sew-on specification is often the economical choice when sewing is already planned. Compare the full decorated-beanie cost in dollars, because a lower patch price can be offset by installation, equipment, or rework.
Ready to spec type, size, backing, and quantity? Open the quote form for a free 12-hour mockup and USA shipping after approval.
GET A FREE MOCKUPThe useful comparison is patch cost plus attachment labor, test work, shipping, and any garment loss during application. Iron-on may save labor in a proven setup. It can also become the more expensive choice if the blank cannot tolerate the adhesive's application requirements.
- Patch construction: size, embroidery density, face material, border complexity, and added backing layers affect the quote.
- Attachment work: cuff access, lining, placement requirements, and a complicated outline can increase handling.
- Application equipment: a process that needs controlled pressure is not equivalent to a household-iron plan.
- Rework risk: test compatibility before committing valuable blanks to an unproven method.
- Order scope: confirm whether the quote covers loose patches, attachment services, garments, or a combination.
For a basic staff beanie, I'd skip a removable fastener and a complicated badge shape unless the use case demands them. A readable embroidered mark, a manageable border, and sound sewing are enough. Simpler is not a compromise when the omitted feature has no job.
How should you test a patched beanie before a full run?
Test the actual patch construction on the actual beanie blank, using the planned attachment method. A digital mockup checks the design, but it cannot establish heat compatibility, adhesive strength, or sewing performance.
- Record the blank's fiber content, knit texture, lining, care label, and supplier application restrictions.
- Attach a representative patch with the same backing, border, and process intended for the order.
- Let any heat-applied bond cool and condition according to the adhesive instructions before handling it.
- Check the cuff relaxed, stretched for normal wear, folded, and unfolded where applicable.
- Care for the test garment only as permitted by both the beanie and patch instructions, using the more restrictive compatible limits.
- Inspect patch edges, attachment thread, knit shape, color changes, and wearer comfort. Resolve failures before the full run.
One useful question after testing: does the beanie still behave like a beanie? A patch can remain firmly attached while making the cuff stiff, wavy, or unpleasant against the forehead. Attachment strength is only one acceptance check.
What should you include when requesting a beanie patch quote?
Send the artwork, quantity, proposed dimensions in inches, beanie material, cuff photo, and intended attachment method. Include the event date and delivery ZIP code so the schedule can be checked against the actual destination.
USA Customized Patches has a 10-piece minimum. A free digital mockup is provided in about 12 hours before production, and production starts only after written approval. Typical production takes 7–12 business days after approval; confirm the schedule for the specific order and allow for shipping separately.
USA Customized Patches is open 24 hours a day, 7 days a week for quotes. Orders ship from Corona, CA, to all 50 states in the United States. Review nationwide shipping information when planning delivery, particularly if patches still need to go to a separate sewing shop.
The approval should settle the artwork, dimensions, thread colors, border, backing, and quantity. If the job needs physical testing or a preproduction sample, ask about that separately. A digital rendering is not a stitched sample and should not be presented as one.
You can send the beanie details for a free digital mockup with a note that the patch will be sewn to a relaxed cuff. If you are considering iron-on instead, include the blank supplier's application guidance so compatibility questions surface before approval.
What this advice is based on
This advice rests on the patch-production process, the digital mockup review, and the order specifications that control construction and attachment. It is not a claim that every knit or adhesive behaves alike.
In our production experience, a backing decision works best when the garment, artwork, border, installer, and care requirements are considered together. The mockup helps settle visible design decisions. The written specifications identify what gets made. A test on the actual blank answers the material questions neither document can settle.
Which backing should you approve?
Approve a flexible sew-on construction for a permanent logo on most beanies. Approve iron-on only after the exact fabric and application process pass testing, or hook-and-loop when changing patches is a real requirement.
Before signing off, put one installation instruction in writing: whether the patch should attach only to the outer cuff or through the folded layers. That small decision determines whether the wearer can still adjust the cuff.