
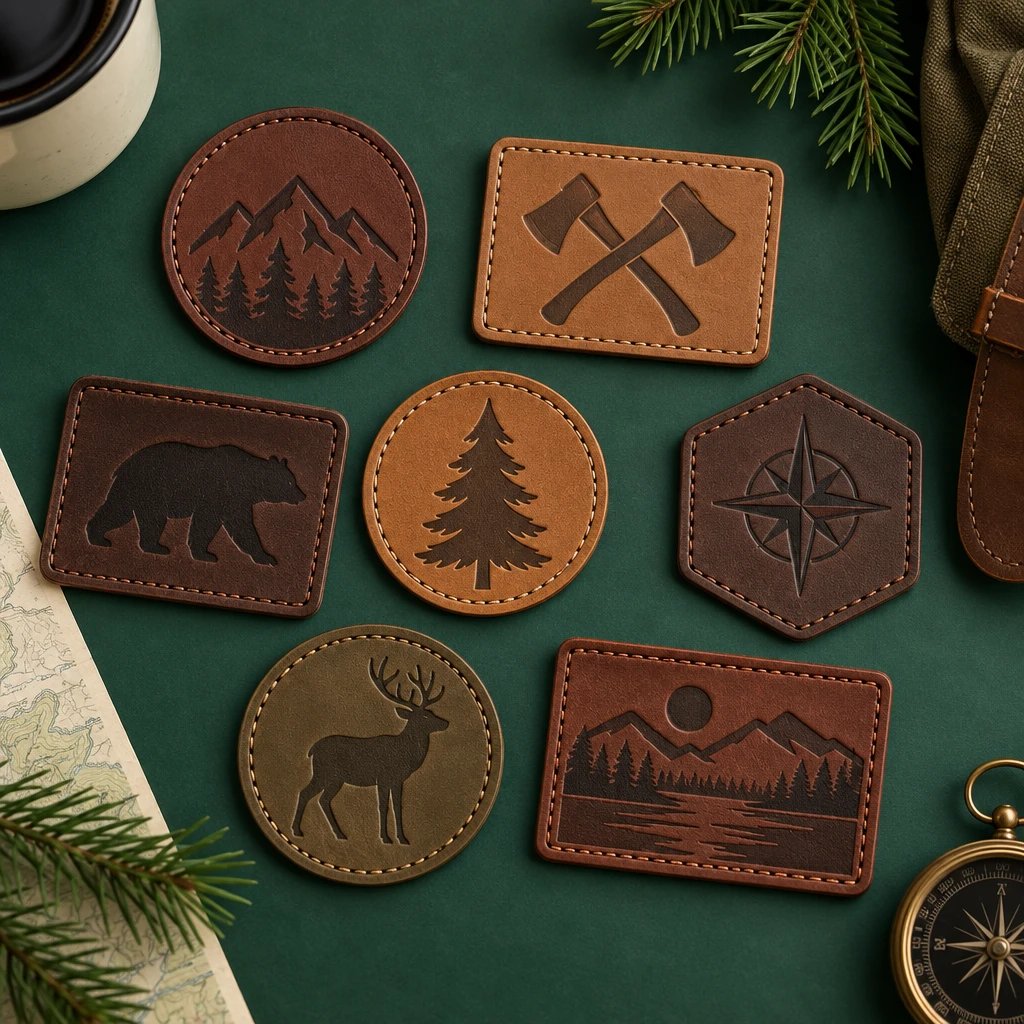
The best backing for leather patches is usually a plain back with a sewn attachment, especially for permanent placement on hats, jackets, and bags. The reasons come down to heat risk, garment construction, and service life; below, we compare those trade-offs with iron-on adhesive, hook-and-loop, and temporary positioning adhesive.
Start with the garment. A leather patch going on a cotton canvas tote presents a different attachment problem from the same patch going on a coated nylon rain jacket. The logo can stay identical while the right backing changes completely. Picking the backing from a product menu before checking the garment is where avoidable problems begin.
Which option is the best backing for leather patches on everyday gear?
For everyday gear that needs a permanent patch, choose sew-on unless the garment construction rules out stitching. It is the most straightforward default because the attachment does not depend on a heat-activated glue bond.
A sew-on leather patch is a leather emblem that attaches to fabric with stitches rather than relying on adhesive. It may have a plain reverse side, a marked stitch path, or pre-punched holes if those are part of the approved specification. None of those features should be assumed from a product photo.
The distinction matters: sew-on describes an attachment method, not necessarily an extra layer on the back. Paying for another backing layer is not automatically an upgrade. If a decorator can reach the panel with a sewing machine and the garment tolerates needle holes, a plain-back patch may be all the order needs.
Real leather and synthetic leather also need separate treatment. Genuine leather varies by hide, finish, and thickness. Synthetic leather may use polyurethane or polyvinyl chloride coatings over a fabric base, and those coatings respond differently to heat, flexing, and adhesive. A backing that works on one sample is not proof that it works on every leather-look material.
How do sew-on, iron-on, and removable backings compare?
Sew-on offers the strongest default case for permanent attachment; hook-and-loop offers the clearest advantage for removal. Heat adhesive can simplify application, but only when the patch, adhesive, garment, and equipment work together.
| Buying criterion | Sew-on / plain back | Heat-activated adhesive | Hook-and-loop | Pressure-sensitive adhesive |
|---|---|---|---|---|
| Attachment durability | Dependable when the stitch path, thread, and garment construction are appropriate; stitches can wear or pull through weak material. | Depends on adhesive compatibility and controlled application; exposed corners may lift if the bond is incomplete. | Useful for repeated removal; holding power depends on engagement area, cleanliness, and the underlying attachment. | Often suitable for positioning or short-term display; do not assume it is a permanent washable bond. |
| Detail level and appearance | Does not increase logo detail; perimeter stitches need room and become part of the finished appearance. | Does not increase logo detail; can leave a clean edge without visible sewing if the bond holds. | Does not increase logo detail; raises the patch farther from the garment. | Does not increase logo detail; can look flat initially, but edge lift remains a concern. |
| Cost drivers | No added adhesive layer is needed, but sewing access, stitch length, and decorator labor affect installed cost. | Adds an adhesive layer and requires application equipment, testing, and operator time. | Adds hook material and may require a separate loop panel plus labor to attach it. | May reduce initial placement labor; adhesive selection and later permanent attachment still affect cost. |
| Typical uses | Permanent leather labels on canvas bags, compatible hats, denim jackets, and workwear. | Tested patch applications on garments approved for the required heat and pressure. | Interchangeable team identifiers, work-bag labels, and patches on existing loop panels. | Layout checks, presentation samples, and temporary positioning before an approved permanent attachment. |
| Installation limits | Requires needle access and makes holes; lined, coated, or heavily structured items need extra planning. | Requires even pressure, adequate support, and material-specific settings. | Hook backing must mate with loop fabric; hook material alone will not attach properly to ordinary cloth. | Bonding is affected by surface texture, coatings, contamination, and adhesive specification. |
| Removal and care | Not intended for routine removal; taking out stitches may leave visible holes. | Not intended for routine removal; peeling can leave adhesive or damage the garment. | Patch can be removed before cleaning if the garment setup allows; exposed hook material can snag nearby fabric. | Removal may leave residue; laundering performance must be confirmed rather than assumed. |
There is no honest universal price winner. A plain-back patch can have a lower patch-only cost while becoming more expensive to install on a finished, lined jacket. Compare quotes in dollars for the completed attachment, not just the loose patch. Ask who supplies the loop panel, who applies the patch, and who handles a failed application test.
When should you choose sew-on leather patches?
Choose sew-on if the patch is meant to stay put and the garment can be stitched without compromising its function. It is the right call for many denim jackets, canvas totes, aprons, and accessible hat panels.
In our production experience, the practical advantage is control. The stitch line shows where the patch is held, and the decorator can inspect it. There is no hidden adhesive bond to judge from the outside. That does not make every sewn patch indestructible, but it makes the attachment easier to specify and inspect.
Keep the artwork away from the sewing path. A logo can look balanced when it fills the entire leather face, then feel cramped once contrasting thread runs around the perimeter. For example, a 3-inch-wide rectangular hat patch needs a deliberate border area rather than lettering pushed to the cut edge. The exact margin should match the material and the decorator's sewing setup.
I'd skip pre-punched holes unless the installer wants them. They can help with hand sewing and a particular decorative finish, but they also commit the order to a hole pattern. Machine sewing may call for a different approach. Agree on a clean-cut edge, stitch groove, or punched perimeter before production instead of treating those details as interchangeable.
The simpler option wins here often. A permanent club patch on a denim overshirt usually does not need hook material, a loop panel, and adhesive stacked behind it. A plain back and a planned stitch line can do the job with less bulk. Review custom leather patch options with the garment and attachment method in mind.
When should you choose iron-on instead of sewing?
Choose heat-activated adhesive if a test confirms compatibility and avoiding visible stitches matters to the design. Do not choose it merely because a household iron seems easier than arranging sewing.
A heat-activated backing is an adhesive layer that bonds when the specified heat, pressure, and application time are applied. Those settings belong to the particular adhesive and material combination. There is no single safe temperature for all leather patches, and copying instructions from an unrelated embroidered patch can damage the face or leave a weak bond.
Heat can change a leather finish, distort some synthetic materials, or affect the garment underneath. Pressure can also mark a surface. Meanwhile, a curved cap panel may prevent full contact at the edges even if the center bonds. This is why a flat fabric scrap does not fully represent an assembled hat with seams, internal supports, and a sweatband.
The cheaper route can still be correct. If a brand already has a compatible heat press, approved blank garments, and a validated patch specification, heat application may reduce installation labor compared with sending every piece to a sewing contractor. That is a process advantage, not evidence that iron-on is better for every garment.
Do not rely on a digital rendering for this decision. A rendering can show the backing choice and placement, but it cannot prove adhesive performance. Use an actual application test before treating an untested combination as ready for a team order.
When should you choose hook-and-loop or temporary adhesive?
Choose hook-and-loop if users need to remove or exchange the patch. Choose pressure-sensitive adhesive only when its specified purpose matches the job, such as temporary positioning rather than permanent garment attachment.
See your artwork as a custom USA patch before you buy. Free digital mockup in 12 hours — 5-piece minimum per design. We do not produce until you approve.
GET A FREE MOCKUPChoose hook-and-loop if the patch needs to come off
Hook-and-loop backing is a two-part fastening system that joins a hook surface to a matching loop surface. A hook-backed leather patch will not fasten properly to ordinary cotton simply because the cloth feels textured. The garment needs a suitable loop field, either already installed or added as part of the job.
For example, a volunteer team might use one canvas gear bag with different removable role labels. Hook-and-loop makes sense because replacement is part of the design. It also lets the user remove the leather patch before cleaning the bag, provided the remaining loop panel and garment can be cleaned together.
There is a bulk penalty. Leather plus hook material plus a loop panel stands farther off the fabric than a plain sewn label. On a bag, that can be acceptable. On a lightweight polo pocket, I'd skip it unless removability is essential. Soft fabric can sag under a stiff patch assembly.
Choose positioning adhesive if it is only doing positioning work
Pressure-sensitive adhesive is a sticky layer that bonds through contact and pressure without a heat-activation step. Its performance depends on the actual adhesive specification. The phrase peel-and-stick does not establish that a leather patch will survive repeated washing, outdoor exposure, or flexing on clothing.
A temporary adhesive can help hold a patch during layout or an approved sewing process. Confirm that it is compatible with the sewing operation, since some adhesives leave residue on needles or equipment. For a one-day display sample, temporary attachment may be enough. For a permanent work jacket, it is not a substitute for a validated attachment.
Which attachment works on hats, jackets, and bags?
Match the attachment to the construction of the finished item, not just its fiber label. Sewing access, panel curvature, coatings, lining, and cleaning instructions can matter as much as the patch material.
Structured caps and knit beanies
On a structured cap, check where the patch crosses the center seam and how the crown is supported during attachment. A stiff leather patch can bridge the seam instead of sitting against the fabric. Sewing still needs suitable equipment and access; calling a patch sew-on does not make every cap easy to decorate.
A knit beanie brings a different problem: stretch. For example, a smaller leather tab on a folded cuff can suit the knit better than a broad, rigid badge. Check the beanie while worn or stretched to its intended shape. Attaching a stiff patch to relaxed knit without planning can leave puckering or an uncomfortable hard spot.
Denim, leather, and weather-resistant jackets
Denim usually gives a decorator a more forgiving sewing surface than a coated rain shell. Still, pockets and lining need attention. Stitching straight through a chest pocket can close it, and stitching through a loose lining can catch folds that are invisible from the outside.
For a leather jacket, use an installer who can handle the garment material and construction. Needle holes are permanent, so repeated repositioning is a bad plan. On waterproof or water-resistant outerwear, sewing can create leakage paths and heat can affect coatings. Check the garment maker's decoration guidance before approving either method.
Canvas totes, backpacks, and work aprons
Canvas totes and aprons are often good sew-on candidates when the panel is accessible. Backpacks require a closer look because foam, internal sleeves, and coated fabric can sit directly behind the proposed location. Confirm that the stitch path will not cross a hidden pocket or a padded compartment.
Edges matter on bags. A patch placed where it constantly scrapes a desk, buckle, or seat will face different wear from one on an upper jacket chest. Rounded corners may reduce catching compared with projecting points, but shape alone cannot rescue a weak attachment.
What should the mockup and order specifications show?
The mockup should show the patch layout, dimensions, and intended attachment features, while the order specifications should identify the material and backing. Neither document should leave the installer guessing about where stitches or adhesive belong.
USA Customized Patches has a 10-piece minimum. A free digital mockup is provided before production, generally in about 12 hours. Production starts only after written approval. That approval should cover more than the logo color; confirm the attachment details at the same time.
For a free digital mockup, send the garment photo, desired patch dimensions, and intended attachment through the patch specification contact form. Include a close view of any seam or pocket beneath the proposed location so the layout can account for it.
Ready to spec type, size, backing, and quantity? Open the quote form for a free 12-hour mockup and USA shipping after approval.
GET A FREE MOCKUP- Identify the actual patch material. Specify genuine leather or the proposed synthetic leather, along with the finish and thickness information available for that material. A brown leather-look image is not a complete material specification.
- Record the finished width and height in inches. For example, a 3-inch-wide patch should be checked against the usable panel area, not against the full garment width. Leave room for seams and construction details.
- Name the attachment method. State plain-back sew-on, the specified heat adhesive, hook backing, or another agreed option. If hook-and-loop is selected, confirm whether the matching loop piece is included and who attaches it.
- Mark the edge and sewing details. Confirm the clean-cut border, artwork clearance, stitch path, thread color if applicable, and any requested holes. Do not assume an embroidered-style merrowed border is part of a leather patch.
- Check the finished garment. Identify lining, coatings, elastic fabric, pockets, and heat restrictions. Share the garment model or construction details with the installer rather than describing every item simply as a jacket or hat.
- Separate visual approval from application testing. Approve the digital artwork in writing, then follow the agreed test and installation plan for the actual materials. A correct logo does not establish that a heat bond or stitch pattern is suitable.
Keep the written approval specific. If the backing changes after approval, the order specification needs to change too. Swapping from plain back to hook backing can alter thickness, fit, cost, and the way the patch sits on the garment even though the artwork remains untouched.
How can you keep the installed cost down without weakening the patch?
Use the simplest attachment that meets the garment's requirements, then reduce avoidable installation work. Extra backing layers, inaccessible placement, and unnecessary decorative features can increase cost without improving the result.
For example, a club ordering 40 patches for canvas totes may be well served by one patch size, a plain back, and the same accessible placement on every bag. Switching among several sizes and locations makes the decorator's setup more complicated. That added handling can matter more than a small difference in the loose-patch quote.
- Ask for patch-only and installed costs separately when an installer is involved. Compare totals in USD with the same garment quantity, backing, and placement.
- Avoid hook-and-loop when nobody needs to remove the patch. You would be buying a feature that also adds thickness.
- Do not add pre-punched holes for appearance alone unless that appearance is part of the design. Confirm their purpose with the installer.
- Choose a placement the sewing equipment can reach. A clear outer panel is usually easier to plan than a spot above an enclosed pocket or inside a finished lining.
- Test unfamiliar materials before applying an entire batch. The less expensive attachment is not a saving if it damages finished garments.
Leather itself is not always the economical answer. If the design needs several thread colors, a softer feel, or a familiar stitched uniform badge, embroidery may fit the job better. For a free digital mockup of that alternative, use the embroidered patch options and keep the same intended dimensions for a useful visual comparison.
What should you confirm about cleaning and delivery?
Confirm care for the complete patch-and-garment assembly, then schedule delivery around any separate attachment work. A durable backing does not automatically make the leather face suitable for the garment's normal wash cycle.
Follow the most restrictive applicable care instructions. Genuine leather may react to soaking or dryer heat, while synthetic leather performance depends on its construction and finish. If a work shirt must go through frequent commercial laundering, ask whether a different patch material is the more practical choice instead of trying to solve everything with stronger glue.
With removable patches, take them off before cleaning when the care plan calls for it. With sewn patches, the leather and garment stay together, so their care requirements must be compatible from the start. The backing cannot correct a mismatch between a wash-heavy uniform and a material intended for gentler care.
USA Customized Patches typically plans production for 7-12 business days after written approval, subject to the order specifications. Orders ship from Corona, California, to all 50 states across the United States. Quotes are available 24 hours a day, 7 days a week.
Production time is not the same as a promised arrival date. Confirm transit and any decorator's installation schedule through the United States shipping information before setting a uniform handout or club event deadline. Loose patches arriving on time do not help if the sewing appointment is still a week away.
What is this advice based on?
This advice rests on patch construction, attachment requirements, the digital mockup review, and the written order specifications. It is production guidance, not a claim that every leather, adhesive, or garment has passed the same laboratory test.
In our production experience, the important questions are repeatable: Can the installer reach the panel? Will the patch flex with it? Does the proposed heat process suit both materials? Does the buyer need removal, or just a permanent label? The mockup resolves visual decisions; the material specifications and any required application test resolve questions a screen cannot answer.
Which backing should you approve for your order?
Approve plain-back sew-on for most permanent leather patches on stitch-compatible garments. Approve heat adhesive only for a validated application, and choose hook-and-loop when removal provides a real benefit.
I'd skip peel-and-stick as the default for a permanent jacket or work-bag patch. For an ordinary sewn label, the simpler plain back is enough. Before approving production, put the garment, backing, border, dimensions, and installer responsibility on the same specification sheet; that is the document that prevents a good-looking patch from becoming an attachment problem.