
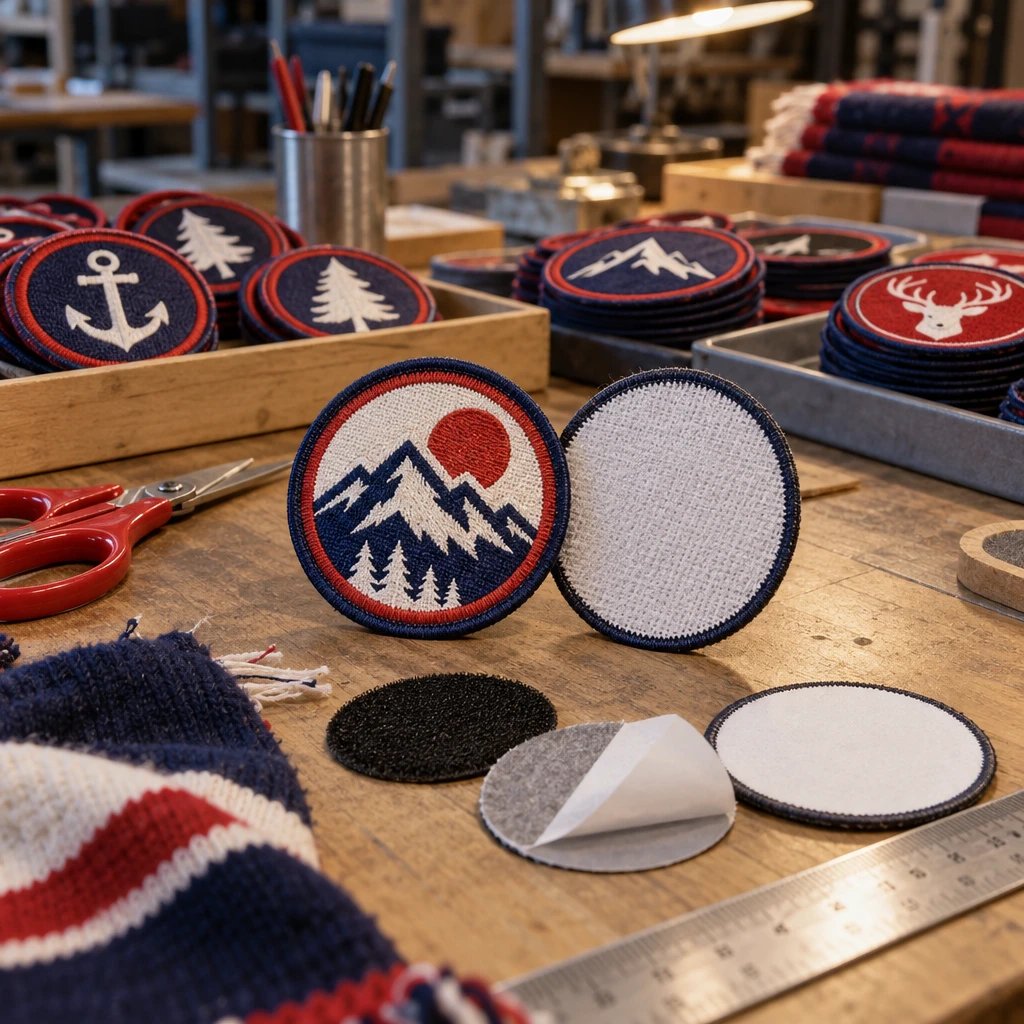
Sew-on is usually the best backing scarf patches can have because it avoids application heat and gives you more control over comfort and drape. Iron-on is reasonable for stable, heat-compatible fabric, but it isn't the default I'd choose for a stretchy team scarf. The reasons come down to fabric movement, laundering, installation, and what the wearer feels against the neck.
How do you compare the best backing scarf patches can use?
Compare the attachment method against the actual scarf, not just the patch artwork. Sew-on generally offers the broadest fabric compatibility; iron-on trades some flexibility for faster application when the fabric and adhesive are compatible.
A patch backing is the material or treatment on the reverse of a patch that supports its construction or helps attach it to a garment. Those are different jobs. A patch may contain stabilizing material even when you order it without heat-activated adhesive, so “sew-on” doesn't automatically mean a completely soft reverse.
That distinction matters on scarves. A structured cap can carry a firm emblem without much complaint. A scarf folds, twists, stretches, and sometimes sits directly against skin. The backing choice needs to work with all of that.
| Buyer criterion | Sew-on without heat adhesive | Iron-on adhesive | Peel-and-stick adhesive | Hook-and-loop |
|---|---|---|---|---|
| Durability | Strong long-term option when stitches catch sound fabric and tension suits the scarf. | Depends on fabric compatibility, application conditions, and care; edges can lift as the scarf flexes. | Usually a temporary attachment, not a dependable washable finish. | Useful for repeated removal, but the receiving panel still needs secure attachment. |
| Detail level | Artwork detail comes mainly from patch construction, not sewing attachment. | Adhesive does not make lettering or artwork sharper. | Adhesive does not improve artwork detail. | Artwork remains construction-dependent; added thickness can affect the finished appearance. |
| Cost drivers | Installation labor, access to the scarf layers, patch size, and stitching requirements. | Adhesive treatment, application equipment, testing, and any sewing added afterward. | Adhesive treatment and replacement if used beyond a temporary purpose. | Matching hook and loop materials, panel installation, and extra bulk. |
| Typical uses | Knit club scarves, wool scarves, fleece accessories, and washable brand merchandise. | Stable, heat-compatible woven scarves after an application test. | Display mockups, temporary placement, and short-term presentation. | Purpose-built utility accessories with a designated receiving panel. |
| Comfort and drape | Usually the least complicated attachment, although patch density still creates stiffness. | The adhesive layer can make a light scarf feel firmer beneath the emblem. | Can catch lint or leave residue; suitability varies by adhesive and fabric. | Usually the bulkiest option, with exposed hooks potentially catching scarf fibers. |
| Installation risk | Puckering, stretched knit loops, or visible reverse stitches if sewing is poorly planned. | Scorching, shine, flattening, distortion, or weak bonding if heat and fabric are mismatched. | Unreliable grip on fuzzy or textured fabric and possible residue after removal. | Snagging, panel distortion, and uncomfortable placement near the neck. |
There isn't a backing that wins every column. In our production experience, scarf problems often come from treating a soft accessory like a jacket panel: too much patch, too much stiffness, or an attachment process the fabric can't tolerate.
Choose sew-on if the scarf stretches, folds, or gets washed
Choose sew-on for most knit, wool, fleece, and regularly worn scarves. It avoids heat activation and allows the person attaching the patch to manage stitch placement, tension, and support.
That's my default recommendation. It isn't because sewing is foolproof. A tight line of stitching can gather a knit scarf, and a dense patch can still create a stiff spot. Sewing simply removes adhesive activation from the list of things that must go right.
For example, say a run club orders 40 acrylic knit scarves with a 2-inch embroidered badge near one end. I'd start with sew-on attachment and a compact design rather than ask the club to press an adhesive-backed patch onto a springy, textured surface. The sample scarf should be sewn while relaxed, then checked for puckering and how it hangs.
Loose knits need particular attention. Stitches must catch stable yarn rather than bridge open spaces, and any added support should be chosen by the person doing the attachment. An oversized, rigid stabilizer can solve the stitching problem while creating a new comfort problem.
- Choose sew-on when the care label prohibits ironing or the scarf supplier cannot confirm heat compatibility.
- Choose sew-on when the scarf has noticeable stretch and the patch needs a controlled attachment point.
- Choose sew-on when repairability matters, since attachment stitches can often be replaced without relying on an aging adhesive bond.
- Inspect the reverse before approving the installation method, especially on single-layer scarves where stitching remains visible.
If you're considering a stitched emblem, request a free digital mockup through our embroidered patch options. Include a photo of the scarf laid flat and identify the intended patch location; the artwork preview is more useful when the production team knows what sits underneath it.
Choose iron-on if the scarf is stable and approved for heat
Choose iron-on only when the scarf can tolerate the adhesive's required application conditions and provides a suitable bonding surface. A stable woven scarf may qualify; a loosely knitted or heat-sensitive scarf is a much less forgiving candidate.
Iron-on backing is a heat-activated adhesive layer that bonds a patch to compatible fabric under specified application conditions. Heat alone isn't the whole process. Pressure, dwell time, surface texture, coatings, and the scarf's construction all influence the result.
Don't use a universal temperature from an unrelated patch tutorial. Get the instructions for the actual backing, then compare them with the scarf manufacturer's care guidance. If the adhesive needs conditions the scarf cannot tolerate, that pairing is wrong.
For example, a brand might use a compact patch on a stable cotton scarf that permits the required heat. After testing a spare scarf, iron-on could be a practical choice for a short promotional run. The same method shouldn't automatically carry over to a polyester satin scarf or a brushed acrylic knit.
A pressing cloth may help protect a surface in some applications, but it doesn't make an incompatible fabric safe. It also changes heat transfer. Follow the application guidance rather than improvising a gentler process that leaves the adhesive only partly bonded.
Would I add perimeter stitching? For frequently worn merchandise, often yes, after checking the fabric and installation plan. But if sewing was available from the start, ask whether the adhesive layer is doing enough useful work to justify itself. Sometimes plain sew-on is the simpler order.
Which scarf fabrics need special handling?
Loose knits, brushed surfaces, delicate weaves, and heat-sensitive fibers need a fabric-specific plan. Fiber content helps, but the fabric structure and care instructions matter just as much.
Acrylic and blended team knits
Start with sew-on. These scarves often stretch substantially, and raised yarn gives an adhesive an uneven contact surface. Keep the scarf relaxed during attachment. Pulling it flat under tension can leave ripples once it returns to its normal shape.
Wool and wool blends
Sewing is usually the more controllable route, particularly when the label calls for specialized care. Wool construction varies widely, so don't treat a dense woven wool scarf and an airy knit as interchangeable. Check both the visible face and the reverse for pressure marks or puckering.
See your artwork as a custom USA patch before you buy. Free digital mockup in 12 hours — 5-piece minimum per design. We do not produce until you approve.
GET A FREE MOCKUPPolyester fleece
Fleece can support a sewn patch well, but its pile can flatten under pressure and heat. Stitch tension also needs attention because a patch can pull the surrounding fleece into a shallow cup. A small emblem near the end generally asks less of the fabric than a large badge across its width.
Cotton and stable woven blends
These are more plausible iron-on candidates when their care instructions and finishes allow it. Still, “cotton” isn't an application approval. Coatings, thin construction, and decorative treatments can change the result, so use an actual scarf for the test.
Silk, satin, and lightweight fashion scarves
I'd skip a heavy embroidered patch here. Even sewing can leave visible needle marks or distort a delicate weave. If the brand requires an emblem, explore a smaller, lighter construction and professional attachment; sometimes a label is a better answer than a conventional patch.
How do patch material and border affect scarf comfort?
The patch's face construction, internal support, and edge can affect comfort as much as its backing. A sew-on patch can still feel bulky if the embroidery is dense or the border is heavy.
An embroidered patch is a textile emblem that uses stitched thread to form artwork on a base fabric. It suits bold club badges, school initials, and simple team marks. The raised texture looks right on substantial winter scarves, but very dense coverage can resist folding.
A woven patch is a textile emblem that forms its design with interlaced threads rather than raised embroidery stitches. For a small sponsor name or fine lettering, woven patch construction may offer a flatter result. It doesn't solve every comfort issue, because the backing and border still need to be specified.
A merrowed border is an overlocked thread edge that wraps the patch perimeter. It works well for many simple badge shapes but adds a noticeable rim. A cut edge can follow more detailed shapes and may look less bulky, although its feel depends on the construction and finishing.
Don't add thickness just to make the patch feel substantial in your hand. A scarf isn't a display board. Polyvinyl chloride (PVC), thick chenille, and firm leather constructions can be useful on other products, but I'd question them on a light scarf unless the design intentionally calls for that weight and texture.
Backing cannot rescue artwork that is too small. If a club crest includes fine lettering, compare a simplified embroidered version with a woven version at the intended size. That is a more useful decision than choosing iron-on or sew-on first and hoping the details work later.
Where should a patch sit on a scarf?
Place the patch where it stays visible without creating a hard fold or rubbing against the neck. Near an end is often a practical starting point, but check the scarf in the way people will actually wear it.
Flat placement can be misleading. A patch centered neatly on a table may disappear inside a loop when the scarf is wrapped. A badge close to fringe may also pull on a weak transition area if the installer catches loose yarn instead of the scarf body.
For example, compare paper templates measuring 2 inches and 3 inches across on a sample scarf. Wrap it, hang it, and fold it for retail packaging. Those example sizes aren't universal recommendations; they help reveal when the emblem starts controlling the scarf instead of sitting naturally on it.
Single-layer construction deserves a reverse-side decision. Attachment stitches may show, and covering them with another patch adds weight. Double-layer scarves may allow concealed attachment to one face, but access depends on how the scarf was assembled. Tell the sewing shop which result you expect before it quotes installation.
- Check visibility with the scarf wrapped, not only laid flat.
- Keep the attachment on sound fabric rather than fringe or an unstable edge.
- Compare the patch width with the scarf width so the badge does not become a stiff crossbar.
- Inspect both faces and the folded edge for exposed threads, hard corners, and uncomfortable bulk.
When is the cheaper or simpler option the right call?
The simpler option is right when it meets the wear and care requirements without adding unnecessary layers or application steps. Compare the finished attached cost in dollars, not just the patch unit price.
A plain sew-on patch can be the economical choice when a scarf maker already has sewing equipment and can attach it during assembly. Adding adhesive, testing a press cycle, and then sewing the perimeter may create extra work without improving the finished scarf.
Iron-on can make sense when compatible scarves and suitable pressing equipment are already available, especially if the alternative is arranging separate sewing labor. That doesn't mean iron-on is always cheaper. Ask for a USD quote that separates the patch specification from any attachment service and shipping.
Ready to spec type, size, backing, and quantity? Open the quote form for a free 12-hour mockup and USA shipping after approval.
GET A FREE MOCKUPFor a basic club emblem, a smaller shape with readable initials can be enough. I'd cut tiny decorative text before paying for a larger, denser patch that makes the scarf hang awkwardly. Artwork simplification often improves both usability and the order specification.
Peel-and-stick is appropriate for temporary placement or a display test when the adhesive is safe for that surface. It isn't a shortcut to washable merchandise. Likewise, hook-and-loop earns its place when removable identification is genuinely needed, not simply because it is available.
How should you test a scarf patch before a full run?
Test the intended patch construction and attachment method on the actual scarf before applying patches across the order. A digital mockup confirms visual decisions; it cannot verify heat resistance, adhesive strength, or how the fabric feels after sewing.
- Identify the scarf. Record fiber content, knit or woven construction, number of layers, care instructions, and any surface finish.
- Confirm the patch specification. Include finished dimensions in inches, material, border, backing, and orientation.
- Check placement with a template. Wear and fold the scarf to find hidden artwork, awkward stiffness, or contact with the neck.
- Have the intended installer attach a physical test patch. Use the planned sewing method or the backing supplier's approved heat-application process.
- Inspect the relaxed scarf. Look for puckering, flattened pile, shine, loose stitches, distorted yarn, and lifted edges.
- Check care compatibility. Clean the test piece only by a method permitted for both components, then inspect it again.
- Document the approved attachment. Record placement and application details so the rest of the run does not depend on guesswork.
A successful test should resemble the way the product will be used. A patch that looks fine immediately after pressing hasn't yet shown how it handles repeated folding. A sewn badge that lies flat on a bench may still feel too firm against the collarbone.
Physical samples and attachment tests are separate from a free digital mockup. Ask what is available, what it costs, and how it affects the schedule before making the full order dependent on a test piece.
What should you send for an accurate scarf patch quote?
Send the artwork together with the scarf specifications and intended attachment method. The quote needs to reflect the finished use, not just a logo file and a quantity.
- Artwork or a clear reference image, with any required lettering identified.
- Patch dimensions in inches and the requested piece count.
- Scarf fiber content, care label, construction, and photos of both faces.
- Preferred patch material, border, backing, and placement.
- Whether you need loose patches or want to discuss attachment requirements.
- Your delivery state, ZIP code, and actual event or retail deadline.
USA Customized Patches has a 10-piece minimum. A free digital mockup is provided before production, usually in about 12 hours. Production starts only after written approval. Review dimensions, spelling, colors, border, and backing rather than approving from the logo alone.
Typical turnaround is 7-12 business days, with the schedule confirmed for the order specifications. Ask how approval, production, and transit apply to your deadline rather than assuming every stage fits inside the same window. Quotes are available 24 hours a day, 7 days a week.
We ship from Corona, CA, to all 50 states across the United States. Review the U.S. shipping information when planning a distribution date, particularly if your team still needs to attach the patches after delivery.
For a free digital mockup, send the scarf details and artwork through our patch specification contact form. Mention any heat restrictions at the start so the proposed backing doesn't conflict with the garment.
What this advice is based on
This advice rests on patch construction, attachment requirements, the digital mockup step, and the order specifications. In our production experience, matching the patch to the fabric is more reliable than choosing a backing by convenience alone.
The comparison is not a laboratory durability ranking, and it does not establish a guaranteed service life. Scarf yarn, weave, finishes, sewing quality, application conditions, and care all affect performance. A mockup helps settle artwork and placement; a physical attachment test answers questions about the actual textile.
Which backing should you approve for the order?
Approve sew-on for most scarf orders, and approve iron-on only after fabric compatibility and the application method are confirmed. For light or delicate scarves, reducing the patch's weight may matter more than either backing choice.
My practical verdict: a compact sew-on emblem near the scarf end is the sensible starting specification for a team, club, or business scarf. If a simpler design does the job, keep it simple. Before approving production, make sure the order says what the scarf is made from and who will attach the patch.