
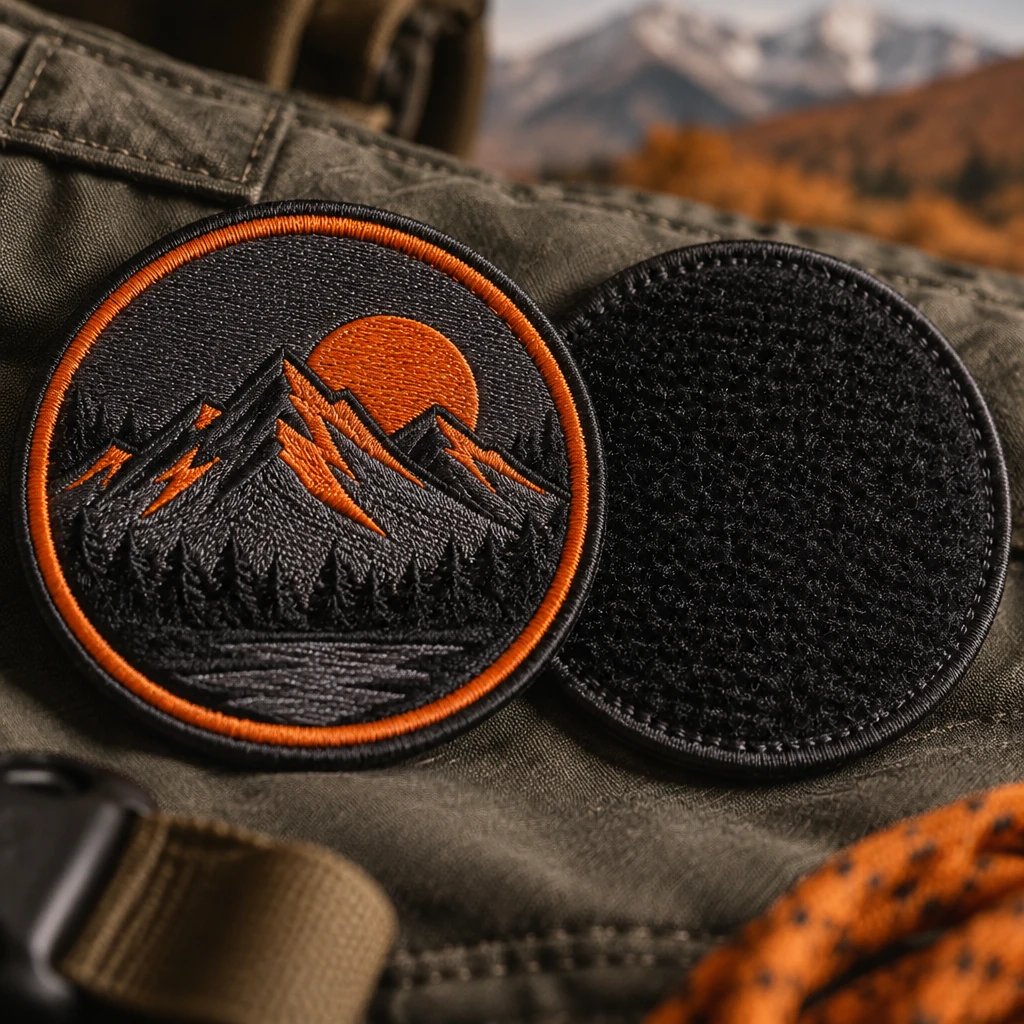
The practical answer to “best backing sleeve patches” is a sew-on finish for permanent uniforms and hook-and-loop for removable identifiers. The reasons come down to laundry, sleeve construction, replacement needs, and the total cost of getting each patch onto a garment.
I'd skip temporary adhesive for a work shirt that goes through the wash every week. I'd also skip paying for hook-and-loop on a permanent company emblem unless the shirt already has a compatible panel. Extra features aren't automatically useful. A straightforward patch sewn onto a cotton-twill maintenance shirt can be the more sensible order than a thicker, removable setup that nobody plans to remove.
What does “best backing sleeve patches” mean for your uniform?
It means choosing the attachment around the garment and its use, not simply selecting a backing from a quote form. For most permanent sleeve emblems, start by evaluating sew-on attachment; for changing assignments or identifiers, start with hook-and-loop.
A patch backing is the material or finish on the reverse side that supports the patch, enables attachment, or does both. Sew-on describes an attachment method rather than one specific backing material. A patch with no added attachment layer may still have manufacturing support behind its embroidery, and some heat-seal patches can also be sewn on.
That distinction matters when you request a quote. “Plain sew-on, no heat-seal adhesive” is more useful than “regular backing.” Likewise, “hook backing with matching sew-on loop panels supplied loose” tells production much more than “removable.” Specify what reaches the sewing station, not just what the finished uniform should look like.
The front matters too. Polyester embroidery thread on a twill base gives an embroidered patch its familiar raised surface. That texture can suit a security shirt or club jacket, but the backing will not rescue lettering that is too small or artwork crowded into a narrow sleeve position.
How do sew-on, iron-on, hook-and-loop, and adhesive compare?
Sew-on favors permanent installation, hook-and-loop favors replacement, iron-on depends on heat compatibility, and pressure-sensitive adhesive favors temporary use. None is the lowest-cost answer for every garment once installation and upkeep are included.
| Comparison criterion | Sew-on finish | Iron-on heat-seal backing | Hook-and-loop backing | Temporary adhesive backing |
|---|---|---|---|---|
| Durability in repeated use | Stitching provides a mechanical attachment; thread, fabric condition, and stitch quality still matter. | Bond durability depends on fabric compatibility, correct pressing, and laundering conditions. | Patch face is removable; hook engagement and the sewn loop panel both need to remain sound. | Temporary hold varies with fabric texture, movement, surface condition, and adhesive. |
| Artwork and detail level | Does not inherently change face detail; leave a workable perimeter for stitching. | Does not add artwork detail; patch construction still sets lettering limits. | Does not improve detail and can add thickness beneath a small emblem. | Does not improve detail; a temporary patch still needs suitable face construction. |
| Main cost drivers | Patch construction plus sewing labor, sleeve access, and any lining complications. | Backing plus press setup, garment testing, placement, and application labor. | Hook material, matching loop panels if needed, panel installation, and replacement planning. | Adhesive layer plus possible replacement; low installation effort can suit short use. |
| Typical uses | Permanent staff emblems, maintenance shirts, club jackets, and stable team identities. | Heat-compatible garments with accessible application areas and a controlled pressing process. | Role identifiers, training assignments, interchangeable team insignia, and panel-equipped sleeves. | Short indoor events, display samples, and temporary placement checks. |
| Sleeve installation | Requires needle access without catching the opposite sleeve wall or unwanted lining layers. | Requires even heat and pressure despite seams, sleeve curvature, or pockets. | Usually requires a loop panel already on the sleeve or sewn on separately. | Applied directly to a suitable surface; edges may lift as the sleeve flexes. |
| Removal and replacement | Stitches must be cut carefully; needle holes or color differences can remain. | Removal can leave adhesive residue or affect the garment finish. | Patch can be exchanged without removing the garment's loop panel. | Removal is easy in some applications, but residue-free removal is not assured. |
| Feel on the sleeve | Often the least bulky choice when no extra attachment layer is needed. | The heat-seal layer can add stiffness, depending on construction. | Hook and loop layers add thickness and can make a patch stand farther off the fabric. | May feel light, but temporary convenience does not establish wash durability. |
In our production experience, buyers often compare backing prices before checking who will install the patches. Reverse that order. An inexpensive backing can become an expensive choice if each sleeve needs awkward press handling, while a higher-material-cost removable patch can be practical on a shirt that already has the right loop panel.
Choose sew-on if the sleeve emblem should stay put
Choose sew-on attachment when the emblem is permanent, the garment permits stitching, and repeated laundering is part of normal use. It is the simpler option worth choosing when removability offers no real benefit.
Think cotton-twill shop shirts, denim club jackets, and stable company logos on uniform overshirts. The patch does not need to come off between shifts. A suitable perimeter stitch secures it without relying on an adhesive bond, and there is no separate loop panel to buy, match, or keep clear of lint.
Sewing isn't effortless. A narrow sleeve may be hard to fit over the sewing machine, a lining may need separate handling, and a sleeve pocket can block the intended placement. Those are installation questions, not reasons to automatically switch to iron-on. Ask the person doing the sewing before ordering the full run.
Where the simpler option is the right call
Example: a maintenance team orders 40 permanent shoulder emblems for cotton-twill work shirts, and its uniform shop already handles sewing. A plain sew-on finish is the right starting point. Paying for hook-and-loop adds components without solving a stated problem. Adding heat-seal backing merely to hold the patch during sewing may also be unnecessary if the installer has a preferred placement method.
The cheaper patch configuration is not always the cheaper completed uniform, though. Sewing labor belongs in the comparison. Ask for the installed cost in dollars, including any work needed to open and close a lining, rather than comparing patch unit prices alone.
Match the edge to the stitching plan
A merrowed border is an overlocked thread edge that wraps around the patch perimeter. It suits many straightforward shapes and gives the installer a clear visual boundary. A heat-cut edge follows the cut outline more closely and can suit shaped artwork, but thin points and narrow extensions need enough room for a secure stitch path.
Do not ask the sewing shop to drive a needle through tiny lettering to make the attachment work. Leave a sensible edge area in the artwork. If the patch has an irregular outline, review how each point will lie against a curved sleeve before approving that shape.
Choose hook-and-loop if the identifier needs to change
Choose hook-and-loop when staff exchange role patches, remove identifiers between assignments, or use garments with existing loop panels. The added material and thickness earn their place when patches actually need to move.
Hook-and-loop is a two-part fastener that joins small hooks on one surface to loops on the other. Typically, the patch carries the hook side and the uniform carries the softer loop panel. A hook-backed patch will not attach properly to an ordinary shirt sleeve just because the fabric feels slightly fuzzy.
Measure the existing panel first. Example: if a shirt has a 3-inch-wide loop panel, a wider patch may leave unsupported edges or exposed hooks. Match the actual panel shape and usable area, including its rounded corners. A catalog description of the shirt is not a substitute for measuring the garment in hand.
See your artwork as a custom USA patch before you buy. Free digital mockup in 12 hours — 5-piece minimum per design. We do not produce until you approve.
GET A FREE MOCKUPOrder the components you actually need
If every uniform already has a compatible loop field, ordering another loose loop panel for every patch may waste money. If the uniforms have bare sleeves, ordering hook-backed patches alone leaves the installation unfinished. State whether matching loop panels are included, supplied separately, or not required.
Removability also changes laundry handling. Follow the garment and patch care instructions, and consider whether removing the patch prevents exposed hooks from catching other items. The loop panel remains part of the garment. Its stitching and placement still need to withstand the uniform's normal use.
I'd skip this setup for a lightweight polo with a permanent logo unless there is a clear operational reason. The combined patch and fastener can pull on thin knit fabric and stand away from the sleeve. A removable role identifier on a structured uniform overshirt is a much more convincing use.
When is iron-on backing a reasonable sleeve option?
Iron-on backing is reasonable when the garment tolerates the required heat and the sleeve can receive controlled, even pressure. It is not a universal shortcut for uniforms that are difficult to sew.
Heat-seal backing is an adhesive layer that bonds under specified application conditions. Those conditions depend on the adhesive and the garment, so a generic temperature copied from another patch order is not enough. Get the application instructions for the actual patch and compare them with the garment manufacturer's care and decoration guidance.
Sleeves complicate pressing. A raised seam can prevent even contact. A pocket can add uneven layers. A narrow sleeve may not sit flat on the available press equipment. Even if the fabric itself is compatible, uneven pressure can leave part of the adhesive insufficiently bonded.
Stretch polyester performance shirts, coated outerwear, and heat-sensitive finishes deserve particular caution. Some fabrics may show press marks, distortion, or color changes under unsuitable conditions. Test a representative garment with the actual patch before treating the full order. A digital proof cannot answer that question.
When lower installation effort can be enough
Example: an event team uses compatible overshirts for occasional indoor duties and has access to suitable sleeve-press equipment. A tested heat-seal application may be a sensible alternative to individual sewing. That is a real use case, not a promise that any household iron will produce the same result on any uniform.
For repeated service wear, ask whether perimeter stitching should be added. If the plan already includes sewing every patch, compare a plain sew-on finish against heat-seal plus stitching. The adhesive might help a particular installer with placement, but it may also be an extra feature the job does not need.
Is temporary adhesive ever the right call?
Temporary adhesive is the right call for some short-duration uses, not for a uniform patch expected to survive regular washing. Its main advantage is low-effort placement without sewing or heat.
Pressure-sensitive adhesive is a tacky layer that attaches when pressed against a suitable surface. Fabric texture, moisture, motion, and garment finishes can all affect its grip. A sleeve is a demanding location because it bends and brushes against desks, seat backs, and other clothing.
Example: a club wants to check patch placement on sample shirts during an indoor fitting session. A temporary adhesive option may be enough if the fabric is compatible and residue is not a concern. I'd skip it for the final washable uniform, even if it looks secure during that short fitting.
Do not assume removable means residue-free. Test a hidden area or an expendable garment when the surface finish matters. For a valuable jacket or coated shirt, the consequences of removal belong in the decision before anything touches the sleeve.
How should sleeve fabric, patch size, and artwork affect the choice?
Match patch weight and stiffness to the sleeve, then confirm that the design fits the usable placement area. Backing cannot compensate for an oversized emblem, crowded lettering, or a patch that fights the garment's stretch.
Example: a 3-inch-wide patch may sit comfortably on a structured work-shirt sleeve but feel bulky on a small performance polo. Cut a paper template at the proposed dimensions and hold it against the smallest and largest garment sizes in the order. Check the view with the arm relaxed, not only with the shirt spread flat on a table.
- Cotton-twill work shirts: evaluate sew-on attachment first for permanent logos, then check sleeve access and seam placement.
- Lightweight polyester polos: control patch size and stiffness, and verify heat compatibility before considering iron-on.
- Structured uniform overshirts with loop fields: match a hook-backed patch to the existing panel rather than ordering by appearance alone.
- Lined jackets: confirm whether the installer can reach the outer shell without catching or bunching the lining.
- Coated or protective garments: follow the garment manufacturer's permitted decoration methods; neither sewing nor heat application is automatically acceptable.
For fine text, consider the face construction separately. A woven patch construction may suit a design that needs a flatter surface and finer lettering than the proposed embroidery can reproduce. That decision does not automatically dictate the attachment; the selected backing still needs to suit the sleeve.
For an embroidered uniform emblem, you can request a free digital mockup through our embroidered patch options with the sleeve dimensions and preferred attachment noted. Ask to see the finished width and height, border, thread colors, and the design at its intended size.
Ready to spec type, size, backing, and quantity? Open the quote form for a free 12-hour mockup and USA shipping after approval.
GET A FREE MOCKUPA mockup settles visual questions. It does not measure how a thick patch hangs on a thin knit or prove how an adhesive behaves after washing. Keep artwork approval and garment testing as separate checkpoints.
How do you compare the total installed cost?
Compare the patch, backing components, installation labor, and likely replacement process as one job. The lowest patch unit price can lose its advantage once difficult sleeve access or unnecessary components enter the order.
Bigger dimensions and denser embroidery generally increase material and production demands. A removable setup adds fastening material, and it may add separate loop panels. Sewing on a lined sleeve can require more handling than sewing on an accessible unlined work shirt. None of those costs should be hidden behind a vague “premium backing” label.
- Hold the design constant. Compare the same quantity, dimensions in inches, face construction, thread colors, and border.
- List every component. Identify hook backing, matching loop panels, heat-seal adhesive, or plain sew-on finish explicitly.
- Get installation requirements. Tell the installer the sleeve fabric, lining, pockets, seams, and placement.
- Separate one-time setup from repeat work. Installing a loop panel may support later patch changes without another garment alteration.
- Ask for comparable dollar totals. Include patch production, required components, garment application, and shipping instead of comparing incomplete unit prices.
Example: a team changes training-role identifiers but keeps the same shirts. Hook-and-loop can avoid repeatedly cutting and replacing stitches. For a business keeping one logo on each shirt for its service life, that same removable system may buy flexibility nobody uses. Choose around the actual replacement pattern.
What should you approve before sleeve patches enter production?
Approve the artwork and the written construction specifications together, including the backing and any matching components. A front-view mockup alone does not define a complete sleeve-patch order.
USA Customized Patches has a 10-piece minimum. We provide a free digital mockup in about 12 hours, before production. Production starts only after written approval. Typical production takes 7–12 business days; confirm the schedule for your order and allow separately for transit.
Quotes are available 24 hours a day, 7 days a week. USA Customized Patches ships from Corona, CA, to all 50 states across the United States. Review the nationwide shipping information when planning a uniform rollout, especially if an outside shop will install the patches after delivery.
- Identify the actual garment. Supply its fabric composition, style, and any decoration restrictions, along with a sleeve photo if access is unclear.
- Measure the placement area. Record width and height in inches, plus clearance from seams, pockets, and any existing loop panel.
- Choose the attachment purpose. State permanent sew-on, tested heat-seal, removable hook-and-loop, or temporary adhesive.
- Specify the delivered parts. Confirm whether loose loop panels are included and whether patches need an attachment layer beyond their manufacturing support.
- Review the free digital mockup. Check spelling, proportions, thread colors, border, finished dimensions, and the written backing specification.
- Resolve installation testing. For heat application or an unfamiliar garment, agree on how compatibility will be checked before treating all uniforms.
- Give written approval. Keep the approved proof and order specifications available to whoever installs the patches.
Artwork approval does not turn into a wash guarantee. If an employer uses a commercial laundry service, obtain that service's garment-care requirements before selecting the backing. Household laundering and commercial processing are not interchangeable assumptions.
What is this advice based on?
This advice rests on the patch-production process, the digital mockup step, and the garment and attachment specifications needed to complete an order. It is a practical comparison, not a controlled durability study or a claim that one backing works on every uniform.
In our production experience, a useful recommendation starts with questions about the sleeve: what it is made from, how it is cleaned, where the patch sits, and whether the identifier changes. The mockup addresses appearance. Written specifications address construction. Installation instructions and representative garment testing address questions that a screen image cannot resolve.
Which backing should you put on the order?
Put sew-on on the order for a permanent sleeve emblem when the garment permits stitching. Choose hook-and-loop for identifiers that genuinely need removal, use iron-on only with a compatible application process, and reserve temporary adhesive for short-use jobs.
The simpler option is often enough. A permanent embroidered logo on a washable work shirt does not need a removable fastening system just because one is available. Spend attention on the finished dimensions, a sewable edge, and the installer's access to the sleeve instead.
If the garment details are still uncertain, send the fabric information, a sleeve photo, and the proposed dimensions through our patch specification and mockup form for a free digital mockup. Include whether the patch must come off; that single requirement can change the entire backing recommendation.