
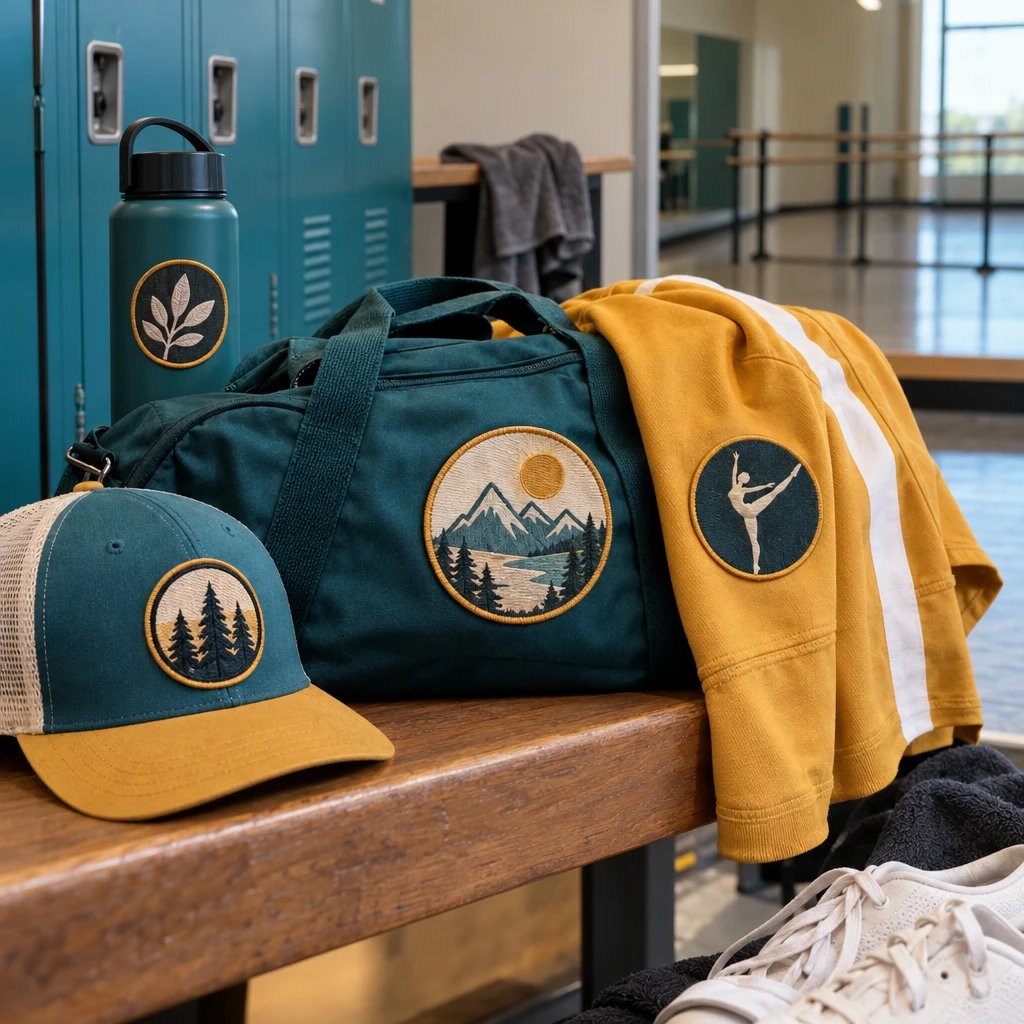
Embroidered patches are the best patch type for dance studios ordering bold logos for team jackets and dance bags. The deciding reasons are readable artwork, a raised thread finish, and practical attachment to stable fabric, but woven, printed, and chenille patches each win when the design or garment needs something different.
Start with the garment. A patch that looks right on a structured warm-up jacket can feel stiff on a leotard, and a detailed studio crest that reads well on a bag may turn into a crowded badge on a youth jacket. Those are production decisions, not reasons to buy the most expensive material.
Which is the best patch type for dance studios on team jackets?
Embroidery is the strongest default for a bold studio name, a clear dancer silhouette, or a simple team emblem on a stable jacket panel. Choose woven instead when the same patch must carry small lettering or closely spaced lines.
An embroidered patch is a fabric badge that builds its design with stitched thread over a base material, commonly polyester twill. That raised surface gives a jacket logo some presence without requiring an oversized badge. It works especially well when the artwork has open spaces and distinct shapes.
The catch is detail. Thread occupies physical space. A script studio name, a thin dancer's wrist, and a tiny city name cannot all stay delicate when squeezed into a small chest patch. In our production experience, simplifying the artwork often produces a better result than adding more stitches.
For example, consider a 3-inch chest patch with a studio name around a dancer silhouette. Embroidery can work if the name uses substantial letters and the silhouette has a clear outline. Add a founding year, a long motto, and several fine costume details, and woven construction becomes the more sensible candidate.
Use the embroidered patch options as the starting point for a jacket badge, not as a rule that every item in the studio shop must follow. Bags, caps, and performance clothing can require different versions of the same logo.
How do embroidered, woven, printed, and chenille patches compare?
Embroidery favors texture, woven favors small detail, printed patches favor image reproduction, and chenille favors large, fuzzy lettering. Compare them at the same finished size and with the same attachment requirements, or the quote comparison will be misleading.
| Buying criterion | Embroidered | Woven | Printed | Chenille |
|---|---|---|---|---|
| Durability and wear | Suitable for routine jacket and bag use; raised threads can snag against rough surfaces. | Low-profile construction reduces raised surfaces; edges and attachment still need proper finishing. | Wear depends on the printing process, substrate, and laundering; confirm care requirements. | Raised pile can flatten or catch; better suited to varsity styling than constant abrasion. |
| Detail level | Best with bold lettering and distinct shapes; tiny gaps can close with stitching. | Usually better for small text, narrow lines, and detailed crests at the same size. | Best for gradients, shading, and photographic artwork; tiny text still needs adequate physical size. | Best for large letters and simple shapes; poor choice for small text or fine facial details. |
| Feel and profile | Raised thread surface with body that increases as stitching becomes denser. | Flatter thread surface that generally feels less bulky than dense embroidery. | Flat graphic surface; actual flexibility depends on the base and backing. | Thick, fuzzy yarn surface, often supported by a felt base. |
| Cost drivers | Size, stitch coverage, artwork preparation, border, backing, and quantity. | Size, design complexity, setup, border, backing, and quantity. | Size, print method, substrate, finishing, backing, and quantity. | Size, yarn coverage, felt layers, added embroidery, finishing, and quantity. |
| Typical dance studio uses | Team jacket chest logos, duffel badges, staff apparel, and simple cap logos. | Detailed studio crests, compact chest badges, and logos with secondary lettering. | Gradient logos, illustrated recital keepsakes, and full-color artwork patches. | Varsity letters, senior recognition jackets, and large initials. |
| When the simpler option wins | A simplified stitched logo can avoid a larger or more elaborate patch. | A flat woven badge can preserve detail without increasing the patch footprint. | A printed patch can retain artwork without rebuilding it as complex thread work. | A plain chenille initial can be enough; extra felt layers are not always useful. |
There is no honest universal price order here. A small, simple embroidered badge may cost less than a large woven crest, while changing a dense stitched design to a flatter construction may make another order more practical. Ask for comparable quotes in USD using the same dimensions, quantity, border, and backing.
Should you choose embroidery or woven for a studio logo?
Choose embroidery for a bold logo whose thread texture is part of the look. Choose woven when preserving fine artwork matters more than a raised finish.
Choose embroidery if the logo can stay bold
Embroidery is the right call for block lettering, a simple monogram, or a dancer silhouette with enough separation between the limbs. It also suits a traditional team-jacket look. You can leave some twill visible rather than filling every part of the patch with stitches, provided the exposed fabric supports the design.
I'd skip full stitch coverage when it adds density but no useful visual information. More thread does not automatically mean a better patch. On a lightweight jacket, unnecessary coverage can make a small badge feel disproportionately stiff.
Choose woven if the lettering needs breathing room
A woven patch is a fabric badge that forms its design by interlacing fine threads rather than laying raised embroidery stitches over a base. That construction generally handles close lines and small lettering more cleanly, although no material can make undersized text easy to read.
Look at woven patches for detailed logos when the studio name includes thin script or the crest contains secondary text that must stay. The trade-off is a flatter surface. If the purchaser expects chunky stitched texture, a detailed woven badge may be technically correct but visually wrong for the brief.
A simpler solution is sometimes better than either upgrade: remove the motto from the chest version and keep it on the larger bag version. One master logo does not have to become one identical patch for every placement.
When do printed or chenille patches make more sense?
Choose printed patches for artwork that depends on gradients or shading. Choose chenille for large varsity letters where the fuzzy texture is the point, not for detailed studio crests.
Choose printed if changing the artwork would spoil it
A printed patch is a fabric badge that reproduces artwork with ink rather than constructing the entire image from colored thread. For example, a recital illustration with a sunset background and softly shaded costumes is a stronger candidate for printing than conventional embroidery.
See printed patches for full-color artwork if retaining the original image matters. Ask about the substrate and care instructions as well as color. A digital image on a screen is not proof that every small element will remain readable at finished size.
Printing is also worth quoting for a short-use keepsake when stitched texture adds little value. It is not automatically the cheapest option. Still, I'd choose the simpler production method over an elaborate thread conversion when the buyer mainly wants the illustration preserved.
Choose chenille if you want a varsity letter
A chenille patch is a badge that uses raised yarn loops to create a fuzzy surface, usually over a supporting base such as felt. Large initials suit that construction. A narrow script name generally does not.
See your artwork as a custom USA patch before you buy. Free digital mockup in 12 hours — 5-piece minimum per design. We do not produce until you approve.
GET A FREE MOCKUPConsider chenille patches for varsity-style jackets for senior recognition or a studio initial on a substantial jacket. Keep the hierarchy clear: chenille for the large letter, embroidery for supporting detail if needed. Extra felt layers increase the footprint and thickness, so use them for a deliberate outline rather than adding them by default.
I'd skip chenille on a frequently dragged dance bag. The texture that makes it appealing on a jacket is less useful against rough floors and equipment.
Which patch materials suit jackets, bags, caps, and costumes?
Stable garment panels give patches the most predictable results. Stretch zones, curved cap fronts, and thin costume fabrics need placement and attachment checks before the material is finalized.
- Warm-up jackets: Embroidered or woven patches usually make sense on a stable chest or sleeve panel. Check stretch, lining access, nearby seams, and the garment's heat restrictions.
- Canvas or sturdy polyester dance bags: Embroidery works well for bold branding. Woven construction suits detailed logos. Avoid placing a badge where handles, zipper pulls, or the floor will repeatedly rub it.
- Caps: Use a compact design that fits the usable front panel. A center seam or pronounced curve can keep a thick patch from sitting flat, especially if the attachment method does not accommodate the shape.
- Hoodies: A sew-on badge can work on a stable placement, but heavy coverage may pull on lightweight fleece. Check the smallest garment size before approving one patch size for the whole group.
- Leotards and fitted stretch costumes: Treat any patch as a nonstretch addition unless its construction is specifically confirmed otherwise. Keep it away from areas that must extend during movement.
- Varsity jackets: Chenille letters and bold embroidery both fit the garment. Decide whether the patch is the main visual feature or a smaller identification badge before choosing its scale.
A dance team does not need the same construction everywhere. Matching colors, lettering, and overall shape can create a consistent identity even when the jacket uses embroidery and the smaller bag badge uses woven thread.
Polyvinyl chloride, usually called PVC, creates a molded, rubber-like patch rather than a textile badge. It can be useful for wipe-clean gear, but I'd usually leave it out of a standard studio jacket comparison unless that molded feel is specifically wanted. More material choices do not always improve the decision.
Should dance studio patches be sew-on or iron-on?
Sew-on is usually the safer starting point for washable team garments, provided the fabric can support stitching. Iron-on backing is appropriate only when the garment and adhesive application requirements are compatible.
Backing is separate from patch type. An embroidered patch can have a plain sew-on back, heat-activated adhesive, or another specified attachment system. Choosing embroidery does not tell the production desk how the badge will be attached.
Polyester is not one uniform fabric. A stable polyester jacket shell, a coated bag panel, and a thin stretch costume can react differently to heat and pressure. Follow the garment care label and the supplied application instructions. Test on a spare garment or suitable hidden area before committing a full team order.
Don't improvise a heat setting. Excess heat can mark fabric, distort trims, or affect finishes. If the garment cannot accept the required application conditions, sewing may be the better route, assuming needle holes and access are acceptable.
Hook-and-loop backing makes sense when patches must move between compatible garments or bags. It adds thickness and requires a matching receiving surface. I'd skip it for a flat chest logo that will stay on one jacket throughout the season.
Pressure-sensitive adhesive can help with temporary placement or suitable short-term displays. It should not be treated as a substitute for a durable washable attachment unless the specific system is rated for that use. A backing choice that saves application time but fails during laundering is not a saving.
How do you size a dance patch without losing detail?
Size the patch against the actual garment and judge the artwork at its finished dimensions. Enlarging the mockup on a monitor hides the very problems that small patches create.
- Measure the usable panel. Leave room for seams, zippers, pockets, and the garment's curve rather than treating the entire chest or sleeve as open space.
- Print a paper outline at actual size. For example, compare a 3-inch and a 3.5-inch badge on the smallest youth jacket and an adult jacket before selecting one shared size.
- Read the smallest lettering without zooming. If the studio name or secondary line is difficult to read on paper, discuss enlargement, simplification, or woven construction.
- Check narrow spaces in the dancer artwork. Arms near the torso, crossed ankles, and small openings inside lettering need enough separation for the chosen material.
- Include the border in the measurements. A finished patch dimension covers the complete badge, not just the artwork inside it.
- Review the placement during movement. Bend the elbow, reach forward, and check whether the badge crosses a fold or stretch zone.
For example, a studio ordering 40 patches for mixed youth and adult jackets might prefer one shared chest size to keep ordering simple. That can work if the artwork remains readable on the smallest garment. If it doesn't, separate sizes are worth discussing, along with how those variations affect the quote.
If you're deciding between embroidery and woven, send the logo, intended inches, and garment description for a free digital mockup. Seeing the design at its proposed size is more useful than choosing a material from a close-up photograph.
Which border works for a dancer silhouette or studio crest?
A merrowed border suits simple outlines such as circles, ovals, and many rounded rectangles. A cut edge is usually more practical for irregular shapes and tighter turns.
A merrowed border is an overlocked thread edge that wraps the patch perimeter. It creates a visible frame and a slightly raised rim. That can look right on a team crest, but it also uses space around the design.
Cut-edge finishing follows shapes that a wrapped border cannot handle cleanly. The appropriate cutting and edge treatment depend on the patch material. Confirm the proposed finish on the order rather than assuming every irregular badge uses the same process.
I'd put a detailed dancer silhouette inside a simple badge shape rather than cut around every finger, ankle, and ribbon. Thin projecting sections can be awkward to finish and attach. The simpler outline is often easier to sew, easier to position consistently, and better suited to repeated garment use.
How can a studio reduce patch costs without spoiling the result?
Reduce unnecessary variations and simplify features that do not improve recognition. Compare complete order specifications, because material alone does not determine the price.
Ready to spec type, size, backing, and quantity? Open the quote form for a free 12-hour mockup and USA shipping after approval.
GET A FREE MOCKUPA quote should identify quantity, finished dimensions, construction, border, backing, and any personalization. Ask for the total in USD and clarify application and shipping charges where applicable. A lower patch unit price can stop being useful if it requires an attachment process the studio cannot perform.
- Keep one standard studio badge when individual names are not essential. Personalization creates more artwork to check and more pieces to sort.
- Remove tiny supporting text from a chest logo instead of enlarging the entire patch solely to fit it.
- Use a simple outline when a custom silhouette offers no meaningful visual benefit.
- Choose plain sew-on backing if a garment decorator will sew every patch and no adhesive is needed for placement.
- Quote partial embroidery coverage when visible twill suits the artwork. Do not add stitches merely to make the specification sound more substantial.
- Reserve layered chenille or elaborate finishes for recognition garments where that look matters, rather than applying them to every practice bag.
The cheaper option is the right call when it meets the same reading, attachment, and care requirements. For a basic staff badge with a bold name, a straightforward embroidered patch may be all you need. Paying for fine-detail construction makes little sense when the design contains no fine detail.
Likewise, do not pay for tactile embroidery just to imitate a full-color illustration badly. A printed patch may preserve the artwork with fewer compromises. Get the actual quotes, then choose based on the finished item rather than a presumed material hierarchy.
What should you approve before production starts?
Approve the finished dimensions, artwork, colors, construction, border, backing, and quantity in writing. A digital mockup checks the proposed design, but it does not replace a physical test of garment attachment.
USA Customized Patches has a 10-piece minimum. A free digital mockup is available in about 12 hours. Production starts only after written approval.
Typical production timing is 7–12 business days. USA Customized Patches is open 24 hours a day, 7 days a week for quotes. Orders ship nationwide from Corona, CA, to all 50 states in the United States.
For a competition or recital deadline, confirm the current schedule before placing the order. Ask how the quoted production window relates to approval and shipping, and allow time for the person attaching the patches. Delivery to the studio is not the same as having every jacket ready to hand out.
- Send the cleanest logo file available, plus the garment description and intended patch location.
- State the quantity, desired finished size in inches, preferred attachment method, and required arrival date.
- Check the mockup for spelling, missing details, changed proportions, border shape, and the smallest lettering.
- Confirm the written specifications match the picture, especially the backing and overall dimensions.
- Collect one clear approval from the studio's decision-maker rather than combining conflicting comments from several messages.
- Plan garment application and inspection before distribution. Check placement consistency and edge attachment before dancers take the garments home.
Screen colors are useful references, not a promise that thread, felt, ink, and garment fabric will look identical under every light. If matching an existing uniform color is critical, raise that requirement before approval. The same color name can mean different things to different suppliers.
For a second look before ordering, request a free digital mockup with the garment placement noted alongside the patch dimensions. Confirm the destination and deadline using the nationwide shipping information before scheduling jacket decoration.
What is this recommendation based on?
This advice rests on the patch-production process, the digital mockup step, and the specifications that determine the finished order. It is not a claim that one material wins every durability or price comparison.
In our production experience, artwork scale, fabric stability, edge finishing, and attachment compatibility explain many of the differences buyers notice after patches reach their garments. A mockup helps check layout and design decisions. It cannot establish wash performance, reproduce every thread reflection, or show how a badge will feel during a dance routine.
The examples here illustrate ordering decisions, not named customer projects or test results. Final recommendations should use the actual artwork, garment information, and approved order specifications.
Which option should your studio order?
Order embroidery for a bold studio logo on stable team jackets or bags unless the artwork gives you a concrete reason to choose something else. That is the verdict: start simple, then change construction only to solve a real problem.
Choose woven if small lettering must remain. Choose printed if gradients or illustration are essential. Choose chenille if a large varsity letter is the intended look. For a stretch costume, settle the attachment and movement questions before ordering any of them.
Before approving the order, tape a paper version of the proposed patch onto the smallest garment size. If the name is hard to read, the badge crowds a zipper, or the placement crosses a stretch zone, fix that now rather than asking the attachment crew to work around it.