
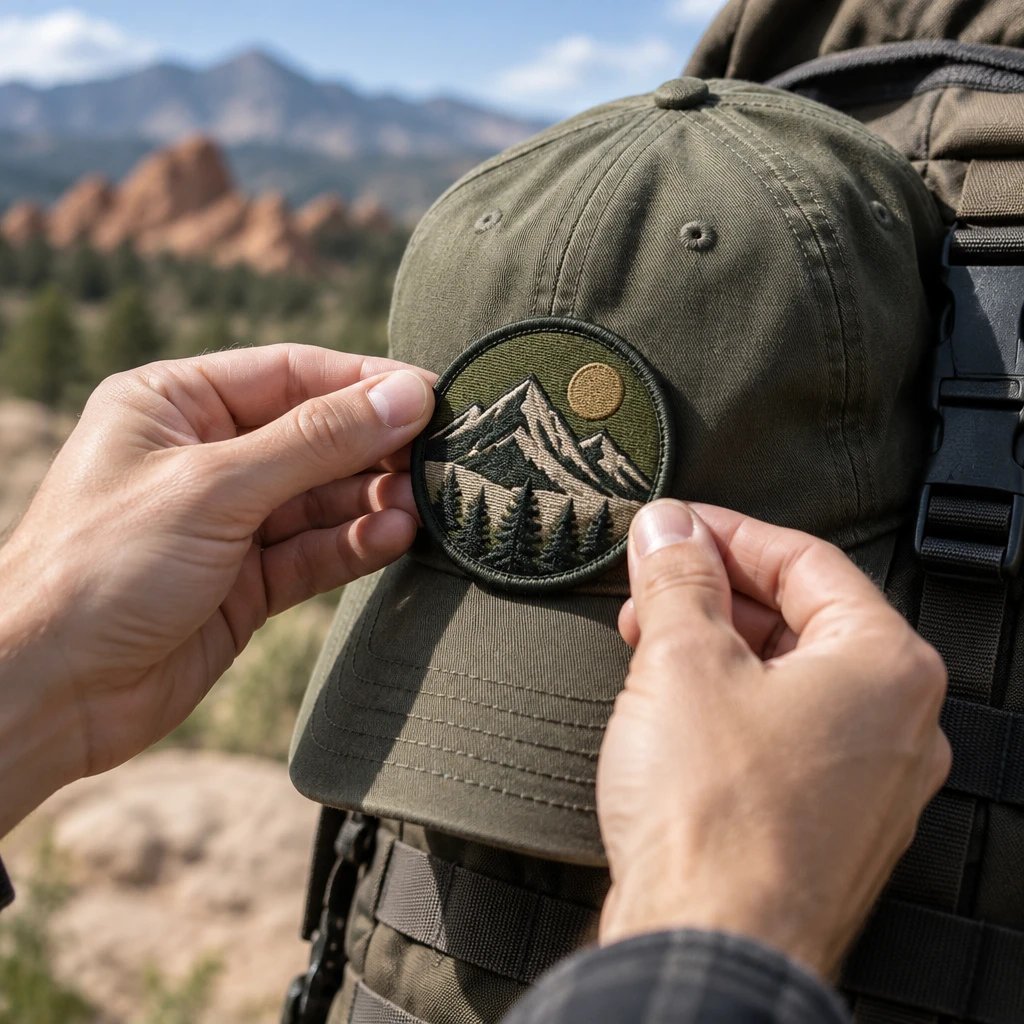
Patch size, especially the area covered with embroidery, is the biggest starting cost driver when comparing the same quantity of embroidered patches because it changes material use and stitching time. For a “colorado springs bulk patches events” quote, specify the finished size, quantity, backing, and required arrival date before comparing prices. Work backward from when patches must be attached or packed, not merely from the event opening.
How do size and stitch coverage change an event patch quote?
A larger embroidered patch generally costs more than a smaller version of the same design, and a densely stitched background adds work beyond the outline dimensions. Size and coverage should be considered together.
Embroidery coverage is the portion of the patch face filled with thread rather than exposed base fabric. That distinction matters. A bold club name around an open twill center can require less stitching than a similarly sized patch with a filled mountain scene, shaded lettering, and a stitched background.
For example, a Colorado Springs race organizer might compare a 3-inch round patch with a 4-inch version of the same emblem. The larger version creates more room for the event name and year, but it also increases the area that may need fabric and thread. The quote should reflect the actual artwork at each size, not an assumption that every round patch takes the same work.
I’d start with the garment. A patch for a cap front has different limits than a jacket sleeve or a backpack panel. Making the patch smaller can save money, but only until the lettering stops reading cleanly or the border crowds the design. A low quote for an unreadable badge isn’t a useful saving.
Leave the base fabric visible where it supports the design. Twill can provide a background color without filling that entire area with thread. In our production experience, this is often a better first adjustment than stripping out the event name or shrinking the patch until its details collide.
How do you compare colorado springs bulk patches events quotes?
Compare quotes using the same finished dimensions, artwork, patch type, backing, quantity, and arrival requirement. Otherwise, a lower total may simply describe a different patch or leave out work your team still has to do.
Ask for the quote in US dollars and check what is included. Patch production, attachment to garments, packaging, and shipping are different tasks. Don’t assume that ordering iron-on patches includes pressing them onto caps, or that a hook-backed patch includes the matching loop material sewn onto a jacket.
| Quote factor | Effect on cost | How to keep it down |
|---|---|---|
| Finished size | Larger dimensions generally require more material and, for embroidered areas, more stitching. | Choose the smallest size that keeps the event name readable and fits the actual garment. |
| Stitch coverage and density | More filled area and denser stitching increase machine work; unnecessary density can also make a patch stiff. | Use exposed twill as the background where the artwork allows it. |
| Thread colors and color changes | Additional colors and production changes can affect the quote, but stitch count may matter more than the number of colors alone. | Remove colors that do not improve recognition and ask how the proposed palette affects this specific order. |
| Border and outline | Irregular shapes, narrow projections, and special edge finishing can require more preparation and handling. | Use a circle, oval, rectangle, or uncomplicated shield when the design does not need a custom silhouette. |
| Backing | Heat-seal layers, hook material, matching loop material, and other attachment features change construction and cost. | Order only the backing the garment and use case need. |
| Quantity | A larger run usually spreads setup work across more pieces, reducing unit cost while increasing the total purchase. | Combine confirmed demand for an identical design instead of ordering several small batches. |
| Rush timing | A compressed schedule may require expedited production or shipping, if available. | Approve artwork early and set the required arrival date before requesting the quote. |
| Artwork preparation | Redrawing, simplifying details, and preparing an embroidery stitch file require different amounts of work. | Supply clean artwork, correct wording, color references, and finished dimensions together. |
| Design versions | Separate names, years, sponsor layouts, or shapes can create distinct setup and handling requirements. | Use one shared event design unless the versions serve a real operational purpose. |
Keep the unit cost and total cost separate on your planning sheet. A higher quantity may improve the price per patch without improving the event budget. If the unused pieces will sit in a storage box with last year’s sponsor names, buying more was not necessarily the economical choice.
Which artwork details add production work?
Dense fills, tiny lettering, repeated color changes, and complicated outlines add work or make an embroidered design harder to reproduce. Removing unnecessary detail is often more useful than simply reducing the color count.
Color count is not stitch count. A simple emblem with several solid thread colors can be easier to produce than a single-color design that fills nearly every part of the patch. Ask about both rather than treating the palette as the whole cost calculation.
For example, a community festival patch might show a mountain silhouette, an event name, a date, and a full sponsor list. I’d keep the mountain and primary wording on the patch, then place the longer sponsor list on the event program or garment print. Embroidery is the right call for bold identity, not for squeezing a page of information onto a cap.
Digitizing is the preparation of an embroidery stitch file that tells the machine where and how to sew the design. A clean vector logo helps with preparation, but it is not itself a finished stitch file. Stitch direction, sequence, underlay, and compensation still need attention.
If small lettering is essential, compare construction methods rather than forcing embroidery to do the wrong job. Woven patches for fine lettering can suit designs that need flatter detail. That does not automatically mean a lower quote; it means the patch method should match the information you need people to read.
For a cost-focused starting point, request a free digital mockup through our embroidered patch options with the garment, intended size, and event date included. Ask to see where exposed twill could replace background stitching before locking the design.
Which border keeps the patch practical without adding needless work?
A simple outline with a compatible border is usually the most straightforward specification. Intricate silhouettes should earn their place by improving the design, not just making the outline different.
A merrowed border is a wrapped thread edge that finishes the perimeter of a patch. It suits many simple shapes and gives an event badge a familiar raised outline. A cut edge follows the patch silhouette more closely and may be the better construction for shapes a wrapped border cannot handle cleanly.
Neither border is automatically the cheapest choice in every size and material. The outline, equipment, and finishing requirements determine the quote. Ask for the border to be named explicitly instead of accepting an unspecified “finished edge.”
See your artwork as a custom USA patch before you buy. Free digital mockup in 12 hours — 5-piece minimum per design. We do not produce until you approve.
GET A FREE MOCKUPFor example, a volunteer jacket patch could use a simple shield instead of following every peak in a mountain illustration. The mountain still appears inside the shield, but the outer edge becomes easier to sew around. That helps the person attaching the patch as well as the patch-production team.
Should event patches use sew-on, iron-on, or hook backing?
Choose backing for the garment and expected use, then compare cost. Plain sew-on construction is enough when a patch will be stitched permanently to suitable fabric; iron-on and hook backing solve different attachment problems.
Backing is the material or attachment layer on the reverse of a patch that determines how it can be secured. It should not be an afterthought. An unnecessary backing adds construction without helping the wearer, while an unsuitable backing can create attachment problems right before distribution.
- Sew-on for suitable jackets and work shirts: A plain back avoids paying for an attachment layer you do not need. Budget separately for sewing, and check access behind the garment panel.
- Iron-on for compatible fabrics: Heat-seal backing can be useful, but the garment must tolerate the required application conditions. Ask for application instructions and follow the garment care restrictions.
- Hook backing for existing loop panels: This is the right call for removable patches on compatible bags or uniforms. Confirm that the receiving loop field is already present and large enough.
- Temporary attachment for short use: Discuss the actual surface and duration before choosing an adhesive option. Temporary adhesion should not be treated as a substitute for durable garment attachment.
Caps deserve a separate conversation. Their curved fronts, center seams, and limited interior access complicate both heat application and sewing. I’d skip a household-iron plan for a large cap distribution unless the organizer has already verified the patch, cap fabric, and application method together.
For technical race shirts or coated outerwear, do not assume heat is acceptable. Sewing can also affect waterproof construction. If attachment is uncertain, distributing the patch loose may be more practical than promising it will work on every participant’s garment.
How many patches should an event order?
Base quantity on confirmed recipients, planned sales or giveaways, and a deliberate reserve. USA Customized Patches has a 10-piece minimum, but the most economical order is the quantity your event can actually use.
Bulk pricing is not a reason to stop counting. Separate staff patches from participant patches if they use different artwork, and ask how each version will be quoted. A shared order form does not necessarily make different designs one production run.
For example, a run club might need 40 patches for registered volunteers and consider another batch for merchandise sales. The volunteer count is known; the merchandise demand is not. Quote those needs clearly, then decide whether the same design can serve both groups without creating confusion.
Dated patches need extra restraint. An event year can make a patch a useful keepsake, but it limits how easily leftovers can be used later. A year-free club emblem may work across recurring events, while a dated finisher patch has a different purpose. Choose deliberately.
A reserve can cover late additions or handling losses, but there is no universal reserve quantity that fits every event. Use registration behavior and distribution plans you can document rather than adding pieces because a generic buying guide suggested it.
When should a Colorado Springs event approve its patch order?
Approve the order early enough to cover the confirmed production schedule, shipping, inspection, and any garment attachment. The useful deadline is the day the patches must be ready for use, which may be earlier than the public event date.
USA Customized Patches provides a free digital mockup in about 12 hours. Production starts only after written approval. Typical order timing is 7–12 business days; confirm how that timing applies to your specifications and delivery destination before committing the event schedule.
Quote requests are open 24 hours a day, 7 days a week. That access does not mean production and carrier movement follow the same around-the-clock calendar. Keep business days distinct from calendar days when you write the plan.
- Set the ready-to-use date. Identify when patches must be on jackets, inside registration bags, or handed to the volunteer coordinator.
- Allow time after delivery for counting and inspection. If patches will be attached locally, confirm that person’s schedule before choosing the arrival deadline.
- Confirm the shipping plan to the actual receiving address. Include any venue receiving restrictions or dates when someone can accept the package.
- Confirm production timing for the selected patch type, backing, quantity, and artwork rather than relying on a general estimate alone.
- Set an internal approval deadline before the production window. Assign one person to collect comments and return the written approval.
- Check the calendar again after any specification change. A revised size, quantity, backing, or design can affect both the quote and schedule.
Orders ship from Corona, CA, to all 50 states. For a Colorado Springs event, use the actual destination rather than assuming every Colorado address has the same delivery conditions. Review United States shipping information and confirm the shipment details for the order.
A venue address is not always the best receiving address. If the event space accepts freight only during setup, delivery to a staffed business or organizer’s receiving location may be easier to control. Make that decision before the package is moving.
What makes a rush order cost more?
Rush costs can come from compressed production scheduling, expedited shipping, or both. Availability depends on the order, and faster transportation cannot recover time that is still being spent revising artwork.
Ready to spec type, size, backing, and quantity? Open the quote form for a free 12-hour mockup and USA shipping after approval.
GET A FREE MOCKUPStart with the fixed date. Tell the production desk when the patches must physically arrive and what happens next. “Needed for an event” is incomplete if someone still has to sew every patch onto a volunteer vest.
Then identify what can change. A simpler outline or less complicated artwork may make a specification more practical, but changing it also requires review. Don’t trade away a recognizable event logo without seeing the revised mockup.
I’d keep a backup distribution plan for any genuinely tight schedule. Handing out loose patches instead of attaching them in advance can remove a local work step, provided loose distribution fits the event. It does not make production faster, and it should not be presented as a delivery guarantee.
What should you send with the first quote request?
Send the artwork, finished dimensions in inches, quantity, patch construction, backing, receiving address, and required arrival date together. Complete specifications reduce the back-and-forth that can push an ordinary order into a rush discussion.
- Artwork: Supply the cleanest original file available, plus the exact wording typed separately so names and dates can be checked.
- Size and placement: State width and height in inches and name the garment or item, such as a cap front, jacket sleeve, volunteer vest, or backpack panel.
- Construction: Identify embroidered, woven, or another requested patch type, and note whether the choice is flexible.
- Border and backing: Name the preferred finish and attachment method. If you are unsure, explain how the patch will be used.
- Quantity and versions: List the count for each design rather than giving only a combined total.
- Timing and destination: Give the required arrival date, Colorado Springs receiving address, and any packing or attachment deadline.
- Budget constraints: If there is a spending limit in US dollars, say whether it must include shipping and local attachment.
Ask what artwork preparation is included in the quote and what changes could require a revision. A free digital mockup should not be confused with unlimited changes to an approved production order. Those are different stages.
If the dimensions or backing are still undecided, send the garment details through the patch quote and artwork contact form and request a free digital mockup. A marked-up layout gives the organizer and production desk something specific to evaluate.
What should you check before giving written approval?
Check the mockup against the written order specifications, not just against the logo on your screen. Approval should settle the artwork and the production details that affect price, fit, and delivery.
A digital mockup is a visual layout that shows the proposed patch design before production. It helps review placement, wording, color choices, shape, and stated dimensions, but it is not a physical test of thread texture or attachment performance on a particular garment.
- Read the event name, year, location wording, and sponsor text character by character.
- Verify the finished width and height. View a paper outline at actual size on the intended garment rather than relying on an enlarged screen image.
- Check that the border leaves enough room for the lettering and that important details are not crowded against the edge.
- Confirm the color references, exposed base fabric, backing, and whether any matching loop material is included.
- Match the quantity and design versions to the quoted order, then reconfirm the required arrival date.
- Have the designated decision-maker submit written approval and retain the approved specifications with the event purchasing records.
Name one approver. Several committee members can review a design, but contradictory replies waste time and make the final instruction unclear. Collect their comments first, resolve them, and return one decision.
What is this advice based on?
This advice rests on the patch-production process, the digital mockup step, and the order specifications that determine manufacturing work. Cost directions describe general production realities, not a fixed price schedule or a promise that every design behaves identically.
In our production experience, the useful comparison is between fully specified patches: the same dimensions, construction, quantity, backing, and delivery requirement. Artwork and garment details can change the right recommendation, which is why a quote should follow the actual design rather than a generic price-per-patch claim.
Before circulating the purchase request, put these items on the same line: finished size, quantity, backing, approved artwork version, required arrival date, and who handles attachment. If attachment has no owner, the event schedule still has an unfinished step.