
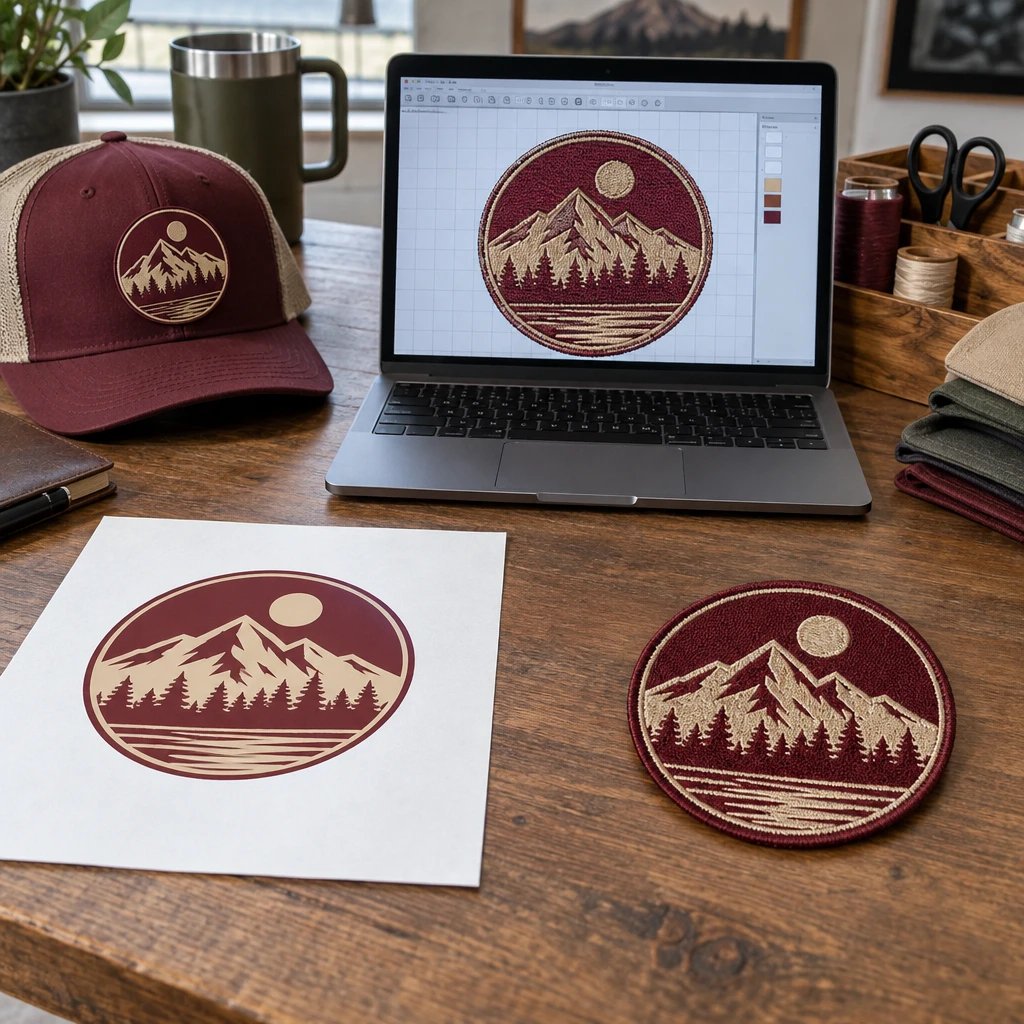
Use this checklist just before requesting a quote or approving custom patches for hat and cap brands, while material, size, and attachment can still change. Choose the patch around the actual cap, then verify artwork, quantities, assembly, and delivery before authorizing production. Allow one short desk review if the cap and artwork are ready; measuring samples and testing attachment take additional time.
Confirm the exact hat before choosing the patch
Start with the cap model and its construction, not the logo file. A patch that sits neatly on a structured trucker front can pull an unstructured cotton cap out of shape.
- Verify the blank's identity. A good answer includes the manufacturer, model, fabric composition, front-panel construction, and color. 'Black baseball cap' isn't enough because cotton twill, polyester performance fabric, and foam-backed trucker fronts respond differently to sewing and heat.
- Verify the placement surface. A good answer identifies the front panel, side panel, back opening, or beanie cuff, with a photo of that exact area. Check for seams, eyelets, cord trim, and the point where the crown meets the bill.
- Verify whether the panel holds its shape. A good answer distinguishes a structured crown from a soft, unstructured crown. In our production experience, a broad, stiff patch can dominate a soft cap rather than follow its curve, especially near the sides.
- Verify who owns the assembly step. A good answer names the person or shop attaching the patches and confirms whether the quote covers loose patches or finished decorated hats. Don't assume patch manufacturing includes blank caps, attachment, relabeling, or retail packaging.
Choose materials for custom patches for hat and cap brands
Choose the material by the smallest important logo detail and the cap's intended use. Embroidery is the right call for a bold club emblem; I'd skip it for a design whose identity depends on tiny lettering or a photographic gradient.
| Patch construction | Good hat application | Detail and surface | Attachment to confirm | Main trade-off |
|---|---|---|---|---|
| Embroidered thread on a fabric base | Structured cotton caps, team hats, club merchandise | Raised thread texture; strongest with bold lettering and open shapes | Sew-on construction or compatible heat-seal backing | Small text and narrow gaps can lose definition |
| Woven polyester yarn | Small wordmarks, detailed badges, lightweight caps | Flatter surface with finer line definition than conventional embroidery | Sew-on construction or compatible heat-seal backing | Less raised texture and still subject to minimum readable detail |
| Printed fabric | Illustrations, color blends, artwork-led merchandise | Printed surface that can reproduce gradients without translating every detail into stitches | Compatible backing and a finish suited to handling and care | Fine printed detail can still be unreadable at a small physical size |
| Polyvinyl chloride (PVC) | Outdoor-themed trucker hats and bold dimensional logos | Molded flexible plastic with defined color areas and raised elements | A specified sewing channel or another approved attachment system | Added thickness and weight may overwhelm a soft crown |
| Leather or synthetic leather | Workwear-style caps and restrained wordmarks | Surface and contrast depend on the selected material and marking method | Sewing or a material-specific approved bonding method | Natural leather and synthetic alternatives do not share identical care requirements |
| Chenille | Large varsity-style lettering on a supportive cap front | Lofty yarn surface with substantial visual texture | Sewing access and a suitable supporting base | Poor choice for tiny text or a crowded, small badge |
| Three-dimensional embroidery | Simple raised initials on a structured crown | Raised stitched elements with more depth than flat embroidery | Patch construction and sewing clearance | Fine outlines and tightly spaced characters need simplification |
- Verify the logo's nonnegotiable feature. A good answer says whether that feature is raised texture, fine lettering, full-color artwork, or a particular surface. Don't choose embroidery for tradition alone if the finished mark needs detail that a flatter process can handle better.
- Verify the material against cap flexibility. A good answer pairs patch stiffness with the crown beneath it. For a lightweight running cap, I'd favor a lighter, flatter construction over a heavy molded badge unless an attachment trial proves the combination comfortable.
- Verify the reason for choosing PVC. A good answer requires a molded appearance or a surface suited to wiping clean, rather than assuming the entire decorated hat becomes waterproof. Review PVC patch construction options with the attachment method in mind.
- Verify the simpler option first. A good answer explains what a premium material adds to this particular design. If standard embroidery already preserves the logo and fits the cap, a more elaborate construction may add cost without improving the result.
For a bold stitched logo, send the cap model and intended dimensions with a request for a free digital mockup of embroidered hat patches. That gives the artwork review a real placement constraint instead of an empty canvas.
Measure the usable panel and test the patch at actual size
Set both width and height in inches, then check a full-size paper template on the actual cap. There isn't one universal hat-patch size because panel shape, crown height, and logo proportions vary.
- Verify usable space rather than total panel width. A good answer leaves room around the bill junction, top seam, eyelets, and neighboring panels. Measure along the curved surface, then inspect the template from the front and side for lifting or awkward overlap.
- Verify dimensions independently. Example: a proposed patch might be 2.5 inches wide by 1.5 inches high. A good answer confirms both measurements rather than approving '2.5 inches' and leaving the height or aspect ratio open to interpretation.
- Verify the smallest text at physical size. A good answer lets someone read the actual-size print without zooming into a screen. If the tagline fails, remove it, enlarge the patch if the cap allows, or discuss a flatter process such as woven patches for detailed logos.
- Verify each placement separately. A good answer treats the front badge and side identifier as different layouts, even when they share artwork. Shrinking the entire front design for a side panel usually preserves the clutter while sacrificing readability.
Set the border and artwork clearances
The border should suit the outline and leave enough room for attachment. A merrowed border is an overlocked thread edge that wraps around a patch perimeter, usually working best on straightforward shapes.
- Verify the outline before selecting the edge finish. A good answer uses a rounded or otherwise simple shape for a conventional merrowed border, or confirms an appropriate cut-edge finish for narrow points and internal angles. A complex silhouette needs a production review.
- Verify the sewing path. A good answer shows where the attachment stitch will run without crossing lettering or removing the visual gap around the logo. Don't fill every available inch with artwork and expect the assembler to find room later.
- Verify border color as its own specification. A good answer names the border separately from the background and primary lettering. A contrasting edge can frame the badge, while a matching edge makes the shape quieter; neither should be decided by an unstated default.
- Verify how fine features will be simplified. A good answer identifies any enlarged lettering, opened gaps, thickened lines, or removed details before approval. In our production experience, deliberate simplification reads better than forcing fragile details into a small stitched area.
Match the backing to the cap and attachment equipment
Sew-on attachment is a sensible starting point for frequently worn caps when the panel is accessible to a machine. Heat attachment can work, but the adhesive, cap fabric, crown structure, and equipment must all be compatible.
See your artwork as a custom USA patch before you buy. Free digital mockup in 12 hours — 5-piece minimum per design. We do not produce until you approve.
GET A FREE MOCKUP- Verify access for sewing. A good answer confirms that the assembler can reach behind the placement without accidentally catching the sweatband, flattening the crown, or stitching through an unwanted layer. The center seam and bill can restrict machine movement.
- Verify heat tolerance before ordering iron-on backing. A good answer checks the blank manufacturer's guidance for face fabric, coatings, foam, and internal support materials. I'd skip an untested household-iron plan for performance polyester or a foam-front trucker cap.
- Verify equipment and application instructions together. A good answer comes from the actual patch adhesive specification and the actual cap, with temperature, pressure, and dwell instructions supplied for that combination. Don't borrow settings from a flat cotton T-shirt project.
- Verify both sides of a removable system. A good answer specifies the patch's hook backing and the matching loop field on the hat, including dimensions and orientation. Hook backing alone does not make a conventional retail cap ready for removable patches.
- Verify the role of adhesive-only attachment. A good answer states whether the adhesive is for temporary positioning or an approved finished application. For repeatedly worn caps, don't substitute a positioning adhesive for a tested permanent attachment just because installation looks easier.
Check how the patch will sit after attachment
Evaluate the decorated cap, not just the loose patch. The panel curvature, stitch tension, and backing can change the appearance after assembly even when the patch itself matches the approved artwork.
- Verify the center reference. A good answer defines whether the patch aligns to the center seam, the visual center of the front panel, or another agreed landmark. On an asymmetric logo, the visual center may differ from the geometric center of the patch.
- Verify the patch over seams. A good answer acknowledges any raised center seam underneath and checks for rocking, gaps, or uneven bonding. Moving the badge or changing its proportions may be more reliable than trying to compensate with extra pressure.
- Verify how a knit cuff behaves. A good answer checks the beanie both relaxed and stretched as worn, with the patch attached only through the intended cuff layers. A stiff, wide badge can restrict stretch or make the cuff fold awkwardly.
- Verify an assembly trial when the combination is unfamiliar. A good answer assigns someone to test the selected cap, patch construction, and attachment process before decorating the full batch. Ask separately about physical samples, availability, cost, and schedule; a digital mockup isn't that test.
Reconcile quantities, designs, and cap colorways
USA Customized Patches has a 10-piece minimum. List every artwork version and patch colorway separately so the quote confirms exactly how the minimum applies to your order.
- Verify the quantity by approved patch specification. A good answer separates different logos, sizes, materials, and backing choices rather than presenting one total. Ask how variants are counted before assuming several small versions can be combined to satisfy the minimum.
- Verify whether one patch works across the cap assortment. Example: a club orders 40 patches for navy and tan caps. A good answer checks the same patch colors against both blanks before creating separate colorways that complicate counting and future reorders.
- Verify spare-piece needs without guessing. A good answer discusses attachment trials, replacements, and retained reference pieces with the assembler. If extras are needed, include them in the quoted quantity rather than assuming production will supply an unpriced overrun.
- Verify the receiving list. A good answer identifies each version by a clear name or internal stock-keeping unit, with its quantity and destination. Similar dark thread colors or nearly identical sizes are easy to mix up when loose patches arrive together.
Compare quotes on the same finished specification
Compare the total cost in USD for the same patch and attachment scope, not just the lowest unit figure. Bigger patches, more demanding construction, additional variants, and separate assembly steps can change the order total.
- Verify what the patch price includes. A good answer identifies material, finished dimensions, border, backing, quantity, and any setup charges. A quote for a loose sew-on patch isn't comparable to one that includes a cap, heat attachment, and individual packaging.
- Verify decoration labor. A good answer prices sewing or heat application separately when another shop performs it. The lower-priced patch may not create the lower-priced finished hat if its shape or placement takes more assembly time.
- Verify the purpose of every upgrade. A good answer connects extra texture, a molded construction, special packaging, or another added feature to an actual requirement. If a standard border and sew-on backing do the job, I'd keep them.
- Verify the delivered total. A good answer states applicable shipping charges, taxes, packaging costs, and any additional service charges before approval. It also identifies the destination, because a quote without a receiving address may leave delivery assumptions unresolved.
Read the digital mockup as a production document
USA Customized Patches provides a free digital mockup before production, typically in about 12 hours. The mockup records the intended artwork and layout; it does not physically demonstrate thread texture, cap fit, or attachment performance.
- Verify the complete specification beside the image. A good answer includes width, height, patch material, border, backing, color references, and quantity in the mockup or accompanying order record. An attractive rendering with missing dimensions is not ready for approval.
- Verify spelling character by character. A good answer checks the team name, location, founding year, punctuation, and any small text against the final supplied copy. Read the lettering without relying on memory; familiar names are easy to skim past.
- Verify what the colors represent. A good answer distinguishes thread or material references from screen colors and explains how an important brand color will be reviewed. Your display is a communication tool, not a physical color standard.
- Verify revisions against the latest version. A good answer identifies the current mockup and confirms that a requested change didn't alter another detail. After widening a wordmark, for example, recheck its spacing from the border and the intended sewing path.
Ready to spec type, size, backing, and quantity? Open the quote form for a free 12-hour mockup and USA shipping after approval.
GET A FREE MOCKUPIf the artwork still needs a production check, send the cap photo, dimensions, and attachment plan through the patch specification contact form for a free digital mockup. Ask for the uncertain detail to be called out rather than quietly assumed.
Release the order with a written approval trail
Production starts only after written approval at USA Customized Patches. Use one final approval that ties the artwork to the commercial and delivery details instead of scattering decisions across several messages.
- Identify the final mockup. Reference its file name, revision, or other clear identifier so an older image cannot be mistaken for the approved version.
- Restate the physical specification. Confirm width and height in inches, material, border, backing, colors, and quantity for each version.
- Confirm the scope of supply. State whether the order is for loose patches or another explicitly quoted arrangement, and identify who will handle attachment.
- Confirm the schedule and destination. Provide the receiving address, the required in-hand date, and any downstream assembly deadline rather than giving only an event date.
- Send explicit written approval. Keep the approved mockup and order specification together so purchasing, receiving, and the decorating shop can work from the same record.
Schedule production, shipping, and cap assembly separately
Typical turnaround is 7–12 business days; confirm what that quoted window includes for your order. USA Customized Patches ships from Corona, California, to all 50 states across the United States and is open for quotes 24 hours a day, 7 days a week.
- Verify when the clock starts. A good answer separates the mockup step, revisions, written approval, production, and transit. The availability of quotes around the clock does not mean every production or carrier day is a business day.
- Verify the real deadline. A good answer gives the date the finished hats must be ready, plus the assembler's required receiving date. Loose patches arriving before a tournament still won't help if the decorating shop's schedule is already full.
- Verify transit for the actual address. A good answer uses the destination and selected service rather than assuming every state has the same delivery timing. Review United States shipping information and confirm order-specific arrangements, especially for Alaska or Hawaii.
- Verify schedule changes after revisions. A good answer asks for an updated timeline if dimensions, quantity, backing, or artwork changes before release. Don't keep an earlier estimated ship date attached to a specification that hasn't yet received approval.
Inspect the shipment before decorating the full batch
Check the patches against the approved specification before committing the full cap inventory to attachment. Keep a reference patch and a record of the successful assembly method for reorders.
- Verify quantity and versions first. A good answer reconciles the received pieces with the packing record and separates each design or colorway before assembly. This is much easier while the patches are loose than after similar versions have been sewn onto different hats.
- Verify visible construction and dimensions. A good answer checks lettering, border continuity, backing, and the specified finished size, using any agreed dimensional tolerance rather than inventing one at receiving. Photograph a suspected discrepancy before attempting to trim, heat, or alter it.
- Verify the first attached result. A good answer checks placement, puckering, edge lift, sweatband clearance, and appearance on a worn cap. For heat application, evaluate the result after the adhesive's specified cooling or curing period rather than pulling at it immediately.
- Verify care instructions for the whole hat. A good answer follows the most restrictive requirements among the cap, patch material, and attachment method. A wipe-clean PVC surface doesn't make a structured cap suitable for machine washing, and leather needs its own care review.
What this checklist is based on
This advice rests on patch-production steps, digital mockup review, order specifications, and the attachment constraints of common cap constructions. Material recommendations reflect general production experience, not a claim that every cap-and-patch combination has been physically tested.
- Verify how each uncertainty will be resolved. A good answer uses the mockup for artwork and dimensions, the order record for commercial specifications, and an actual attachment trial for cap compatibility. Those checks answer different questions and aren't interchangeable.
- Verify what will be saved for the next order. A good answer retains the approved artwork, material and color references, finished dimensions, backing, cap model, and attachment notes. Keep one finished hat when practical; a loose patch alone won't preserve the placement reference.