
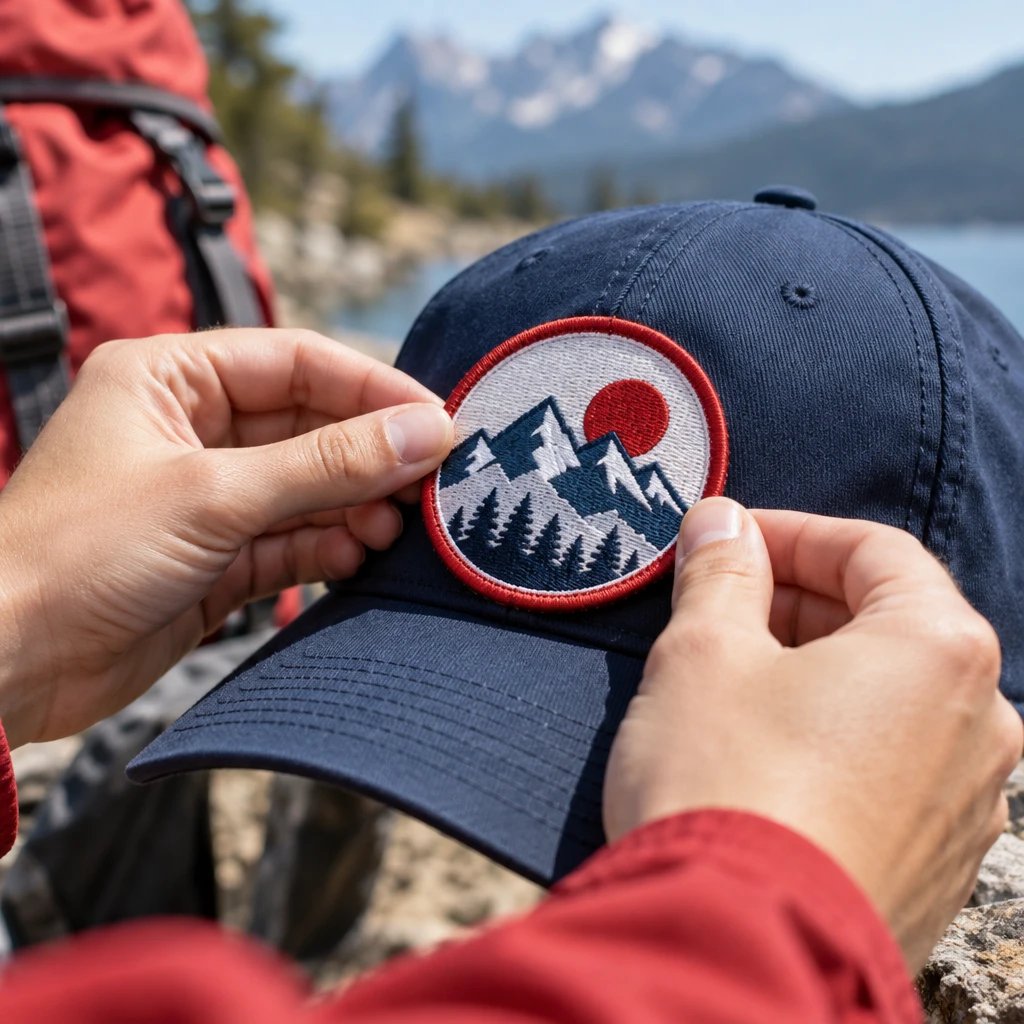
Patches work on stretchy fabric, but a small sew-on patch in a low-movement area is usually a better choice than an iron-on patch across a heavily stretched panel. For teams asking “do patches work on stretchy fabric” before ordering uniforms, the reasons come down to fabric movement, heat tolerance, patch construction, and the attachment test explained below.
Where do patches work on stretchy fabric without puckering?
Patches are most likely to sit flat where the garment stretches least during normal wear. Loose sweatshirt panels, supported cap fronts, and some jersey chest areas are better candidates than leggings knees, fitted elbows, or elastic waistbands.
Placement beats backing. A well-sewn patch can still pull a shirt out of shape if it bridges an area that needs to expand every time the wearer moves. On the production side, the first useful question isn't which adhesive to use. It's what happens to that exact spot when the garment is put on, worn, and taken off.
For example, a club considering a 2-inch chest patch on a loose fleece hoodie has a different problem from a team considering the same patch on a fitted running top. The hoodie may have enough ease around the decoration. The running top may need that entire chest panel to extend. Same patch. Different result.
Test the intended location on a worn garment, not just a flat garment. Reach forward, sit, bend, or make the movement the uniform is used for. Watch the fabric around the proposed patch footprint.
Why does a patch make stretch fabric pucker?
Puckering happens when the patch and garment cannot move or relax together. Sewing while the knit is stretched, using excessive thread tension, or bonding a rigid patch over an expanding panel can all create this mismatch.
A stretch knit is a fabric whose looped construction allows movement, sometimes with added elastane fiber for stretch and recovery. A conventional embroidered patch is a separate fabric badge whose backing, base cloth, and stitched design usually stretch much less than the garment beneath it.
Those are different structures. When the shirt stretches around a relatively fixed badge, the strain concentrates near the patch perimeter. You may see ripples, a raised edge, or a patch that looks flat on a table but cups against the body.
In our production experience, making the patch thicker to make it feel more durable can work against a lightweight knit. More stiffness isn't automatically better. Reducing the patch footprint or moving it to a supported panel often addresses the underlying problem more effectively than stronger glue.
Sew-on or iron-on: which attachment works better?
Sew-on is generally the better starting point for stretch garments because it avoids the heat needed to activate an adhesive. Iron-on can be simpler on a compatible, low-stretch garment panel, but it needs a successful application test rather than an assumption.
| Buyer criterion | Sew-on patch | Iron-on patch |
|---|---|---|
| Durability during movement | Perimeter stitching can hold securely when the garment is sewn relaxed and the attachment is tested. Stress can still damage thin fabric around the edge. | The bond depends on adhesive compatibility and correct application. Repeated extension can lift edges when the patch and garment move differently. |
| Detail level | Attachment does not set artwork detail. Embroidered or woven construction determines how well lettering and fine lines reproduce. | The same artwork limits apply. Adhesive backing does not make small lettering sharper or improve stitch resolution. |
| Cost drivers | Patch size and construction affect the patch quote. Sewing labor, access to the panel, and any suitable support material affect the installed cost. | Backing and patch construction affect the quote. Press setup, test garments, and rejected applications can add to the installed cost. |
| Typical uses | Loose fleece hoodies, suitable jersey panels, stretch caps with supported fronts, and garments that should not receive adhesive application heat. | Stable panels on garments explicitly compatible with the adhesive's required temperature, pressure, and dwell time. |
| Effect on stretch | The patch footprint remains relatively fixed, even if the attachment stitch can accommodate some movement. | A full-face adhesive bond restricts movement beneath the patch. Standard iron-on backing should not be treated as stretch adhesive. |
| Heat exposure | No heat activation is required for a sew-on-only patch. | Heat and pressure are required. Some synthetic blends, finishes, and colors may respond poorly. |
| Comfort against skin | Interior stitching and any stabilizer need inspection. A heavy border can still feel stiff through a thin garment. | No sewing thread is needed inside the garment, but the bonded area can feel stiff and any lifted edge can catch. |
| Replacement | Stitches can sometimes be removed, although needle holes, fading differences, or fabric damage may remain. | Removal can leave adhesive residue or damage the fabric. It is not a reliably reversible attachment. |
Compare installed cost, not just the loose patch price. A lower-cost attachment stops being economical if it ruins a team jersey or requires repeated repairs. Ask for a quote in dollars that separates patch production from any garment application service; don't assume sewing or pressing is included.
Choose sew-on if the garment needs to move or avoid heat
Choose sew-on if heat compatibility is uncertain and the garment has a suitable place for perimeter stitching. It gives the installer control over attachment without bonding the entire patch face to the knit.
I'd start here for a loose team hoodie, a suitable stretch polo panel, or a cap with a structured front and stretch-fit sides. That recommendation still depends on the actual fabric. Very fine jersey can be damaged by a poor needle choice, and bulky seams can make clean sewing difficult.
- Choose a patch without unnecessary adhesive backing when it will only be sewn. Confirm the backing specification rather than relying on the words “sew-on.”
- Keep the garment relaxed during attachment. Pulling the knit flat under the machine can leave ripples when it returns to its resting shape.
- Have the installer select a needle and thread combination for both the knit and the patch thickness.
- Inspect the inside of the garment. Thread tails, rough support material, and dense stitching matter on clothing worn against skin.
Sewing isn't permission to ignore movement. A large badge across a fitted sleeve still blocks stretch, even with excellent stitching. The advantage is avoiding adhesive-related heat and bond issues, not turning the badge into elastic.
Choose iron-on if the panel is stable and heat-compatible
Choose iron-on if the garment accepts the adhesive's application conditions and the placement barely stretches in use. It can be the simpler option for occasional-use garments when testing confirms a sound bond.
For example, a club adding badges to loose cotton-rich sweatshirts for an event might reasonably choose iron-on attachment after testing the actual sweatshirt style. If the patch lies flat, the fabric tolerates application, and care requirements match, paying for sewing may not be necessary for that use.
This is where the simpler option earns its place. It isn't always the wrong choice. It is the wrong choice when the only evidence is that the badge stuck while the garment was lying on an ironing board.
Check the garment manufacturer's guidance alongside the patch application instructions. A laundry label that permits light ironing does not automatically authorize the temperature, pressure, or exposure needed to bond an adhesive. If the requirements conflict, don't improvise with a hotter setting or a longer press.
A household iron also makes even pressure difficult on seams, curved cap fronts, and thick fleece. Use the application equipment specified for the backing. If you plan to sew the patch anyway, paying for adhesive and applying heat may add work without solving a real problem.
When is no patch the right call?
Skip a conventional patch when the decoration area must stretch substantially with the body. Compression garments, fitted leggings, and lightweight performance tops often suit a decoration specifically made for that fabric better.
See your artwork as a custom USA patch before you buy. Free digital mockup in 12 hours — 5-piece minimum per design. We do not produce until you approve.
GET A FREE MOCKUPI'd skip a dense embroidered badge over a leggings knee. That panel needs to bend and extend, and a rigid island in the middle can be uncomfortable even if the attachment never fails. A stretch-compatible transfer may be appropriate, but its adhesive and application conditions still need testing on the exact fabric.
Compatible sublimation is another option for suitable polyester garments because the image does not add a separate patch layer. It has its own limits, including fabric composition and garment color. Direct embroidery is not an automatic solution either; dense stitches and stabilizer can also restrict a knit.
Sometimes the least expensive solution is changing the placement or reducing the artwork. A simple logo on a supported panel can do the identification job without a large badge, added adhesive, or a complicated installation. Buy the decoration the garment can carry.
Which patch materials and borders suit stretch clothing?
Lighter, less bulky constructions generally suit thin stretch garments better than thick, dense badges. Material choice can reduce stiffness, but no standard patch material should be assumed to match the stretch of the clothing.
An embroidered patch uses thread stitched into a base material to create a raised design. It works well for bold lettering, club emblems, and straightforward team logos. Dense fill adds substance, but on lightweight jersey that substance can become unwanted weight and resistance.
A woven patch is a badge made by interlacing threads to form the design, usually with a flatter surface than embroidery. For fine lettering on a light garment, compare woven patch construction before enlarging an embroidered design just to fit the text. Flatter does not mean stretchable.
A merrowed border is an overlocked thread edge that wraps around the patch perimeter. It gives many conventional badges a finished edge, but it adds bulk. A suitable cut-edge construction may sit flatter, although the edge finish and attachment method must still prevent fraying or lifting.
Polyvinyl chloride (PVC) patches, leather patches, and chenille patches each have useful applications, but I'd be cautious about their weight, thickness, or stiffness on a thin stretch shirt. Physical flexibility in your hand is not the same as elastic recovery on clothing.
For a first layout, request a free digital mockup of embroidered patches for your garment with the intended placement and finished dimensions. Keep the artwork simple enough that the patch doesn't need to grow just to preserve tiny text.
How should patch size and placement change by garment?
Choose the patch footprint from the available low-movement area, then fit the artwork inside it. Starting with a large logo and trying to force it onto a stretch panel reverses the useful order.
Hoodies and fleece sweatshirts
The body of a loose fleece hoodie is often a reasonable candidate, while ribbed cuffs and waistbands are poor ones. Avoid treating the kangaroo pocket as an easy sewing surface without checking access. An installer can accidentally stitch the pocket shut or leave an irritating seam inside it.
Athletic jerseys and stretch polos
Check fit before picking a chest or sleeve location. Mesh openings, lightweight knit structure, and moisture-management finishes complicate attachment. For example, a proposed 2.5-inch round patch should be represented with a paper template on the actual jersey, not judged only on a large screen.
Stretch-fit caps
A stretch-fit cap may have a relatively stable front and elastic side or back panels. Use that construction difference. A patch centered on a supported front can be practical, but a wide patch wrapped across expanding side panels can interfere with fit. Curvature also matters when selecting patch width.
Soft-shell jackets and fitted outerwear
Don't equate jacket weight with attachment compatibility. Stretch soft shells can have coatings, laminated layers, or water-resistant finishes that complicate adhesive bonding. Needle holes can also compromise a water-resistant layer, so check the garment manufacturer's guidance before choosing sewing simply to avoid heat.
Leggings and compression tops
These are the hardest candidates because the fabric is already extended during wear. A patch that looks acceptable on an empty garment may tug immediately when worn. Unless there is a genuinely stable separate panel, I would choose a compatible decoration that preserves movement.
How do you sew a patch without stretching the garment?
Sew with the garment relaxed, the patch held in its intended position, and a machine setup tested on comparable material. The right setup depends on the knit, patch thickness, access, and intended care.
Ready to spec type, size, backing, and quantity? Open the quote form for a free 12-hour mockup and USA shipping after approval.
GET A FREE MOCKUP- Check the garment construction and care instructions. Identify elastic zones, pockets, lining, coatings, and seams before choosing a position.
- Mark placement on the relaxed garment. Confirm it on the wearer or an appropriate form so the patch does not land across a high-extension area.
- Select a needle for the material combination. A knit-friendly needle may help avoid damaged yarns, but it must also pass through the patch cleanly; test rather than assuming.
- Hold the patch without pulling the fabric. Use a suitable temporary positioning method that will not mark the garment or interfere with sewing.
- Test stitch formation and tension. Use support material only when needed, and choose something appropriate for the knit and next-to-skin comfort.
- Sew the perimeter while keeping other garment layers clear. Do not catch the pocket back, opposite sleeve, or lining unintentionally.
- Inspect the relaxed garment, then test normal movement. Check for rippling, skipped stitches, broken yarns, edge curl, and uncomfortable interior contact.
A stretch-capable stitch can help the attachment accommodate movement, but it cannot make a rigid patch expand. Likewise, stabilizer can improve sewing quality while making the area less flexible. Use only the support the job needs, not a heavy backing by default.
What should you test before decorating a team order?
Test the actual garment style with the actual patch construction and intended attachment. A digital drawing cannot show adhesive compatibility, wearer comfort, or how a stretched knit will recover.
For example, say a run club orders 40 patches for stretch warm-up tops. Before applying the whole run, decorate a representative garment and put it through ordinary wear movements and its intended care routine. A successful test on a cotton sweatshirt doesn't qualify a polyester-spandex running top.
- Check appearance after attachment and, for heat application, after the materials have cooled or conditioned as instructed.
- Wear the garment and repeat the movements expected in use. Watch whether the patch edge digs in, pulls the fabric, or changes fit.
- Wash and dry according to a care method permitted by both the garment and the patch attachment instructions.
- Inspect the perimeter for lifting, thread damage, adhesive migration, distortion, or color changes.
- Repeat the relevant use and care conditions enough to judge suitability for the order. Record the garment style, placement, and application settings rather than relying on memory.
Keep a spare test garment in the budget. For a mixed uniform order, different fabrics, finishes, or constructions may need separate checks. Also check placement across the size range: the same badge can occupy much more of the available panel on a smaller shirt.
What changes the patch quote and production schedule?
The quote depends on dimensions, quantity, construction, border, backing, and artwork requirements. Garment installation is a separate specification, and a difficult stretch application can cost more in labor than a stable-panel application.
Bigger and denser generally costs more. Extra thread colors and complicated shapes can affect production requirements, while changing the design to remove tiny lettering may allow a smaller, simpler patch. Don't pay for a heavy badge if a lighter one will display the logo clearly.
USA Customized Patches has a 10-piece minimum. A free digital mockup is generally provided in about 12 hours, and production starts only after written approval. Typical production takes 7–12 business days; confirm the current schedule for the actual order and allow separately for transit and any garment testing or installation.
Quotes are available 24 hours a day, 7 days a week. USA Customized Patches ships nationwide from Corona, CA, to all 50 states in the United States. Review shipping information for U.S. patch orders when planning an event deadline rather than treating production time as the delivery date.
What is the advice based on?
This advice is based on the patch-production process, the digital mockup review, and the order specifications that determine construction and attachment. In our production experience, the key stretch-garment trade-off is the difference between how far the garment moves and how little a conventional badge moves.
The mockup shows artwork layout, proposed dimensions, colors, and border treatment. The order specification identifies the material and backing. Neither replaces a physical application test, and a digital mockup should not be described as proof that a patch will bond safely to a particular fabric.
There is no universal pressing temperature or sewing setup in this guide because those instructions must come from the actual adhesive, garment, and installation requirements. A generic setting would be easier to print and less useful at the machine.
What should you choose for the finished garment?
Choose a lightweight sew-on patch for a suitable low-stretch panel; choose iron-on only when heat compatibility and the application test support it. For a heavily stretched panel, choose a different location or a stretch-compatible decoration instead of forcing a conventional badge to work.
The cheaper option is enough when the garment is stable, the artwork is simple, and the attachment passes the intended use test. Extra backing, more stitch coverage, or a thicker border won't fix a bad placement. Spend the effort on the garment check first.
For a free digital mockup, send the garment composition, a photo of the placement, proposed dimensions in inches, quantity, and intended washing routine through the patch artwork and specification form. Include whether you plan to sew or press the patch, and keep a matching garment available for the attachment test before decorating the full run.