
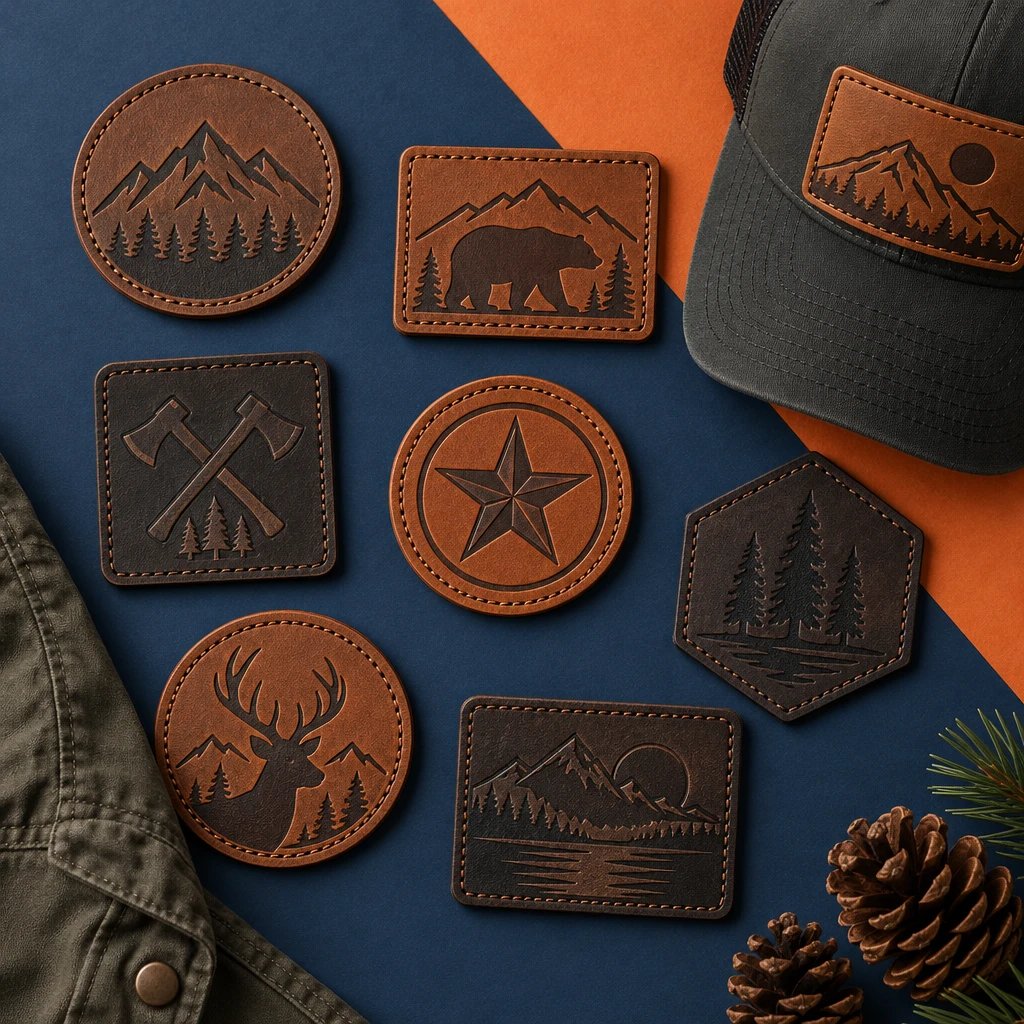
For embroidered vs leather patches on hats and jackets, embroidery is the practical default for colorful logos and regularly washed workwear, while leather is the right call for restrained branding on structured caps and heavier outerwear. The reasons come down to readable artwork, garment fit, attachment, care, and what actually drives the quote.
How do embroidered vs leather patches on hats compare?
Embroidery gives you thread color and a stitched surface; leather gives you a material-led badge whose appearance depends on the leather and decoration method. Neither is automatically more durable or more expensive once size, construction, and attachment enter the order.
An embroidered patch is a fabric-backed emblem that builds its design with stitched thread. A leather patch is a cut leather badge that carries a design through a specified process, such as engraving or debossing. Synthetic leather is a separate material choice, not another name for genuine leather.
| Buying criterion | Embroidered patches | Leather patches | Practical decision |
|---|---|---|---|
| Durability | Thread can snag or abrade; edge construction and attachment affect service life. | The surface can scuff, darken, dry, or change with moisture; behavior varies by material and finish. | Choose for the actual wear and care routine, not a blanket durability claim. |
| Detail level | Strong for bold lettering, recognizable shapes, and separated color areas; tiny gaps can fill with stitches. | Engraving can suit linework, while debossing needs enough space for readable relief; contrast varies. | Judge the smallest lettering at finished size before choosing a process. |
| Color reproduction | Multiple thread colors can separate team colors and logo elements. | Tonal decoration is common; color-filled or printed effects require a separately specified process. | Embroidery is usually the more straightforward route for a multicolor identity. |
| Cost drivers | Size, stitch count, coverage, color changes, border, backing, quantity, and setup. | Material grade, thickness, cutting, decoration method, tooling, finishing, quantity, and attachment. | Compare matching dimensions and quantities before calling either option cheaper. |
| Hat fit | Can conform well when the patch construction suits the crown; dense stitching can add stiffness. | A thick or broad badge can bridge a center seam or resist a curved crown. | Consider crown structure, usable sewing space, and patch flexibility together. |
| Garment care | Often practical for washable workwear when thread, backing, and attachment are compatible. | May require restricted washing or drying depending on the material, finish, and adhesive. | Use the most restrictive compatible care instructions for the finished garment. |
| Borders | A merrowed border provides a wrapped edge; a cut edge can suit shapes that need less bulk. | Usually relies on a cut edge, sometimes with a decorative or attachment stitch. | Budget enough edge space for clean finishing and secure sewing. |
| Typical uses | Team caps, club jackets, staff uniforms, work shirts, and colorful event merchandise. | Structured trucker caps, denim jackets, canvas outerwear, and tonal brand merchandise. | Match the patch to the garment's job and the buyer's expected care routine. |
The table describes tendencies, not interchangeable specifications. A heavily stitched embroidered patch can feel firmer than a thin leather badge, and a thick leather patch can be a poor fit for a soft cap even when the logo looks excellent on screen.
Which material keeps your logo readable?
Embroidery usually makes colorful logos easier to recognize, while leather works well when a simple mark can stand on shape and contrast alone. Small lettering is a production decision, not something either material automatically solves.
Thread has physical width. Stitches also need a direction and somewhere to anchor. When a design squeezes a small slogan beneath a large crest, the slogan may lose its open spaces before the crest loses its identity. Adding more stitches isn't a reliable fix. Sometimes the right answer is deleting the slogan.
Leather changes the problem. A clean engraved mark may retain linework that would be awkward in thread, but the final readability still depends on surface texture, engraving response, finish, and contrast. Debossing presses the design into the material rather than reproducing it with colored thread. Fine recessed letters can disappear visually when the lighting is flat.
Example: a landscaping company wants a green tree, a yellow sun, and its name on a cap. Embroidery gives each part a separate color identity. If the company instead uses a single bold tree symbol without the slogan, a tonal leather badge becomes a sensible option. That's a design change, not simply a material swap.
I'd skip both a crowded embroidered layout and a low-contrast leather treatment if the business name has to be readable across a counter. Simplify first. Then choose the material.
What makes a patch sit correctly on a hat?
A hat patch fits correctly when its width, flexibility, and attachment suit the crown's curve and construction. The available front panel matters more than the cap's overall size.
Structured trucker caps and firm-front snapbacks usually provide a more stable base than unstructured cotton caps. That doesn't mean any leather badge will lie flat on a structured hat. A broad, stiff patch can span the front like a small signboard, especially over a raised center seam.
Embroidery often follows the crown more willingly, but dense stitching, a heavy backing, or a thick border can change that behavior. In our production experience, evaluating only the face artwork misses the part that causes installation trouble: the assembled patch has to bend with the hat.
Example: compare a 3-inch-wide rectangular badge with a narrower round badge on the same six-panel cap. The rectangle may reach farther into the side curves and cross the center seam for more of its height. The round badge may sit more naturally, even if both contain the same logo. Those are example dimensions, not universal cap limits.
- Check the exact cap model, including whether the front is structured or unstructured.
- Locate the center seam and the lower crown area near the bill.
- Leave usable space around the patch for the planned stitch line.
- Consider whether the sweatband can be moved out of the attachment area.
- Confirm that the patch construction can follow the crown without lifting at the edges.
A flat digital layout cannot prove crown fit. If the chosen hat has an unusual profile or a difficult front seam, resolve that installation question before approving a large run.
Which patch works better on denim, canvas, fleece, and shell jackets?
Denim and canvas can support either material, while fleece and lightweight shells need closer attention to patch weight and attachment. On jackets, fabric construction and laundering often decide the choice before appearance does.
Denim and canvas can carry a heavier badge
A leather patch can look appropriate on a denim club jacket or canvas chore coat because the garment already has enough body to support a distinct badge. Embroidery is equally workable when the design needs brighter color. Watch pocket placement. Sewing a chest patch through a pocket bag can close the pocket or restrict its opening.
Fleece needs a stable attachment area
Soft fleece can stretch, pile up around the edge, or pull under an overly stiff patch. I'd favor a lighter construction and a manageable patch size rather than forcing a thick leather badge onto a flexible chest panel. The installer may need suitable support during sewing to avoid distortion.
Technical shells need garment-specific permission
Nylon and polyester shells may have coatings, insulation, membranes, or finishes that limit heat application. Sewing also creates needle holes. Neither sew-on nor iron-on is automatically appropriate for weather-resistant outerwear, and ordinary patch attachment does not restore a waterproof barrier.
For a shell jacket, ask the garment supplier which decoration methods are permitted. A patch that looks right but damages the coating is the wrong patch. Get that answer before deciding between thread and leather.
Should you use sew-on or iron-on backing?
Sew-on is usually the more controllable choice for hats and frequently handled jackets when the garment permits stitching. Iron-on backing can be useful on compatible fabrics, but it requires an adhesive and application process suited to both the patch and the garment.
See your artwork as a custom USA patch before you buy. Free digital mockup in 12 hours — 5-piece minimum per design. We do not produce until you approve.
GET A FREE MOCKUPSew-on attachment secures a patch with stitches around its usable perimeter. Iron-on backing is a heat-activated adhesive layer that bonds under a specified combination of temperature, pressure, and time. Those settings are not universal, and a household iron is not equivalent to a controlled press on a curved cap.
A merrowed border is a wrapped thread edge that finishes the perimeter of an embroidered patch. It creates a recognizable raised outline, but it also takes room. Tight notches and intricate silhouettes may be better served by a suitable cut edge rather than forcing a wrapped border around every turn.
Leather needs its own edge plan. Specify where the attachment stitch will sit relative to the cut edge and artwork. Sewing too close to an edge, particularly with dense perforation, can weaken the material instead of securing it more effectively. A decorative stitch shown in the design should not be mistaken for confirmed garment attachment.
Hook-and-loop backing makes sense when patches must be removable, but the hat or jacket needs a compatible receiving panel. It adds thickness. I'd skip that extra layer on a clean retail cap unless removability is part of the product's purpose.
How do washing, sweat, and abrasion change the choice?
Embroidery is generally the easier starting point for regularly washed apparel, while leather requires material-specific care decisions. Neither patch should be described as indestructible, waterproof, or suitable for every laundry routine.
For embroidered patches, inspect the whole construction: thread, base fabric, backing, edge, and attachment. Raised thread can catch on rough equipment or rub under a shoulder strap. An intact design can still fail as a garment decoration if its adhesive releases or its attachment stitches wear through.
Genuine leather can develop visible changes from handling, moisture, oils, and sunlight. Some buyers want that variation on a denim jacket. A uniform program may not. Synthetic leather has different care limits, and certain constructions can peel or crack with unsuitable exposure. The word leather alone doesn't tell you how the patch will age.
Example: a volunteer crew expects to wash its work jackets frequently and dry them with the rest of its uniforms. I'd start with a sew-on embroidered construction that is confirmed compatible with that routine, rather than add a leather badge that requires separate handling. The simpler care plan is worth more than a dressier mockup.
Ask for compatible care instructions before ordering. A machine-washable jacket does not make an attached leather patch machine-washable.
What actually makes one patch cost more?
The quote follows the construction, quantity, and work required, not just the material name. A simple embroidered patch can be the lower-cost choice, but dense coverage or complex stitching can change that comparison.
For embroidery, a large field of background stitching adds work that an exposed fabric background may avoid. More thread coverage can also make the patch firmer. If the base fabric already provides the background color you need, covering it with thread may buy very little.
Leather pricing depends on the actual material, thickness, cutting, decoration, finishing, and any required tooling. A straightforward tonal badge and a multilayer badge with special finishing are not equivalent products. Don't compare their quotes as though leather were a single specification.
Example: a club orders 40 cap patches with a bold symbol and short name. A modest embroidered patch using an exposed background may meet the brief without full thread coverage. A simple leather badge may also work, but extra color treatment or elaborate edge finishing should earn its place in the budget rather than arrive by default.
- Compare the same finished dimensions and quantity.
- Specify genuine leather or synthetic leather instead of accepting an unspecified material.
- Separate patch manufacturing from attachment to customer-supplied garments.
- Ask whether setup, backing, border treatment, and shipping are included.
- Request totals in USD so quotes use the same currency and scope.
The cheaper option is the right call when it meets the artwork, wear, and care requirements without extra construction. I'd cut decorative complexity before cutting the clarity of the business name.
When should you choose embroidered patches?
Choose embroidered patches if color recognition, a familiar stitched appearance, and practical garment care matter more than a leather surface. They are a strong default for team apparel, club runs, and business uniforms.
Choose embroidery if your colors do real work
A school mascot, multicolor company emblem, or club crest may lose identity when reduced to a tonal mark. Embroidery lets those colors remain separate. That doesn't excuse crowded artwork; the logo still needs enough room for clean letters and recognizable shapes.
Choose embroidery if a simpler construction meets the brief
For everyday staff caps, an exposed fabric background, readable name, and sensible border can be enough. I'd skip full background stitching if it adds cost and stiffness without improving the design. More thread is not automatically a better patch.
Choose it cautiously when the artwork depends on hairline detail or tiny lettering. Embroidery has limits, and switching from leather doesn't remove them. For an artwork check, send the logo and garment model through the embroidered patch options page for a free digital mockup before production.
When should you choose leather patches?
Choose leather patches if the material surface is part of the design and the logo stays clear without relying on several thread colors. Structured caps, denim jackets, and canvas outerwear are useful starting points.
Ready to spec type, size, backing, and quantity? Open the quote form for a free 12-hour mockup and USA shipping after approval.
GET A FREE MOCKUPChoose leather if a tonal mark is enough
A short wordmark, bold monogram, or simple outdoor-brand symbol can work well as a single material-led badge. The restraint is the point. If you keep adding painted details to recover a colorful logo, embroidery may have been the more direct solution.
Choose leather if the garment supports its character
A firm cap crown or heavier jacket can make a leather badge feel intentional rather than awkwardly attached. Confirm thickness and flexibility, not just color. Review the leather patch material options with the garment in mind, especially when genuine leather and synthetic leather would lead to different purchasing decisions.
I'd skip leather for a frequently laundered staff uniform unless its specific care requirements have been cleared. I'd also skip it when exact multicolor recognition is essential. Leather should solve a design problem, not create a care problem.
What should you check on the mockup before approval?
Check finished size, readable artwork, material, edge treatment, and backing before approving either patch. A digital mockup confirms the planned layout and specifications; it does not reproduce physical hand feel, exact screen-to-material color, or real crown fit.
- Identify the garment. Provide the cap or jacket model, fabric, placement, and intended care routine.
- Set dimensions in inches. Check the usable panel rather than estimating from a cropped product photo.
- Read the smallest text at the proposed finished size. Remove nonessential wording if the design depends on enlarging it on screen.
- Confirm construction. For embroidery, identify thread colors, background coverage, and border. For leather, identify the material and decoration method.
- Confirm attachment. Distinguish sew-on construction, iron-on backing, and hook-and-loop backing, including who will attach the finished patches.
- Review the order scope. Check quantity, delivery location, required date, and whether a physical sample is needed and separately available.
- Approve the final specification in writing. Keep the approved version so a later reorder has a clear reference.
Photos in the patch design gallery can help you discuss layout and edge treatment, but another patch's photograph isn't a specification for yours. Lighting, garment curvature, and image scale can disguise the very details you need to evaluate.
If you're deciding between the two materials, send the same artwork and garment details through the patch artwork contact page and request a free digital mockup. Ask for the layout to be reviewed at finished size, not simply displayed larger.
How do minimums, approval, and United States shipping work?
USA Customized Patches has a 10-piece minimum and provides a free digital mockup in about 12 hours. Production starts only after written approval, and orders ship from Corona, CA, to all 50 states in the United States.
Typical production is 7–12 business days. Quotes are available 24 hours a day, 7 days a week. Confirm the current production schedule for the selected construction, and treat transit as a separate part of the delivery plan rather than assuming production time means arrival time.
For an event date, work backward from when the garments need to be ready, not when the patches need to leave the shop. If a local decorator is sewing them onto caps, that decorator needs time after delivery. Artwork revisions and garment availability also belong in the plan.
The United States shipping information is the place to review delivery arrangements. Provide the destination and required arrival date with the quote request so the order can be scheduled against an actual deadline.
How we know this
This advice rests on patch production processes, the digital mockup step, and the order specifications that determine manufacturing and attachment. It is not a claim that one material wins every wear test or costs less on every order.
In our production experience, the useful checks are repeatable: can the design remain readable at finished size, can the chosen construction fit the garment, and can the finished item follow an acceptable care routine? Those questions are more dependable than labeling either material as premium and stopping there.
Which patch should you order?
Order embroidery for the practical default: colorful team marks, staff caps, and compatible washable jackets. Order leather when a restrained logo, supportive garment, and acceptable care routine make the leather surface worth choosing.
If both treatments look equally good, use the simpler construction that meets the job. A modest embroidered badge is enough for many club and business runs; there is no reason to pay for a material change that weakens the logo or complicates cleaning.
Before approving the order, put the exact garment model, patch dimensions in inches, attachment method, and care expectations beside the artwork. If any of those fields is still undecided, settle it before production.