
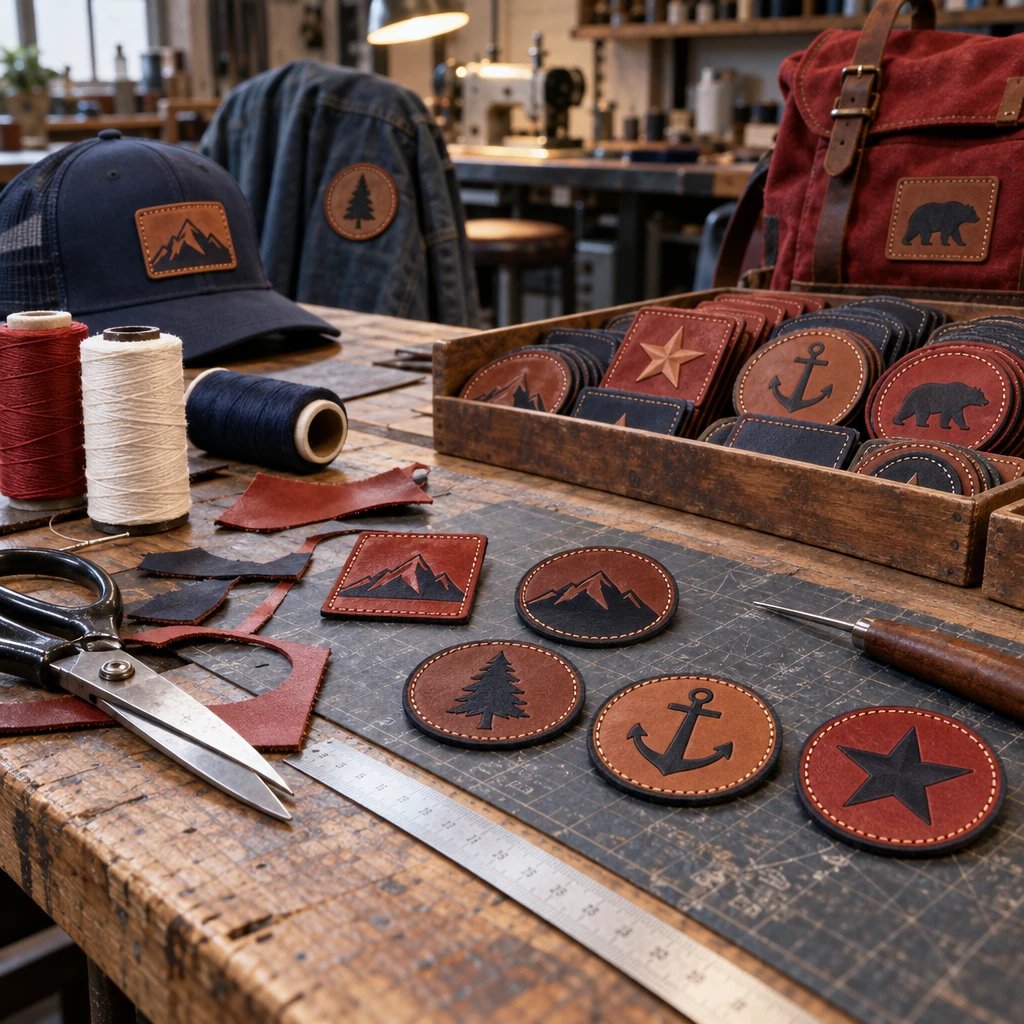
To attach leather patches securely to jackets, hats, and bags, match the attachment method to the garment fabric, patch backing, and access behind the placement. Sewing is usually the right call for a permanent attachment when needle holes are acceptable; heat application needs compatible instructions for both materials. The first mistake is choosing glue or an iron before checking the garment.
Plan how to attach leather patches before ordering
Specify the garment and attachment method before you approve the patch. A patch that looks right on screen can still be too stiff for a cap crown, too large for a jacket pocket, or impossible to sew onto a finished bag with your available machine.
Start with the actual item, not just its product photo. Turn the jacket inside out. Open the bag completely. Fold the cap sweatband away from the front panel. You need to know what sits behind the proposed location: lining, foam, a zipper pocket, stiffener, or nothing at all. That hidden construction often decides the job before thread color enters the conversation.
A sew-on leather patch is a leather label secured to a garment by stitches through its perimeter. A heat-backed leather patch has an adhesive layer that requires a specified application process. Neither description tells you everything about the leather face, coating, thickness, or flexibility. Ask for those details when reviewing custom leather patch options, particularly when the same design will go on several garment types.
Keep a short job sheet: garment style, fabric, patch dimensions in inches, leather type, backing, placement reference, thread color, and who will apply it. Include the garment care instructions. If your club plans to wash denim jackets but only spot-clean its caps, those are different service conditions. Don't assume one attachment recipe belongs on both.
Choose sewing, heat backing, or removable attachment
Use sewing for a permanent attachment on suitable denim, canvas, twill, and accessible leather panels. Choose heat backing only after compatibility is confirmed, and choose hook-and-loop only when you actually need to remove or exchange the patch.
I'd skip household glue for a club jacket or branded work bag. Initial tack is not the same as resistance to flexing, perspiration, laundering, or a snagged corner. A purpose-made adhesive can have a role, but its instructions must cover the specific patch and garment materials. A bottle labeled for fabric does not automatically qualify it for a finished leather surface or coated nylon.
| Attachment method | Good fit | Specification to confirm | Main trade-off |
|---|---|---|---|
| Perimeter sewing | Denim jackets, canvas bags, and cap panels with sewing access | Needle and thread compatibility, stitch path, patch flexibility, and access behind the panel | Creates permanent holes and may require specialized equipment on assembled items |
| Heat-activated backing | Garments and patches explicitly approved for the same application process | Backing-specific temperature, dwell time, pressure, cooling instructions, and garment heat tolerance | Heat or pressure can mark the leather face, distort the garment, or leave an incomplete bond |
| Hook-and-loop | Interchangeable club identifiers and bags with an existing loop field | Matching hook and loop dimensions, orientation, and how the garment-side field is attached | Adds thickness and needs a compatible receiving surface |
| Material-compatible adhesive | Selected nonwashable applications or positioning before another approved attachment method | Exact material compatibility, cure conditions, flexibility, and care limits | Can stain, stiffen, squeeze out, or release; it is not a universal substitute for sewing |
A plain sew-on patch can be enough when an alterations shop already handles your jackets. Paying for heat backing adds little if the operator will sew every piece anyway, unless that backing is specifically being used as an approved positioning aid. The reverse also matters: a backing that makes a patch feel firm in your hand may make it harder to follow a curved cap.
For genuine leather jackets, needle holes are permanent and pressing can alter the finish. For waterproof or coated bags, sewing punctures the protective layer. Those aren't minor details. If preserving the original surface or weather protection matters more than having a patch, use a purpose-built attachment panel or ask a qualified repair shop before modifying the item.
Fit the patch to the jacket, hat, or bag
Choose patch dimensions from the usable garment panel, not from the logo file. Leave room for the stitch path and keep the patch clear of seams, closures, and areas that fold sharply during use.
Jackets: inspect the lining and pocket
On a denim jacket, a flat upper sleeve or chest panel is usually simpler than a location spanning a bulky seam. Check the reverse side before marking anything. Sewing through a chest pocket can close it, and sewing through a loose lining can pull the jacket out of shape. If the panel cannot be isolated, have an alterations professional assess access through the lining.
Example: suppose your team wants a patch about 3 inches wide above a jacket pocket. Cut a paper template to that size, position it with the jacket closed, and check the space while someone wears it. The pocket flap needs to open freely. A patch centered on the flat fabric may look off-center once the jacket hangs on a body.
Hats: respect the curve and front seam
A structured cap is not a flat sewing surface. Its center seam and crown curve can lift a stiff patch at the edges, and a normal flatbed machine may not reach the lower front cleanly. A cap-capable sewing setup or an operator experienced with finished caps is the better choice when access is tight. Don't force the crown flat just to make it fit.
See your artwork as a custom USA patch before you buy. Free digital mockup in 12 hours — 5-piece minimum per design. We do not produce until you approve.
GET A FREE MOCKUPExample: compare a 2-inch-wide paper template with a wider version on the actual cap. The smaller footprint may follow the crown more naturally and stay clear of the brim seam. That's a placement test, not a universal size rule. Crown height, panel construction, and patch thickness determine how much useful space you have.
Bags: protect access and working parts
Canvas totes offer straightforward access when you can open the body and isolate the front panel. Backpacks are another job entirely. Padding, organizer pockets, and zipper compartments may sit directly behind the apparent attachment area. Check inside with the bag empty, then again with its normal contents, because a flat panel can become a rounded surface in use.
Keep the patch away from handles, load-bearing strap attachments, zipper paths, and the crease where a roll-top closes. A leather patch should identify the bag, not brace a moving section. I'd move the artwork to a simpler panel before adding a complicated installation step that makes the bag harder to use or repair.
Approve the artwork, border, and attachment specification
Approve the patch design and the attachment details together. The digital mockup should make the finished outline, dimensions, artwork position, and intended stitch clearance understandable before production begins.
Keep lettering and fine artwork away from the sewing path. A leather patch usually has a cut edge rather than the wrapped merrowed border associated with many embroidered patches. If you want pre-punched sewing holes, request them before manufacture and have the applicator review their location. Closely spaced or oversized holes can weaken the edge instead of making attachment easier.
Debossing, embossing, and surface marking change how artwork reads on leather, but they don't eliminate the need for a clear perimeter. For a small cap patch, simplify crowded artwork rather than pushing tiny lettering into the stitch area. In our production experience, protecting the attachment margin is more useful than squeezing every line from a larger logo into the same small shape.
USA Customized Patches has a 10-piece minimum. A free digital mockup is provided in about 12 hours, and production starts only after written approval. You can send a garment photo, approximate patch dimensions, and your intended attachment method through the patch artwork and specification form for that mockup.
Typical patch production takes 7-12 business days. That is not a promise that garment application and transit fit inside the same window. Quotes are available 24 hours a day, 7 days a week. USA Customized Patches ships from Corona, CA, to all 50 states across the United States; review the patch shipping information when planning delivery and a separate installation appointment.
Prepare the tools and test one complete attachment
Set up the tools for the full material stack, then test on a matching spare garment or representative scrap. The test needs to include the patch, backing, garment fabric, and application method, not just an isolated piece of leather.
For sewing, have compatible thread, an appropriate needle, a marking method tested on the garment, and a way to hold the patch without visible punctures. Small clips can work when the panel edge is reachable. Leather-compatible positioning tape may work where clips cannot reach, but keep it out of the needle path when required by the tape or equipment instructions.
Don't automatically fit a cutting-point leather needle because the patch is leather. That needle can damage some woven fabrics beneath it. Ask the operator or equipment supplier to choose a needle for the complete stack, including any lining or reinforcement that will intentionally remain in the seam. Heavy material may also need a machine with suitable feed and clearance.
A home machine can handle some thin patches on accessible fabric panels. It cannot be assumed to handle a stiff leather patch, a cap seam, and crown reinforcement together. If the machine stalls, skips stitches, or requires you to pull the material through, stop. Pulling can deflect the needle, distort the fabric, and produce uneven stitch placement.
For a heat-backed patch, obtain the actual application instructions before warming the press. Temperature, dwell time, pressure, and cooling conditions belong to that backing and material combination. There is no responsible universal iron setting for every leather patch. A curved cap also needs equipment that supports its shape and makes even contact across the intended bond area.
Attach the test patch in this order
Finish one complete test item before applying patches to the rest of the run. Use the following sequence to settle placement, attachment settings, and inspection standards while a correction still affects only the test.
Ready to spec type, size, backing, and quantity? Open the quote form for a free 12-hour mockup and USA shipping after approval.
GET A FREE MOCKUP- Decide the attachment route. Spec: record sew-on, approved heat application, or hook-and-loop, along with the actual garment fabric and patch backing. Reason: changing the method halfway through a run can create different stiffness, visible marks, and care requirements. If the patch is plain-backed, do not treat it as an iron-on patch. If it has hook backing, confirm that the garment has a compatible loop field or plan how that field will be attached.
- Decide the exact placement. Spec: use a full-size template and measure from a stable feature such as the pocket edge, brim seam, or panel seam. Record the orientation as well as the distance. Reason: a printed logo or a soft garment edge may not be a dependable alignment reference. Check the item in its wearing or carrying position before accepting the marks. For caps, look straight at the crown rather than judging placement from above.
- Decide which layers will be attached. Spec: isolate the target panel and move loose lining, pocket bags, sweatbands, and zipper tape away from the sewing or pressing area. Reason: catching an unintended layer can close a pocket, distort a lining, or stop a cap from fitting properly. If access is blocked, stop and change the placement or equipment. Do not solve an access problem by blindly stitching through everything behind the patch.
- Decide how to hold the patch. Spec: use an approved positioning aid or clips that do not leave marks, and verify that the patch remains aligned when the garment is moved into the machine or press. Reason: hands alone may not keep a stiff patch from rotating. Avoid ordinary pins through visible leather because their holes remain after removal. Any positioning adhesive should be compatible with the surface and the following sewing or heat process.
- Decide the sewing setup if you are stitching. Spec: test the needle, thread, tension, stitch length, and edge distance on a matching stack, using the approved perimeter as your guide. Reason: excessive tension can pucker the fabric, while overly close stitches can perforate the leather like a tear line. A balanced seam should hold the patch without crushing its edge. Match thread to the leather for a quieter border, or specify contrast intentionally rather than accepting whatever spool is already installed.
- Decide the pressing setup if you are using heat backing. Spec: follow the backing supplier's temperature, pressure, dwell, protective-sheet, and cooling instructions, while staying within the garment's permitted treatment. Reason: an incomplete bond may look attached until the edge flexes, while excessive heat can mark the face or distort the shell. If the garment and backing instructions conflict, reject the heat route. Do not compensate for poor contact by repeatedly adding heat without a validated process.
- Decide how to complete and secure the attachment. Spec: for sewing, follow the perimeter without stretching the garment, turn corners under control, and secure thread ends using the operator's suitable finishing method. For heat application, keep the assembly undisturbed through the required cooling or cure stage. Reason: uncontrolled turning can move the stitch line toward the edge, and handling a warm bond too soon can disturb adhesion. Do not pull the patch sideways to help the machine feed.
- Decide whether the test item passes. Spec: inspect alignment, edge contact, thread security, fabric shape, interior access, and normal garment movement after the attachment is stable. Reason: a patch can look acceptable from the front while catching a lining or rubbing inside a cap. Open the pocket, zip the bag, wear the jacket, and flex the crown gently. A defect in any of those functions is a reason to revise the setup before continuing.
- Decide what becomes the repeatable job specification. Spec: retain the approved test item, placement reference, materials, equipment settings, and care instructions together. Reason: memory is a poor production record, especially when multiple people apply patches. Use the finished test as the visual reference for the remaining pieces. If a later garment has different construction or fabric, pause and confirm compatibility instead of assuming the original setup still applies.
Inspect the run and establish care instructions
Inspect both sides of each attachment and base care instructions on the most restrictive component. A washable jacket does not automatically make its leather patch washable, and a firmly attached patch does not prove that its finish will tolerate detergent or heat.
For a team or business order, keep the approved test item nearby rather than relying on a photograph alone. Compare orientation, placement relative to seams, edge appearance, and thread color. Soft goods vary. A small panel difference may require the operator to check the intended visual center instead of following a measurement that now puts the patch against a seam.
Run the proposed care process on the test item before telling recipients how to clean theirs. Look for color transfer, leather curl, changes in surface finish, puckering, or edge release. Use only care methods permitted by the patch and garment suppliers. If those instructions don't support machine washing, don't promise that sewing alone makes a machine-washable combination.
Build the budget around the completed item, not just the patch. Request patch manufacture, garment application, setup work, and shipping as distinct quote components in US dollars. A straightforward canvas tote can be less involved to sew than a lined jacket or structured cap even when all use identical patches. No useful per-piece installation estimate ignores access.
Fix what usually goes wrong before repeating it
The usual problems are lifted edges, puckered fabric, damaged surfaces, and trapped interior layers. Stop at the first failed test and correct the cause rather than applying more stitches, glue, or heat by instinct.
- Lifted cap corners: check patch stiffness, footprint, crown shape, and contact. A smaller or more flexible patch may solve what extra adhesive cannot.
- Puckered fabric: review thread tension, stitch density, stabilizing support, and whether the operator stretched the panel while sewing.
- A shiny or discolored patch face: stop pressing. Recheck heat compatibility and surface protection rather than assuming another press cycle will improve it.
- A closed pocket or twisted lining: reassess access. Removing stitches does not erase holes in leather, so avoid repeating the placement without a clear path.
- An uneven repeat run: replace visual guessing with the approved template and finished test item, while checking garment-to-garment construction differences.
Check what this advice is based on
This advice rests on patch-production requirements, the digital mockup step, and the order specifications needed for attachment. It is not a claim that every leather, backing, or garment combination has been physically tested.
In our production experience, the most useful early details are the real garment, the usable panel dimensions, the intended backing, and the applicator's equipment. A mockup checks the proposed patch layout. It cannot confirm adhesive performance, machine access, wash behavior, or how a stiff patch follows a curved crown. Those questions belong to the attachment test.
If your test shows that leather is too stiff for the panel, request a free digital mockup using embroidered patches for garment applications with the same artwork. Compare the required border space and attachment method before changing materials. Keep the approved test garment and its job sheet together so the person finishing the run has a physical reference, not just an email attachment.