
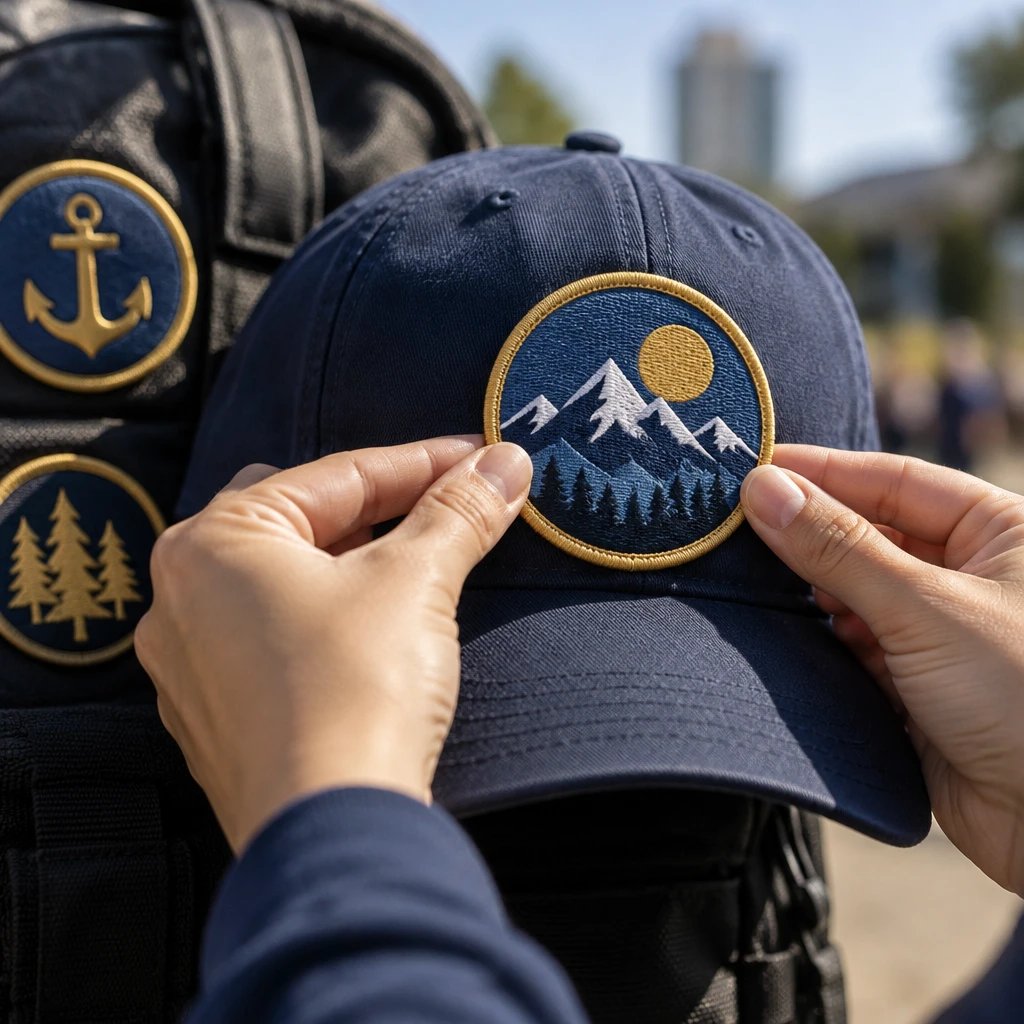
To get indianapolis school club patches that fit your group's gear and arrive ready to use, choose the garment, backing, and finished size before approving the artwork. The first mistake is designing a detailed mascot badge and only afterward discovering that it must fit a curved cap, a narrow sleeve, or a heat-sensitive backpack.
USA Customized Patches has a 10-piece minimum. You receive a free digital mockup in about 12 hours, and production starts only after written approval. Typical production takes 7–12 business days; confirm the schedule for your specifications and plan transit separately. Orders ship from Corona, California, across the United States to all 50 states. Quotes are available 24 hours a day, 7 days a week.
Set the brief for indianapolis school club patches
Write one shared order brief that names the wearer, garment, patch purpose, quantity, and delivery destination. Assign one person to approve the final version so a parent committee doesn't send competing instructions into production.
Start with what the patch must do. A robotics club identity patch needs a readable club name. An achievement badge needs the award or milestone to stand out. A marching band jacket patch might need to work beside existing decorations without covering a pocket or seam. Those are different jobs, even when the same school mascot appears on all three.
Keep the procedure in this order. You can collect artwork and garment photos at the same time, but don't treat the design as finished until the physical placement is settled.
- Decide who can authorize the order. Record the exact school or club name, the permitted mascot artwork, the billing contact, and one final approver. This prevents a spelling correction, logo objection, or purchasing requirement from surfacing after production has started.
- Decide where the patch will sit. Record the garment type, fabric, usable placement area, and proposed finished width and height in inches. Measure the smallest relevant garment or narrowest placement because a design that fits an adult jacket may not fit a youth sleeve.
- Decide which details must survive at actual size. Specify the essential wording, mascot features, color references, and preferred material. This lets you remove decoration before it becomes unreadable thread rather than trying to rescue an overcrowded design later.
- Decide how the patch will attach. Specify sew-on, iron-on, or hook-and-loop backing, plus the edge finish. Match that choice to the garment's care instructions and access behind the placement area because attachment is a garment decision, not just a convenience option.
- Decide what you are actually buying. Record the quantity for each design, finished dimensions, backing, border, individual names if any, and the required delivery date. A complete specification makes quotes comparable and keeps optional variations from hiding inside a single total.
- Decide whether the mockup and written specification agree. Check spelling, proportions, dimensions, colors, backing, border, quantity, and destination, then give written approval to the final revision. Production should follow an identified version, not a mixture of comments from earlier emails.
- Decide how delivery becomes usable gear. Confirm the shipping address, receiving contact, inspection plan, and installer before the order leaves production. You need time to count patches, check the approved details, and attach them before students or club members wear them.
For example, say an Indianapolis robotics club orders 40 patches for cotton hoodies. A single shared mascot design may be enough, with student names handled separately on the garments. That keeps the patch useful for returning members and avoids turning every student assignment into a separate artwork decision.
Measure the garment before choosing the patch dimensions
Choose finished dimensions from the usable garment area, not from how large the logo looks on your screen. Measure around seams, pockets, zippers, existing embroidery, and curved panels before you settle on a shape.
Use a paper cutout. It catches mistakes quickly. For example, if you are considering a patch 3 inches wide by 2 inches tall, cut paper to those dimensions and place it on the actual garment. View it while someone wears the garment, not only while the garment lies flat on a table.
A youth jacket sleeve narrows and curves. A backpack panel may look broad but hide a padded compartment or lining that makes sewing awkward. A structured cap introduces both curvature and limited access for attachment. The largest patch that physically fits is not necessarily the best-looking or easiest-to-install patch.
Check the smallest garment in the run. For example, a parent group ordering the same patch for youth and adult sweatshirts should test the proposed placement on a youth sweatshirt first. If the group wants identical patches, that smaller placement sets the practical limit.
Give width and height together, and make clear that they describe the finished patch, including its border. An oval and a shield can share the same width while offering very different space for lettering. Ask yourself which matters more: preserving the mascot's shape or giving the school name enough room. That decision belongs here, before the lettering is packed into the remaining space.
Simplify the artwork and select the material
Use embroidered fabric patches for bold school names, recognizable mascots, and designs that benefit from raised thread texture. If fine lettering is essential, consider woven construction rather than forcing embroidery to reproduce a dense digital logo.
An embroidered patch is a fabric badge that uses stitched thread to form its lettering and artwork. A woven patch is a fabric badge that forms its design through interlaced threads, allowing finer detail with a flatter surface. Neither construction can rescue wording that is too small to read at the finished size.
In our production experience, a school crest often needs editing rather than simply shrinking. A tiny founding date, a thin outline around the mascot, and a full motto may all look clear on a large screen. At patch size, those details compete. Keep the school or club name and the strongest identifying feature; remove secondary text unless it serves a real purpose.
I'd skip a detailed mascot background for a small cap patch. A clear head silhouette and short club name usually give you a more usable design. For a larger jacket placement, you have more room, but that isn't a reason to fill every open area with stitching.
Send the original logo file if you have it. A vector file is useful because shapes can be inspected and resized cleanly, but a clear image can still start the conversation. Include the exact wording as typed text, particularly unusual school names, abbreviations, and graduation years. Don't make the artwork technician guess from a compressed screenshot.
You can request a free digital mockup through the embroidered patch hub with your garment photo, proposed dimensions, and artwork. Ask to see the simplified lettering at the intended size before you gather committee approval.
If the club name still needs fine letters after sensible simplification, review woven patch construction. The trade-off is texture: woven designs are flatter, while embroidery gives you a more pronounced stitched surface. Choose the construction that keeps the identifying information readable, not the one that looks most elaborate when enlarged.
Match the backing and border to the actual gear
Choose backing according to the garment fabric, care instructions, and whether the patch must be removable. Choose the border according to the outline and the available space around the artwork.
See your artwork as a custom USA patch before you buy. Free digital mockup in 12 hours — 5-piece minimum per design. We do not produce until you approve.
GET A FREE MOCKUPBacking is the attachment treatment on the reverse of a patch. It doesn't tell you whether the host garment can tolerate heat, needle holes, or repeated removal. For mixed student-owned gear, I'd favor a sew-on plan where the garments can be stitched safely rather than assume every family can use the same iron settings.
| Attachment choice | Suitable school or club use | Specification to confirm | Trade-off |
|---|---|---|---|
| Sew-on | Cotton sweatshirts, denim jackets, and accessible fabric bag panels | Sew-on backing, stitchable border, and access behind the placement | Gives you a mechanical attachment, but you need sewing access and someone to install it; stitching can affect linings or weather-resistant construction. |
| Iron-on | Garments whose care instructions permit the required application heat | Fabric compatibility and the supplied heat, pressure, and cooling instructions | Convenient on suitable flat areas, but coatings, curvature, and heat-sensitive fabric can make it the wrong choice. |
| Hook-and-loop | Club gear that already has a compatible loop panel | Hook backing on the patch, matching panel dimensions, and whether a separate loop piece is included | Allows removal and swapping, but it adds thickness and needs a receiving surface on the garment. |
| Peel-and-stick adhesive | Temporary event identification on a compatible surface | Intended surface, temporary use, and removal expectations | Useful for short-term placement, but not a substitute for a washable garment attachment. |
A merrowed border is a wrapped stitched edge that finishes a patch with a raised rim. It suits many circles, ovals, and uncomplicated shields. A cut edge follows more detailed contours and can keep a shaped mascot outline from becoming bulky. Confirm what edge treatment is suitable for the selected material rather than assuming every outline can receive the same finish.
Think about installation before choosing a decorative outline. Narrow points and tight inside corners can be awkward to sew around. A simpler shield may be the better call for a volunteer sewing session, even if a more intricate mascot silhouette looks attractive in the proof.
Don't casually put an iron on a coated backpack or performance jacket. Read the garment label and get application guidance first. If a patch is going onto weather-resistant gear, stitching also deserves a compatibility check because needle holes may affect the garment's construction.
Build a quote that your school or club can approve
Request pricing against one written specification, with quantities separated by design or variant. Ask for the quoted total in U.S. dollars and confirm what it includes before collecting money from families.
Patch size, stitch coverage, construction, edge complexity, backing, and quantity can change the quote. Bigger and denser designs generally require more production work. A simple embroidered badge may be enough for a club identity patch; paying for extra texture or a complicated contour doesn't automatically make the school name easier to recognize.
Keep identical patches separate from personalized patches in the brief. For example, a run of 40 matching club badges is not the same specification as 40 badges with different student names. If names, captain titles, or award levels vary, say so before comparing prices. Confirm how the 10-piece minimum applies to your proposed designs and variations.
Ask about freight, any optional services, and the cost effect of changes you are still considering. A backing upgrade on one quote and a plain sew-on specification on another make the totals hard to compare. Installation is another line to plan for, even when a parent or local alterations shop will handle it separately.
Reserve planning should follow actual needs. Count current members, known incoming members, coaches or advisers, and likely replacements. Don't select an arbitrary extra percentage. If the badge carries a specific year, leftovers have a shorter useful life; if the design is year-neutral, a small reserve can support later enrollment without a redesign.
Before approval, check your organization's purchasing process. You may need a purchase order, a billing contact, permission to use the mascot, or approval from the person responsible for uniforms. These are local administrative decisions, not production details, but they can hold up an otherwise ready order.
Approve the mockup as a production specification
Approve the final digital mockup and the written order details together. A digital mockup is an artwork preview that shows the proposed layout; it is not a physical stitched sample or a test of attachment to your garment.
Read the wording before judging the overall look. Check the official school name, club abbreviation, punctuation, dates, and any award level. Then check the hierarchy: can you identify the group before studying the decorative details? If you cannot, enlarging the preview on your phone won't fix the finished patch.
Review the finished width and height alongside the picture. Printed previews can be scaled by printer settings, so verify any paper test against a ruler. Also check the border specification and the space it consumes. A thick edge can crowd lettering that seemed comfortably spaced in an early sketch.
Color needs a written reference. Supply official school color references when available and ask how they will be translated into available thread colors. A screen mockup helps you inspect the arrangement of colors, but screen brightness and display settings are not a reliable physical thread standard.
Backing can be missed because it isn't obvious in the front-view artwork. Read that line separately. Confirm quantity, variations, destination, and the required date as well. A correct mascot with the wrong backing is still the wrong patch for the job.
Gather feedback internally and send one consolidated revision request. Identify the final approved version in writing, especially if the committee has seen several drafts. USA Customized Patches produces only after approval; changes requested after that point may affect feasibility, cost, or timing.
If the artwork and garment plan still disagree, send the placement photo and revised dimensions through patch artwork and order support for a free digital mockup before production. It's better to settle a crowded club name on the proof than work around it after every patch is made.
Ready to spec type, size, backing, and quantity? Open the quote form for a free 12-hour mockup and USA shipping after approval.
GET A FREE MOCKUPSchedule delivery to Indianapolis around the wear date
Work backward from the day the group needs to wear the patches, allowing separate time for approval, production, shipping, inspection, and installation. Typical production is 7–12 business days, not an all-inclusive promise from first inquiry to finished jackets.
The free digital mockup is generally available in about 12 hours, but your own review may take longer. A school administrator's approval, a mascot revision, or a late decision about garment sizes can move the production start. Quote availability 24 hours a day, 7 days a week does not turn production business days into calendar days.
Tell the production contact the actual wear date. For example, if the patches are for a school performance, receiving them on the performance date leaves no useful time to inspect or sew them onto jackets. State both your preferred arrival date and the event date so the remaining work is visible.
USA Customized Patches ships from Corona, California, to Indianapolis and all 50 states. Review United States shipping information and confirm the applicable transit estimate for your order. Don't assume that a production estimate also includes the carrier's trip to Indiana.
Use a destination that can receive the package when it arrives. Include the school or organization name, street address, suite or department if needed, and a reachable contact. School breaks and limited office hours matter. A package delivered to a closed receiving area is not the same as patches ready for a volunteer installation session.
Inspect the patches before you distribute or attach them
Count the patches and compare them with the approved specifications before installation. Keep the approved artwork and order details available so the check is based on the agreed version, not memory.
Check the name, major artwork elements, finished dimensions, border, backing, and quantities by variant. If something appears inconsistent with the approved order, photograph it and contact the supplier before attaching or altering the patches. Keep packaging and labels until any delivery or count question is resolved.
Sort different award levels or personalized pieces before handing them out. A simple roster is more useful here than a pile of envelopes with handwritten guesses. Keep any reserve patches labeled with the design version and order information so the next organizer knows which badge belongs to which program.
For iron-on installation, follow the supplied application instructions and the garment's care restrictions. Test on a suitable spare or inconspicuous area when practical. A curved cap or bulky seam can prevent even contact, and pressing harder without guidance is not a sensible fix.
For sew-on installation, check what lies behind the patch position. Don't sew a pocket closed or catch a lining unintentionally. A placement template can help volunteers keep the badge consistent across garments, but test that template on different sizes before using it for the whole group.
What usually goes wrong
Most avoidable patch-order problems come from unresolved specifications: the wrong placement size, unsuitable attachment, competing approvals, or a deadline that ignores installation. Catch those before you authorize production.
- The mascot takes all the space. Shorten secondary wording or simplify the illustration before shrinking the school name.
- One backing is assigned to unrelated garments. Check each fabric and construction type instead of treating a cotton hoodie and a coated bag as interchangeable.
- The committee approves different revisions. Name one final approver and identify the approved mockup version in writing.
- A patch arrival date becomes the uniform deadline. Leave room to inspect, sort, and attach the order before the wear date.
- The reorder depends on someone's memory. Save dimensions, material, backing, border, colors, and approved artwork in a shared folder.
What this is based on
This advice rests on the patch-production process, the digital mockup step, and the written specifications used to define an order. Garment-fit, detail, and attachment recommendations reflect production experience, not a claim that every school garment or logo behaves the same way.
The examples are planning illustrations, not customer stories. Final dimensions, material suitability, color selection, pricing, and timing need confirmation for your order. Before handing the job to the next parent or club officer, save the approved proof and specifications together with a photo of the finished placement.