
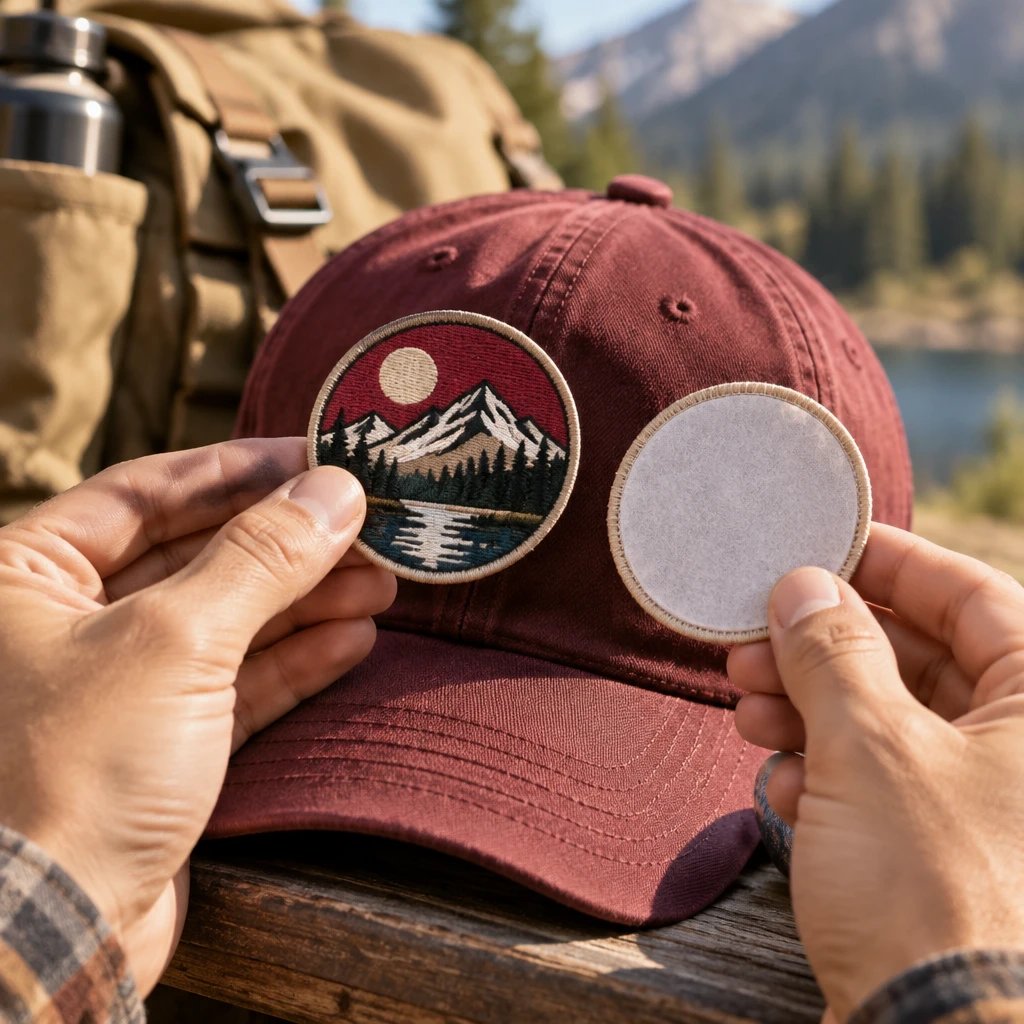
For a patch that stays put for the intended job, choose iron-on vs adhesive patch backing by the garment and wear requirement: iron-on suits compatible, heat-safe fabric for longer-term attachment, while standard peel-and-stick suits temporary use. Most people get the first decision wrong by choosing the backing before checking heat tolerance, washing, and removal needs.
Decide how long the patch needs to stay attached
Start with service life, not the logo. A patch worn through repeated uniform washes needs a different attachment plan from a patch handed out for a club check-in or placed on a product sleeve.
Write down what happens after application. Will you wash the garment, tumble-dry it, stretch it during wear, or remove the patch before returning a borrowed jacket? Those details determine the backing more reliably than calling the project a team order or a promotional run. The same embroidered face can serve either job, but the reverse side must match the use.
For example, say a run club orders 40 patches for a packet-pickup event. If members attach them to smooth paper race packets, peel-and-stick is a sensible starting point. If members expect to keep them on technical running shirts, the plan changes: lightweight stretch fabric, sweat, repeated washing, and heat sensitivity all need attention. I wouldn't promise that one standard backing handles both applications.
Set the removal requirement now. Temporary does not automatically mean residue-free, and iron-on does not mean easy to reverse. If preserving a borrowed garment matters more than keeping the patch attached, direct adhesive application may be the wrong choice altogether. A removable carrier can be more practical, provided the garment owner approves the attachment method.
Compare iron-on vs adhesive patch backing for your use
Iron-on uses heat to activate its adhesive; standard peel-and-stick uses pressure to establish contact without a heat application step. Both are adhesive systems, but they are not interchangeable.
Iron-on backing is a heat-activated adhesive layer that bonds a patch to a compatible surface under specified application conditions. Peel-and-stick backing is a pressure-sensitive adhesive layer that lets you attach a patch after removing its release liner. In patch ordering, the word adhesive usually refers to the second option, so spell out the backing rather than writing only adhesive on your purchase order.
| Decision | Iron-on backing | Standard peel-and-stick backing |
|---|---|---|
| How it attaches | Requires the specified heat, pressure, and dwell time on compatible fabric. | Requires liner removal, suitable surface contact, and the specified pressure. |
| Best starting use | Longer-term attachment on heat-safe garments, with sewing considered for demanding wear. | Temporary event identification, smooth packaging, and other nonlaundered applications. |
| Garment limitations | Heat can damage sensitive fibers, coatings, prints, and structured components. | Texture, stretch, lint, and surface treatments can prevent reliable contact. |
| Washing | Follow the backing instructions and garment care limits; test the complete assembly. | Do not treat standard temporary adhesive as washable unless the supplied specification supports it. |
| Removal | May leave adhesive or damage the fabric; not a reversible attachment plan. | May remove more easily, but residue, staining, or surface damage remain possible. |
| Equipment and labor | Needs suitable application equipment, access, cooling, and inspection. | Needs no heat equipment, but placement and contact still require care. |
| Main trade-off | A more durable bond is possible, but only when application conditions and fabric match. | Fast placement is convenient, but temporary holding strength is not a sewn connection. |
Peel-and-stick is the right call when the patch only needs to identify a volunteer during a short, dry event and the actual garment passes a test. It is also worth considering for smooth display cards. Rough kraft paper, dusty cartons, and heavily textured fabric deserve separate testing; calling something packaging does not make every surface adhesive-friendly.
For a frequently washed work shirt, I'd skip standard temporary adhesive. Iron-on may fit if the shirt and backing are compatible, but perimeter stitching is worth discussing for daily service. The trade-off is installation labor and needle holes. That is usually a more useful conversation than chasing the strongest-sounding backing name.
Compare finished cost in dollars, not just the patch line item. Your quote should identify the backing, while your internal budget should include pressing, sewing, test garments, and possible rework. If a lower-cost temporary option meets a one-event requirement, it is enough. Paying for a permanent attachment you intend to remove creates a different problem.
Check the garment, surface, and application access
Read the garment care label and identify the actual placement area before approving either backing. Fiber content alone cannot tell you how a finished garment will react to heat or adhesive.
Check cotton, polyester, and coated fabrics separately
A cotton twill work shirt is often a more straightforward iron-on candidate than a lightweight polyester performance top, but it still needs a compatibility check. Cotton garments can have finishes or nearby prints that change the application limits. Polyester can shine, distort, or suffer color migration under unsuitable heat conditions. Nylon shells and waterproof coatings are especially poor candidates for guesswork.
Ask for the backing's application instructions and compare them with the garment manufacturer's restrictions. If the backing needs conditions the garment cannot tolerate, there is no safe compromise setting to invent. Choose another attachment method. For protective clothing or specialized uniforms, get authorization from the garment supplier before altering the garment.
Inspect texture and stretch before choosing peel-and-stick
Pressure-sensitive adhesive works through contact, so a smooth face generally gives it a better starting point than a fuzzy or deeply textured one. Fleece fibers, loose lint, mesh openings, and chunky knit loops reduce the usable contact area. A stretchy jersey also moves differently from a relatively stable embroidered patch, which encourages edge lifting.
Do not try to solve every adhesion problem with aggressive cleaning. Use only preparation methods compatible with the surface and the supplied adhesive instructions. Solvents can damage a jacket coating or printed graphic. Fabric softener residue and oily handling can also interfere with contact, which is one reason testing a clean, representative garment matters.
See your artwork as a custom USA patch before you buy. Free digital mockup in 12 hours — 5-piece minimum per design. We do not produce until you approve.
GET A FREE MOCKUPMake sure the tool can reach the whole patch
A structured baseball cap is not a flat T-shirt. The center seam, curved crown, sweatband, and internal support can prevent uniform pressure. For example, a 3-inch-wide patch crossing the front seam may look balanced in artwork but sit poorly during application. Check the usable flat area and the equipment before deciding that iron-on will be an easy installation.
The same issue appears on jacket pockets and backpack panels. A zipper, thick seam allowance, foam layer, or lining can change the way pressure reaches the patch. On a pocket, stitching can accidentally close the opening; on a coated shell, needle holes can affect weather resistance. There isn't a universal fallback that ignores the garment construction.
Set the patch dimensions, face material, and border
Specify the patch at its actual finished size, including its border, before choosing the final attachment plan. Size, shape, and stiffness influence how the patch follows the garment and where edges may catch.
Measure the available space in inches. For example, if your proposed chest patch is 3 inches wide by 2 inches tall, cut a paper template to that size and position it on the actual shirt. Check nearby buttons, pocket openings, embroidery, and seams. A screen mockup can look roomy while the physical patch crowds the pocket flap.
Embroidered patches use thread stitched into a base fabric, commonly polyester twill, to form the design. They suit team crests, business logos, and club emblems with clear shapes. Dense stitching can add body, so a large embroidered patch may resist bending more than you expect on a soft sleeve. More adhesive is not automatically the answer to that mismatch.
A woven patch is a fabric patch that forms its design with interlaced threads rather than raised embroidery stitches. If fine lettering drives the artwork, consider woven patch options before making the patch larger just to preserve the text. The face construction and the backing remain separate decisions; a different face material does not make temporary adhesive washable.
Choose the border with the attachment area in mind. A merrowed border is an overlocked thread edge that finishes a patch perimeter with a raised rim. A heat-cut border uses a cut, sealed edge suitable for shapes that need a closer outline. In our production experience, narrow projections and sharp points deserve extra attention because they offer small attachment areas and can catch during wear.
If you are still balancing lettering, dimensions, and border width, you can request a free digital mockup through the embroidered patch options page. Include the intended garment and backing so the artwork review starts with the right constraints.
Don't make the edge somebody else's problem. If a uniform shop will add stitching, tell the patch supplier before approval so the border and intended stitch path can be reviewed. If the patch must sit on a curved panel without sewing, reduce unnecessary projections and verify that the full reverse can contact the surface.
Approve the backing specification before production
Approve both the artwork and the written attachment specification before production starts. A correct logo with the wrong reverse is still the wrong patch.
Your order specification should identify finished width and height, quantity, face construction, thread colors, border type, backing type, and intended use. Write heat-activated iron-on or pressure-sensitive peel-and-stick in full. Include the garment description and note whether the patches will be commercially installed, distributed for home application, or used only on packaging.
USA Customized Patches has a 10-piece minimum. A free digital mockup is provided before production, usually in about 12 hours. Production starts only after written approval. Quote requests are open 24 hours a day, 7 days a week.
The mockup should let you check the visible layout, dimensions, lettering, colors, and border treatment. Review the associated order notes for the backing, since a front-view image cannot show every reverse-side detail. Screen colors are not physical thread samples, and a digital rendering cannot prove that adhesive will hold on your treated polyester jacket.
If the fabric or finish is uncertain, use the patch specification contact form to request your free digital mockup and send the garment details with it. A clear photo, care-label information, placement measurement, and intended wash routine give the production review something useful to work with.
Typical production takes 7–12 business days after approval; confirm the schedule for your specifications. USA Customized Patches ships from Corona, CA, to all 50 states in the United States. Review the nationwide shipping information when planning your order, and keep production, transit, and garment installation as separate calendar items.
If you need a physical attachment trial before committing to the full quantity, discuss the sample route before approving production. Do not assume a digital mockup includes a physical sample or a tested bond. Put the event date and the date you need finished garments in your request, because those are not necessarily the same deadline.
Test and apply the patches without risking the whole run
Test one representative patch-and-surface combination before applying the entire batch. Use the supplied backing instructions, not a generic temperature or timing recipe found for another product.
Ready to spec type, size, backing, and quantity? Open the quote form for a free 12-hour mockup and USA shipping after approval.
GET A FREE MOCKUPThe procedure below covers both attachment types. Each decision needs a written specification and a reason; otherwise, the second person installing patches may repeat the appearance of your process without reproducing the conditions that made the first patch work.
- Decide what counts as a valid test. Spec: use a patch with the ordered backing and a spare garment or surface that matches the actual material, finish, construction, and placement area. Reason: a bond on plain cotton scrap does not establish compatibility with a coated jacket or a curved cap.
- Decide whether the surface is ready. Spec: keep the placement area clean, dry, and free of loose lint, and use only preparation methods permitted by the garment and backing instructions. Reason: contamination limits contact, while an unsuitable cleaner can cause damage before the patch is even applied.
- Decide the exact location and orientation. Spec: record the finished patch size in inches and measure placement from a repeatable reference, such as a pocket edge or center line; use a removable positioning aid only if it is compatible with the surface. Reason: eyeballing placement creates visible differences across a uniform run.
- Decide which application route the backing requires. Spec: for iron-on, obtain the stated temperature, dwell time, pressure, application direction, and cooling requirements; for peel-and-stick, obtain the pressure, contact-time, and surface restrictions supplied for that adhesive. Reason: heat-activated and pressure-sensitive systems rely on different conditions.
- Decide whether your equipment can reproduce those conditions. Spec: use equipment that reaches the whole patch evenly and follow any instructions for a cover sheet, internal support, or protected reverse side. Reason: a cap seam or jacket zipper can interrupt pressure, and a household iron is not equivalent to a controlled press unless the supplied directions allow it.
- Decide whether the patch is ready to handle. Spec: allow the prescribed cooling or bond-development period before flexing, wearing, washing, or testing removal. Reason: disturbing a fresh attachment can create a failure that would not occur after the required wait. A patch that feels warm and attached is not automatically ready for service.
- Decide whether the result meets the intended use. Spec: inspect the entire perimeter, check normal garment flex, and perform the planned care test only after the required wait and within the garment's care limits. For temporary use, test removal on the spare surface too. Reason: initial tack, wash performance, and clean removal are separate outcomes.
- Decide whether to release the batch for installation. Spec: record the accepted method, garment reference, placement measurements, and inspection criteria, then repeat those conditions across the run. Reason: an approved test is only useful when the batch follows it. Stop if the garment stock, backing, equipment, or application surface changes.
No universal iron setting belongs in this procedure. Household iron labels vary, patch adhesives vary, and garments have different limits. If the supplier has not provided application conditions, ask before heating the patch. Turning up the heat until an edge stops lifting can turn a repairable attachment issue into a permanently marked shirt.
For peel-and-stick, handle the patch by its edges after removing the liner and avoid repeatedly lifting it to straighten the logo. Repositioning can contaminate the adhesive or reduce contact. Align first. If you are distributing patches at an event, give the application volunteer a placement reference and a clear list of unsuitable surfaces rather than relying on the word sticker.
Inspect the finished garments and set care instructions
Inspect attachment as well as appearance before distributing the finished pieces. A centered patch can still have an unsupported corner or an edge that lifts when the garment bends.
Look for lifted edges, wrinkled fabric, surface shine, color change, adhesive squeeze-out, and placement differences. Check the inside where applicable. On caps, inspect the area over the crown seam; on jackets, check that the patch has not bridged a raised seam or affected a pocket opening. Don't release questionable pieces just because the front photograph looks fine.
Build care instructions around both components. The finished garment must stay within its own care limits and those of the patch attachment, using the more restrictive compatible instructions. Avoid inventing a wash-temperature promise for an untested combination. For standard temporary adhesive patches, tell recipients to remove them before laundering, following any supplied removal guidance.
If you sell loose iron-on patches, include the backing-specific directions and explain that not every garment is suitable. If you issue finished uniforms, keep the attachment record with the order specifications for future reorders. A later garment substitution can change the result even when the patch artwork has not changed.
Fix what usually goes wrong before repeating the batch
Most attachment trouble starts with a mismatch between the backing, the surface, and the installation conditions. Stop at the first repeatable failure instead of applying the same mistake to the remaining garments.
- An iron-on corner lifts: check pressure coverage, seam interference, fabric compatibility, and the supplied application conditions. Do not assume extra heat is the answer.
- A peel-and-stick patch falls from fleece: inspect the limited contact with the fuzzy surface. Switching to a suitable attachment method is more useful than repeatedly pressing the same contaminated adhesive.
- The garment becomes shiny or puckered: stop heat application and review the garment limits. Sewing later will not undo heat damage.
- Adhesive remains after removal: check the surface manufacturer's cleaning guidance before attempting removal. Avoid an untested solvent on the visible garment.
- A replacement batch behaves differently: compare the backing specification, garment finish, equipment, and placement area. Matching the logo does not establish matching application conditions.
What this guidance is based on
This guidance rests on the patch production process, the digital mockup review, and the written order specifications used to define the finished patch. In our production experience, garment compatibility, surface contact, and controlled installation matter more than a broad claim that one backing is stronger.
A mockup verifies the proposed design and documented specifications, not a tested service life. Before you release garments to a team, club, or customer, keep one approved application record: the patch specification, the exact garment, the placement measurement, and the method that passed your intended-use test.