
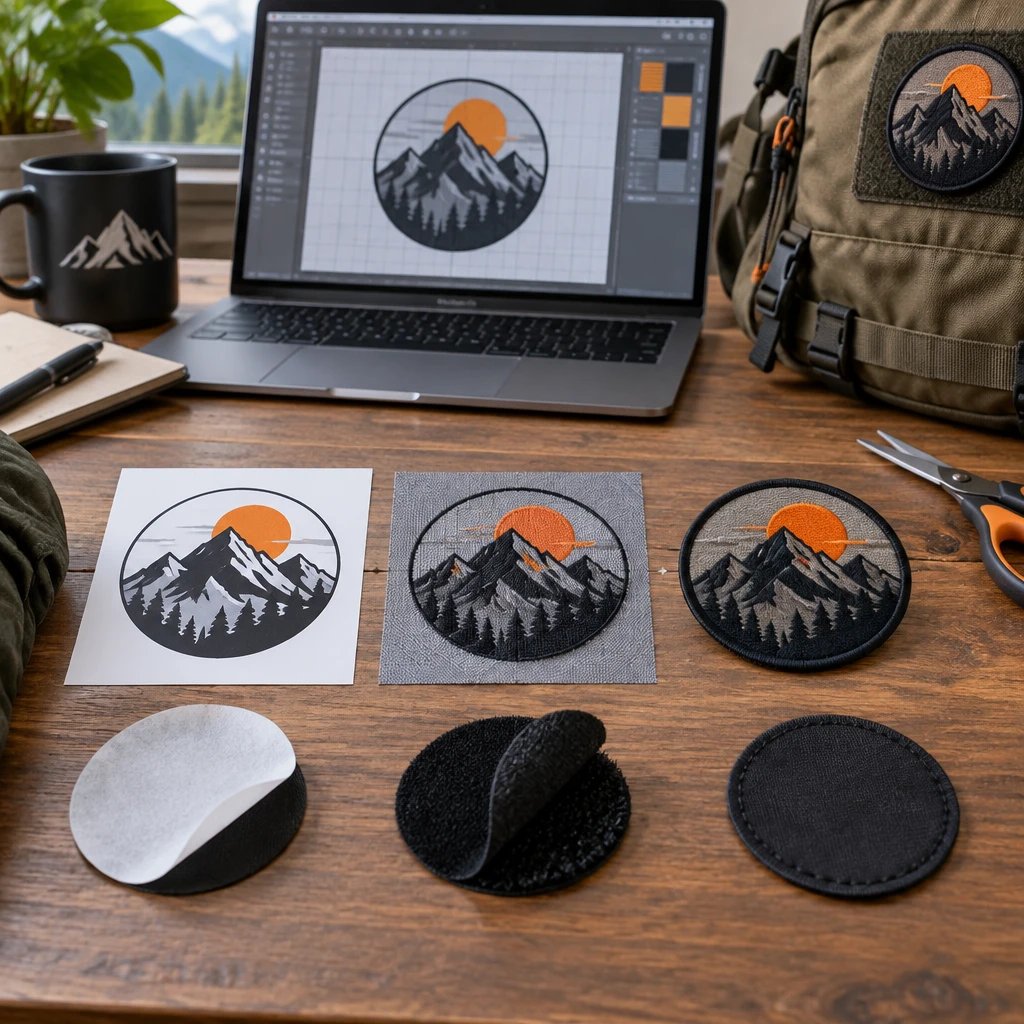
You want a patch that stays where it belongs and comes off only when you intend it to; the first mistake is choosing the backing before checking the garment. For iron-on vs velcro patch backing, choose iron-on for fixed placement on heat-safe fabric and hook-and-loop for removable patches on a compatible receiving panel. Neither option solves an unsuitable attachment surface.
Check the garment before choosing a backing
Read the garment label and inspect the actual patch location before you specify attachment. Fiber content, coatings, seams, lining, and an existing loop panel matter more than the garment's general category.
A cotton denim jacket and a coated nylon rain shell may both be club jackets, but they are different installation jobs. Denim often tolerates heat better, subject to its care instructions and finish. A rain shell may have a heat-sensitive coating or membrane, and stitching can compromise its weather resistance. Don't treat a backing choice as permission to ignore the garment manufacturer's instructions.
Check inside, too. A pocket, insulation layer, or floating lining can interfere with pressure during heat application or get caught during sewing. If your installer cannot reach behind the placement area, a plan that looked simple on a flat sketch can become awkward on the finished jacket.
Existing hook-and-loop changes the decision. On a tactical backpack with a sewn loop field, a hook-backed patch is usually the straightforward choice. On a plain polo shirt, that same patch requires a receiving panel to be installed first. The rough hook surface is not an adhesive, and it should not be pressed directly against ordinary knit fabric.
For example, if a running club wants identification on lightweight performance shirts, I'd skip direct ironing unless the shirt supplier approves the complete application method. Thin stretch fabric can distort, and a dense patch can pull the shirt out of shape even when the adhesive bonds. A lighter patch or a different placement may solve more than changing the backing.
Choose iron-on vs velcro patch backing by how you use the patch
Choose iron-on when the patch should remain in one place and the garment supports heat application. Choose hook-and-loop when you need to swap, remove, or transfer the patch and can provide a matching receiving panel.
Iron-on backing is a heat-activated adhesive layer that bonds a patch to a compatible surface under specified heat, pressure, and time. Hook-and-loop backing is a mechanical fastener that joins a hook surface to a matching loop surface. Velcro is a brand name often used for this fastening category; if genuine VELCRO Brand material is required, specify that rather than assuming every hook-and-loop order includes it.
| Decision | Iron-on backing | Hook-and-loop backing |
|---|---|---|
| Best use | Fixed logos or club badges on compatible, heat-safe garments | Changeable names, roles, morale patches, or identifiers on uniforms and gear |
| Required garment surface | Fabric approved for the adhesive's application conditions | A compatible loop panel, normally securely sewn to the garment or gear |
| Installation equipment | The recommended heat application equipment and a supported pressing surface | No heat needed to mount the patch once the receiving panel is installed |
| Removal | Not designed for routine removal; adhesive residue or fabric damage is possible | Designed for repeated removal, subject to fastener wear and cleanliness |
| Profile | Typically less added thickness than a two-part hook-and-loop assembly | Adds thickness from the fastener and receiving panel |
| Main failure risk | Poor bonding or edge lifting from incompatible fabric or incorrect application | Peeling at an exposed edge, worn fasteners, or an undersized receiving panel |
| Laundry planning | Follow garment and patch instructions; inspect the bond after washing | Remove the patch when appropriate and protect other items from exposed hooks |
| Cost to compare | Patch plus heat application and any reinforcing stitches | Patch plus receiving panel, panel installation, and future replacement needs |
Don't buy removability you won't use. For a fixed logo on a heat-compatible cotton work shirt, iron-on may be enough when the application and care instructions support it. Adding hook-and-loop introduces another material layer, another installation task, and a visible panel whenever the patch is removed.
For rotating job titles or event assignments, the opposite is true. Hook-and-loop lets you change the identifier without replacing the shirt or repeatedly heating the same area. It also lets you remove a substantial patch before laundering, although the receiving panel still has to survive the garment's wash routine.
Neither is automatically the strongest answer. In our production experience, a fixed patch on a frequently flexed or heavily laundered work garment often deserves perimeter stitching. A removable patch needs enough supported contact area and a placement that doesn't invite equipment, straps, or branches to catch its edge.
Write the backing specification before requesting artwork
Put the attachment requirements into the order notes, not just an email that says 'Velcro' or 'iron-on.' The core procedure is to define the garment, receiving surface, finished dimensions, edge construction, and installation responsibility before the patch is quoted.
- Decide whether the patch stays fixed or gets swapped. Specify fixed placement, occasional removal, or routine swapping in the order notes. The reason is practical: removal needs determine whether heat-activated adhesive or a mechanical fastener makes sense.
- Identify the actual garment and placement. Specify the garment model when available, fiber content, care-label restrictions, coatings, and the intended location. Include a photo if seams, pockets, or panels are nearby, because those details affect pressure, sewing access, and edge support.
- Measure the usable attachment area. Specify finished patch width and height in inches and, for hook-and-loop, the receiving panel dimensions. Use a paper template on the garment rather than measuring artwork on a monitor, because a patch that fits the drawing may still bridge a cap seam or overhang a loop field.
- Choose the backing package. Specify heat-activated adhesive for iron-on, or identify which hook-and-loop side belongs on the patch. State whether you need a separate matching loop panel, because 'hook backing' does not by itself describe a complete garment-side installation.
- Match the face and border to the placement. Specify embroidered, woven, or another agreed patch construction, plus the border type and any stitching plan. A bulky edge or rigid face can make a small curved placement awkward, while a detailed design may need a finer construction to remain readable.
- Assign installation and testing. Specify who applies the patch, which garment will be used for an initial test, and who supplies the application instructions. This prevents the patch supplier, decorator, and team organizer from each assuming someone else has checked heat compatibility or sewn on the receiving panel.
- Confirm quantity, schedule, and approval authority. Specify the piece count, delivery state, needed-by date, and the person authorized to approve the proof. These details keep a correct backing choice from being undermined by an incomplete quote or an approval that arrives too late for the intended event.
For example, a club might specify a 3-inch-wide embroidered patch with hook material on the back and a separate matching loop piece for each denim vest. That description is much more useful than '3-inch Velcro patch.' It tells production which components are needed and tells the club that someone still has to attach the loop pieces to the vests.
Measure shape as well as size. A rectangular patch can fit within a rectangular loop field while a wide shield of the same stated width loses useful contact near its pointed bottom. Keep the patch supported by the receiving area rather than relying on a narrow center strip to hold unsupported edges.
An embroidered face uses thread stitched into a base fabric to build the design. It works well for many team crests, jacket logos, and club badges, but backing cannot rescue lettering that is too crowded at the chosen size. If small text drives the layout, compare woven patch construction before adding inches just to make embroidery readable.
Border choice also belongs in the specification. A merrowed border is a wrapped thread edge commonly used on suitable simple shapes. A cut edge can accommodate more intricate outlines, depending on the patch construction. Ask how the backing will be finished at that edge and where reinforcing stitches could run without cutting through important lettering.
For a conventional stitched logo, you can request a free digital mockup through our embroidered patch options and include the garment photo, finished dimensions, and backing requirements together.
See your artwork as a custom USA patch before you buy. Free digital mockup in 12 hours — 5-piece minimum per design. We do not produce until you approve.
GET A FREE MOCKUPApprove the mockup and quote as one complete specification
Approve the artwork only after the written order details identify the correct backing and any separate receiving pieces. A front-view mockup cannot show every attachment detail, and it cannot prove adhesion to your garment.
USA Customized Patches has a 10-piece minimum. We provide a free digital mockup in about 12 hours, before production. Production starts only after your written approval. Quotes are available 24 hours a day, 7 days a week.
Use that approval step to check spelling, orientation, finished width and height, thread colors, border treatment, and the exact backing description. If the patch must align with an existing loop panel, compare its approved outline against the panel measurements. Don't approve based only on how large the artwork looks in the proof email.
Color review needs a little restraint. A screen displays light; embroidery uses physical thread. A digital mockup helps establish the intended layout and color assignments, but it does not promise that every phone or laptop will display thread colors identically. Identify critical brand colors in the order notes before approval.
Compare quotes in dollars using the same scope. Ask whether each quote includes the patch, hook backing, loose loop pieces if needed, shipping, and any separate services. Larger patches, denser stitching, and more involved construction can increase cost, but a lower patch-only figure may leave you paying a local shop to prepare every garment.
For a fixed uniform logo, I'd compare iron-on plus application against sew-on installation before paying for a removable system. For a role badge that changes throughout the year, include the cost of future garment alterations in your decision. The cheaper backing is enough only when it meets the actual use requirement.
Typical production takes 7–12 business days after written approval; confirm the schedule for your specific order and allow for shipping and garment installation. USA Customized Patches ships from Corona, California, to all 50 states across the United States. Review the shipping information and provide the delivery ZIP code before planning an event handout.
If the garment or receiving panel is still uncertain, send its photo and measurements through our patch specification contact form with your free digital mockup request. Resolve those details before giving written approval, not after the patches are made.
Install the approved backing on the actual garment
Test the agreed attachment method on the actual garment material before applying the full run. Iron-on needs material-specific application instructions; hook-and-loop needs a securely installed, compatible receiving surface.
For iron-on, control heat, pressure, and support
Get the application instructions for the supplied adhesive and check them against the garment's restrictions. There is no responsible universal temperature and press-time recommendation for every patch and fabric combination. More heat is not a dependable cure for poor adhesion; it can damage the garment before solving the bond.
Start with a clean, dry placement area prepared according to the instructions. Support it so the application equipment can deliver even pressure. A thick seam, button placket, pocket edge, or cap crown can keep part of the patch from making full contact even when the center appears firmly attached.
Use the recommended cover material and cooling procedure, if specified. Don't tug at the patch while the adhesive is still setting. After the required cooling period, inspect the full perimeter rather than checking only the middle with a quick pull.
For example, an organizer applying patches to structured baseball caps should not assume a flat household iron can press the curved front evenly. A suitable cap press or an experienced decorator may be the better route. Hook-and-loop is not an automatic workaround unless the cap already has a receiving panel or can accept one.
Where long-term edge security matters, consider perimeter stitching with the installer. Confirm that the patch construction can be sewn and that the needle path will not close a pocket or catch an unwanted lining layer. Adhesive backing does not eliminate the need to think through the garment assembly.
For hook-and-loop, install the receiving side first
The usual arrangement puts hook material on the patch and loop material on the garment, but confirm the order rather than assuming. Before sewing anything, mate the supplied pieces to verify compatibility, shape, and orientation. Different fastener constructions do not necessarily behave the same way together.
Position the receiving panel on the garment and check sewing access from the inside. Sew it securely using a method appropriate for that garment and panel. An adhesive-backed strip sold for general household use is not automatically a washable substitute for a properly installed apparel receiving panel.
Mount the patch with its edges aligned and press across the entire face. Then move the garment as it will be worn: bend a sleeve, shoulder the backpack, or close the vest. Watch for corners that curl away or catch nearby straps. A patch can hold well on a table and still sit poorly on a moving garment.
Ready to spec type, size, backing, and quantity? Open the quote form for a free 12-hour mockup and USA shipping after approval.
GET A FREE MOCKUPTo remove it, support the receiving panel and peel the patch away in a controlled motion. Don't yank the garment by the patch. On thin fabrics especially, careless removal can load the panel stitching and distort the surrounding material.
Test wear and washing before handing out the full run
Evaluate a finished garment under its expected movement and care routine before distributing the rest. A successful installation should hold without damaging the fabric, distorting the placement, or leaving exposed edges that snag during normal use.
For iron-on, wait the instructed interval before laundering. Follow the garment and patch care requirements, then inspect for edge lifting, puckering, adhesive changes, or damage to the patch face. If the two sets of instructions conflict, stop and ask the supplier or installer rather than choosing the hotter or more aggressive option.
For removable patches, taking the patch off before washing can reduce unnecessary wear on its face and fastener. Keep exposed hooks away from delicate knits and other snag-prone items. Inspect the sewn receiving panel after laundering as well; removing the patch does not protect loose panel stitches.
Lint matters. Hook material that collects fibers may engage less effectively, and a damaged or worn loop panel may no longer hold the same patch as securely. Clean fasteners gently according to their care guidance and replace worn components when cleaning no longer restores useful engagement.
If an organization uses a commercial laundry service, get that service's requirements before choosing the backing. Commercial processing can differ from home washing in chemistry, heat, and handling. In our production experience, matching the patch installation to the real laundry route prevents more problems than adding a vague 'heavy-duty' note to the purchase order.
Save the approved specifications for replacements and reorders
Keep the approved dimensions, artwork, backing package, and garment information together for future orders. Reordering the same logo is not enough if the receiving panel or garment has changed.
For a removable system, record which side is on the patch, the receiving panel's shape and measurements, and whether loose loop pieces were included. A replacement patch should mate with the existing gear without requiring every wearer to visit an alterations shop.
For iron-on, retain the application instructions and identify the garment that passed your test. A replacement shirt with a similar color but a different fiber blend or finish needs another compatibility check. 'Same navy polo' is not a material specification.
What usually goes wrong
Most attachment problems start with an unverified surface or an incomplete specification. Check those first instead of immediately blaming the patch face.
- The iron-on edge lifts. Check fabric compatibility, even pressure, seam interference, and the prescribed cooling procedure before applying more heat.
- The hook-backed patch has nowhere to attach. Confirm that a garment-side loop panel exists and that any required loose receiving pieces were included in the order.
- The patch overhangs its panel. Compare finished dimensions and outline against the usable loop area, not the surrounding decorative stitching.
- The cap front looks puckered. Recheck curvature, patch stiffness, panel installation, and whether the application equipment supported the crown correctly.
- The removable patch snags during work. Inspect exposed corners and nearby straps; a better-supported placement may help more than a stronger fastener.
- The proof looked right but the order is incomplete. Compare the approval against the written component list, especially separate loop pieces and installation responsibilities.
What this advice is based on
This advice rests on the patch-production process: reviewing artwork, specifying face material and backing, checking the digital mockup, and confirming written order details before production. Practical recommendations about placement, unsupported edges, and installation reflect general production experience, not a promise that one backing will perform identically on every garment.
The mockup establishes the design and listed specifications. The garment label, supplied application instructions, and a test on the actual material establish whether your installation plan is workable. Before you approve a run, make sure the person attaching the patches has all three.