
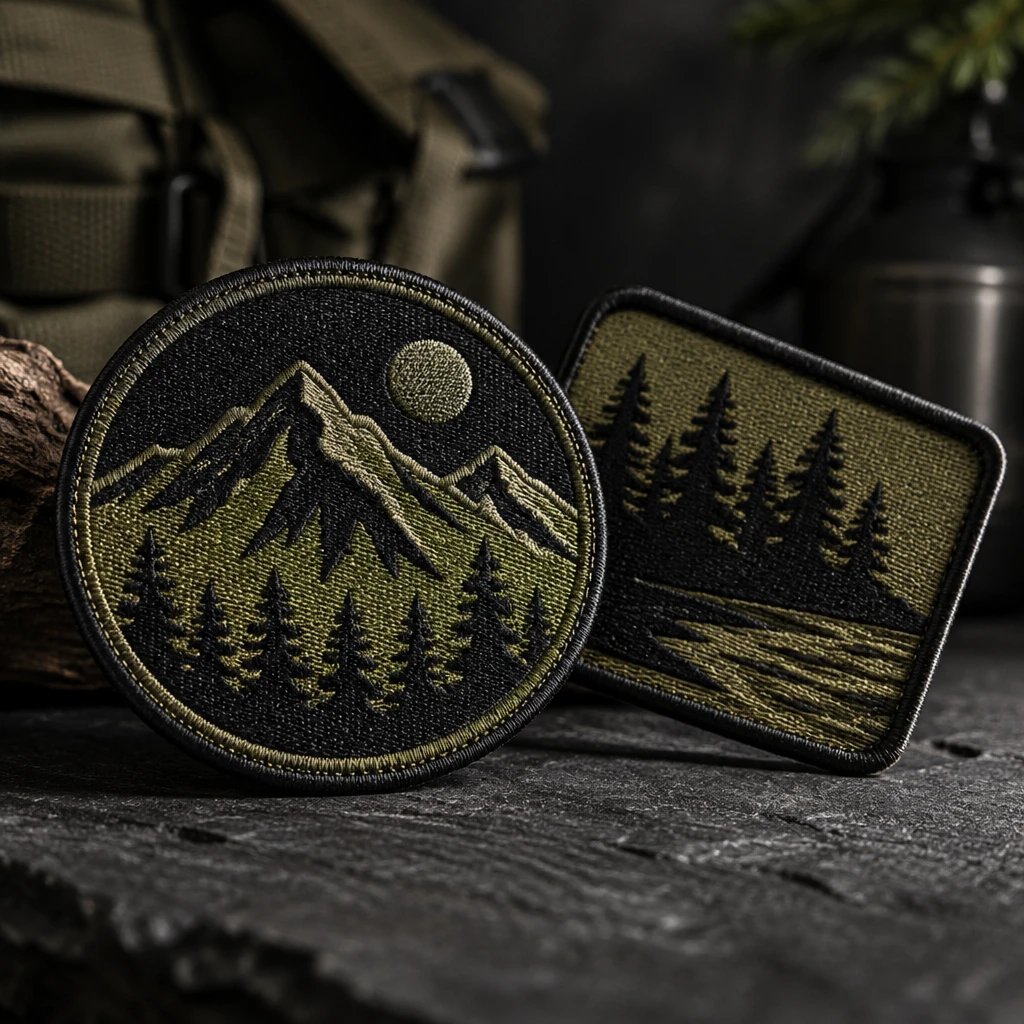
For embroidered patches, the biggest production cost driver is stitch workload: larger, denser designs take more thread and machine time. The practical answer to “what is the cheapest way to make custom patches?” is to simplify that workload, choose only the backing you need, and order the required quantity together. Keep the design readable and the attachment suitable for the garment, or the apparent savings can disappear during installation.
What is the cheapest way to make custom patches without losing useful detail?
Start with a simple design at the smallest size that still reads clearly, then remove production features that do not help the patch do its job. A flat embroidered emblem with a straightforward outline and no added attachment layer is a sensible starting point when someone will sew it onto the garment.
That is a starting specification, not a promise that embroidery wins every quote. Small lettering may be better suited to woven construction. A photograph may need printing. Trying to force either design into embroidery can mean enlarging the patch, removing important information, or paying for stitching that still does not look right.
Price the finished use. A sew-on patch can have a lower patch-only cost but require paid sewing. A removable hook-and-loop patch costs more to build than a plain-backed version in many specifications, yet makes sense on a uniform with an existing loop panel. The least expensive usable option depends on what happens after the box arrives.
USA Customized Patches has a 10-piece minimum. If you have a basic emblem ready, request a free digital mockup for embroidered patches before deciding which details to keep. The layout is a better place to make budget decisions than a finished batch.
Which specifications move a custom patch quote?
Size, stitch workload, color requirements, border construction, backing, quantity, timing, and artwork preparation all affect a patch quote. Their importance changes with the patch material and production method, so a low color count alone does not establish a low price.
| Factor | Effect on cost | How to keep it down |
|---|---|---|
| Finished size | Larger dimensions use more material and usually require more stitching or other production work. | Choose the smallest size that preserves readable lettering and fits the actual garment. |
| Stitch count and coverage | Dense fills, layered details, and large stitched backgrounds increase embroidery work. | Let the base fabric supply background color where full stitching is unnecessary. |
| Color count | Additional thread colors can add sequencing and handling. For printed patches, artwork color count may matter less than size and construction. | Remove redundant shades, but keep enough contrast for names and symbols to read. |
| Border and outline | Intricate silhouettes and tight corners can require more specialized edge finishing. | Use a circle, oval, rectangle, or another uncomplicated outline when the logo allows it. |
| Backing | Heat-seal adhesive, hook-and-loop components, and other attachment layers add materials and processing. | Specify only the attachment components the garment needs. |
| Quantity | Larger identical runs generally spread setup work across more pieces, lowering unit cost while raising total spend. | Combine confirmed demand for the same specification instead of placing separate small orders. |
| Rush timing | A compressed schedule can require rush production or faster shipping, subject to availability. | Allow time for artwork review, approval, production, and transit before the event. |
| Artwork preparation | Unclear files and complex detail increase preparation work and may require revised artwork or specifications. | Supply clean artwork, exact wording, dimensions, and clear color references. |
| Patch construction | Embroidery, weaving, printing, molded PVC, and other methods involve different materials and setup requirements. | Choose the process that reproduces the design directly rather than forcing it into an unsuitable material. |
These factors interact. A small patch filled with tiny lettering can be harder to produce successfully than a larger emblem with an open fabric background. Ask what is moving your particular quote instead of assuming every extra color or every fraction of an inch carries the same charge.
How small can you make a patch before the savings backfire?
A patch is too small when its essential text, symbols, or attachment area stop working. Reducing dimensions usually lowers material and stitch requirements, but readability sets a practical limit.
Example: a run club is considering a 3-inch embroidered patch with its name, a shoe graphic, a founding year, and a long slogan. Shrinking that entire layout to 2 inches is not the first change I would make. I would remove the slogan from the patch and keep the club name and shoe recognizable.
Measure the placement first. A cap front has curvature and may have a center seam. A work shirt chest has pockets, buttons, and limited visual space. A motorcycle vest back offers more room, but a large emblem also creates more material and stitch work. The same artwork should not automatically get the same dimensions on all three.
Embroidery coverage is the amount of a patch's face that is covered by thread. An exposed twill background can carry the main background color without stitching every part of it. In our production experience, this is often a more useful cost discussion than removing a single accent color from an otherwise fully stitched design.
Do not reduce stitch density blindly. Underbuilt fills can expose fabric where the design calls for solid coverage. The sensible saving is less unnecessary embroidery, not inadequate embroidery in the areas that remain.
When does woven or printed construction make more sense?
Woven construction is worth quoting when small lettering and fine lines are central to the design; printing is worth quoting for gradients, photographs, or continuous color changes. Neither method is automatically cheaper, but each can avoid the cost of forcing unsuitable artwork into embroidery.
An embroidered patch is a fabric emblem that uses stitched thread to form raised lettering and graphics. It suits a bold team name, a simple business logo, or a club crest with clear shapes. Texture is part of the appeal. For a basic work shirt emblem, I would usually start with flat embroidery rather than raised 3D embroidery.
A woven patch is a textile emblem that forms its design through fine woven threads rather than embroidery stitched onto a base. Compare woven patch construction if reducing the size of an embroidered design makes the lettering crowded. The flatter appearance is a trade-off, not a defect.
A printed patch is a fabric emblem that carries artwork applied through a printing process. For an example such as a club badge built around a sunset photograph, printed patches for detailed artwork deserve consideration before paying to redraw the image as separate thread colors. You give up embroidery's raised texture.
Polyvinyl chloride, commonly called PVC, uses molded material rather than textile stitching. Leather and chenille create still different surfaces. Choose those materials because their appearance or use fits the project, not because they sound like upgrades. For a straightforward name-and-logo patch, extra relief, thick pile, or specialty material may add cost without improving identification.
Which border and shape keep production straightforward?
An uncomplicated outline usually keeps edge finishing more straightforward than a silhouette with deep notches or narrow projections. The suitable border depends on both the patch material and the shape, so compare the complete construction rather than the border name alone.
A merrowed border is an overlocked thread edge that wraps around a patch's perimeter. It gives many round, oval, and rectangular textile patches a familiar raised outline. It is a practical option for simple shapes, but it is not a universal answer for every tight inside corner.
See your artwork as a custom USA patch before you buy. Free digital mockup in 12 hours — 5-piece minimum per design. We do not produce until you approve.
GET A FREE MOCKUPA heat-cut edge is a trimmed edge that uses heat to finish compatible synthetic patch material. It can accommodate outlines that do not suit a bulky wrapped border. Availability and appearance depend on the material, and an intricate cut outline may still add handling even when the edge looks thin.
Example: a school club wants a patch shaped exactly like a mascot with individual claws and narrow tail points. I would quote the mascot inside a simple oval as an alternative. The trade-off is losing the exact silhouette; the gain is a cleaner perimeter with fewer delicate projections to manage during sewing and wear.
Keep the identity. Simplify the outline. Those are different decisions, and treating them separately often reveals a saving that does not change what people recognize.
Which backing costs least once the patch is attached?
A sew-on patch with no added attachment layer is often the lower-cost patch specification, but installation labor belongs in the comparison. Iron-on or hook-and-loop backing can be the better overall choice when it matches the garment and how the patch will be used.
Sew-on is the right call for many denim jackets, club vests, and work shirts that can accept stitching. It avoids paying for adhesive that will not be used. Someone still has to attach it, though. If a local alterations shop is doing that work, get the sewing quote before deciding that plain backing saves money overall.
Iron-on backing is a heat-activated adhesive layer that bonds a compatible patch to a suitable fabric when applied correctly. It can simplify attachment on some cotton garments, but a household iron is not a guarantee of a durable bond. Curved caps, waterproof coatings, and heat-sensitive fabrics need particular care. Check the garment's care instructions and confirm application requirements.
Hook-and-loop backing is a removable attachment system that connects a hook surface to a matching loop surface. If a uniform already has a loop panel, specify that fact rather than automatically buying both components. If it has no panel, the receiving side and its installation need to be accounted for.
I'd skip pressure-sensitive adhesive as the sole attachment for a regularly washed team jersey unless the exact product and intended use support it. Temporary positioning and permanent garment attachment are not the same job. A backing that fails after application is not a budget option.
How should you choose quantity without buying unnecessary stock?
Order confirmed demand together when the design and specifications are identical, but compare total spend as well as unit cost. A larger run generally distributes setup work across more patches; it does not make unused inventory free.
Example: a run club needs 40 patches for registered members and is debating extra stock for future signups. Quote the confirmed requirement first, then request an alternate quantity based on a realistic membership plan. Do not choose a bigger order solely because its per-piece figure looks better.
Check for hidden variants before combining demand. Different chapter names, background colors, dimensions, and backing requirements can turn one apparent order into separate production specifications. Ask how those variations affect setup and quantity pricing. A shared logo does not automatically mean every version can be priced as one identical run.
For a brand launch, obsolete details are an inventory risk. A dated event title, an unconfirmed sponsor, or a changing website address can make leftover patches difficult to use. An evergreen emblem may be easier to reorder and distribute, provided the event information is not essential to the patch's purpose.
The 10-piece minimum at USA Customized Patches allows a small order without requiring a large stock commitment. It does not mean the smallest run will have the lowest unit price. Keep those two questions separate: how little can you order, and what quantity makes financial sense?
What artwork preparation prevents avoidable quote changes?
Send clear artwork with exact wording, finished dimensions, and the intended garment so the quote reflects a buildable patch. Preparation costs and revision needs depend on the file and design, so ask what artwork work is included rather than assuming every file requires the same effort.
Digitizing is the conversion of artwork into stitch instructions that an embroidery machine can follow. It is not simply saving a logo in a different file format. Stitch direction, sequence, underlay, and how lettering holds together must be planned for the selected size.
A clean vector file can make the intended shapes easier to interpret, but it does not eliminate embroidery digitizing. A blurry screenshot creates different problems: uncertain edges, ambiguous lettering, and colors affected by the image itself. Send the best original file available and flag anything that must remain exact.
- Provide finished width and height in inches, not just a screen image.
- Type out all names, dates, abbreviations, and punctuation separately from the artwork.
- Identify essential logo details and any elements that may be simplified.
- Name the garment, fabric, placement, and preferred attachment method.
- Ask whether artwork preparation, digitizing, revisions, and any physical sample are included or quoted separately.
USA Customized Patches provides a free digital mockup in about 12 hours. The mockup shows the proposed layout and specified design choices before production. It is not a physical sample, and a screen cannot fully demonstrate thread sheen, texture, or how an applied patch will behave on your particular jacket.
How do deadlines and shipping affect the final bill?
Tight deadlines can increase costs through rush production, faster shipping, or both, and not every specification can be rushed. Leaving room for artwork corrections and approval is usually a more dependable saving than cutting essential construction features.
Ready to spec type, size, backing, and quantity? Open the quote form for a free 12-hour mockup and USA shipping after approval.
GET A FREE MOCKUPUSA Customized Patches lists a typical production timeframe of 7–12 business days. Production starts only after written approval. Confirm the schedule for the specific order and ask whether the stated delivery estimate includes transit; the approval date, ship date, and required arrival date are different milestones.
State the event date when requesting the quote. An example would be a club needing patches attached before a weekend ride, not simply delivered that morning. Allow time to count the shipment, distribute the patches, and sew them onto vests. Arrival at the clubhouse is not the end of the job.
USA Customized Patches ships from Corona, CA, to all 50 states in the United States. Review shipping information for US patch orders and provide the destination ZIP code when discussing timing. Shipping across the country does not mean every address has an identical transit schedule or shipping charge.
Is making patches yourself actually less expensive?
DIY production can cost less when suitable equipment, materials, and production skills are already available. If you must buy equipment or learn the process for one order, include that expense and your labor before comparing it with a manufacturer quote.
A home embroidery machine does not remove the need for digitizing, stabilizer, base fabric, thread, cutting, and edge finishing. Test pieces use materials too. For an informal craft project, a handmade finish may be perfectly acceptable; for matching employee uniforms, inconsistent edges and lettering are harder to overlook.
Calculate the usable output, not just the number of designs you can stitch. Trimming a batch of irregular shapes and applying backing can become the slowest part of the work. If you enjoy that work and already own the equipment, DIY deserves a fair comparison. If the goal is outfitting a team on a deadline, outsourced production may be the more practical use of the budget.
How can you compare quotes without missing extra costs?
Compare quotes against one written specification and request the delivered total in US dollars. A lower unit price is not a meaningful saving if the quote leaves out backing, artwork work, shipping, or attachment you still have to pay for.
- Write down the patch material, finished dimensions in inches, artwork version, color requirements, border, backing, and quantity.
- Specify whether every piece is identical or whether names, colors, or other details vary.
- Ask what preparation and setup work is included, and distinguish a digital mockup from a physical sample.
- Confirm the total in USD, including shipping and any applicable additional charges.
- Check production timing, transit expectations, and the approval deadline against the date you actually need to use the patches.
- Request one lower-cost alternate specification and ask exactly what changes in appearance, attachment, or durability.
That alternate quote should change something you can evaluate. An exposed fabric background instead of a fully stitched field is a clear choice. A vague instruction to make everything less expensive is not. Keep the dimensions and quantity fixed while testing a design change so you can see what that change actually does.
What is this cost advice based on?
This advice rests on patch production steps, the digital mockup review, and the specifications used to build an order. It is not a published price list, a market-wide price study, or a promise that one material always costs less than another.
In our production experience, useful savings come from matching the design to the process and removing work that does not improve the finished patch. Actual pricing still depends on the artwork, dimensions, construction, quantity, destination, and required schedule. The approved order specifications should record those decisions before manufacturing begins.
What should you send for a cost-conscious patch quote?
Send the artwork, desired dimensions, quantity, garment, destination ZIP code, and required arrival date. If the border or backing is undecided, say so and ask for a recommendation tied to the intended use.
USA Customized Patches is open for quote requests 24 hours a day, 7 days a week. You can send your patch specifications for a free digital mockup and ask which single change would reduce the quote most without compromising the design's purpose.
Before giving written approval, check the finished dimensions against the actual garment. Print the layout at its intended size if possible. A logo that looks clear on a large monitor may be cramped on a cap, and correcting that before production is far easier than finding a new use for the finished order.