
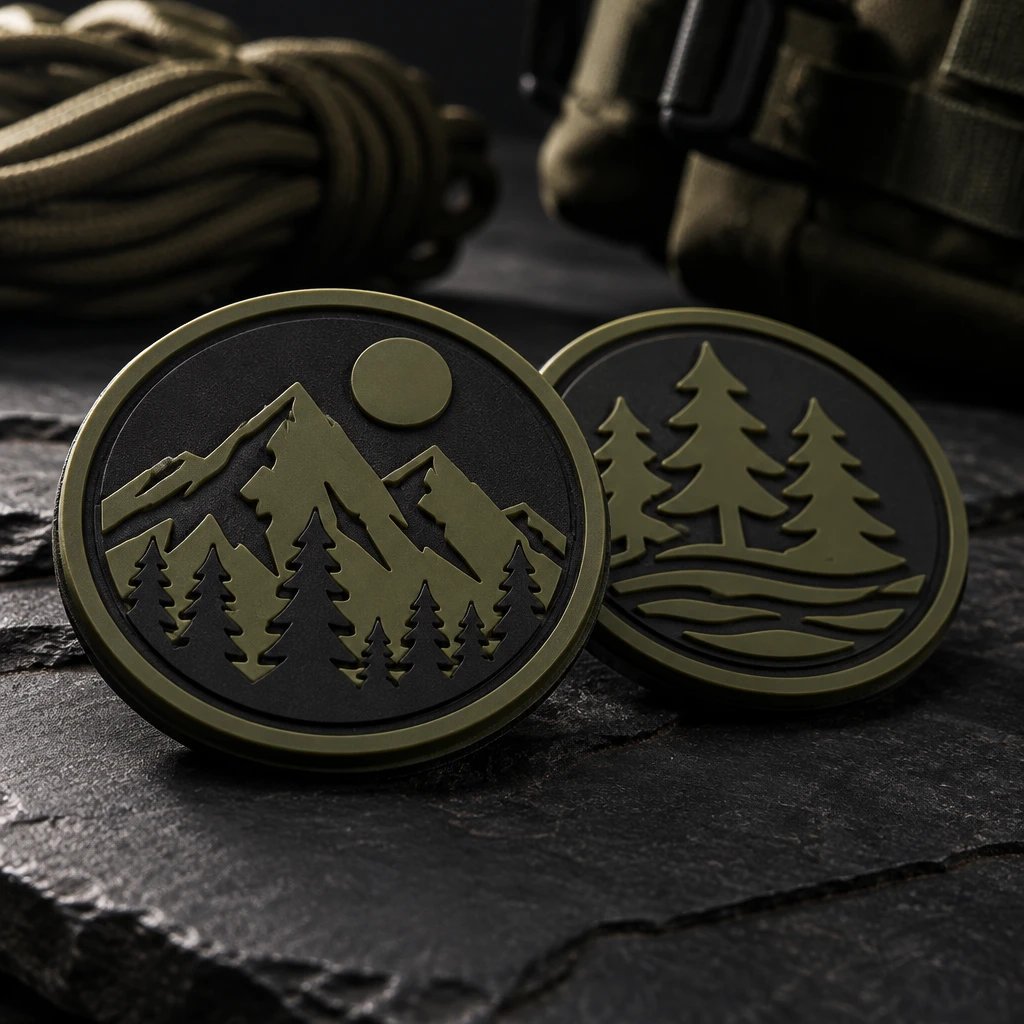
The most expensive mistake is approving PVC patches that cannot be attached reliably to the garment you actually use. If you're deciding when to choose pvc patches, choose them for bold molded designs, a wipe-clean face, and gear sturdy enough to support their weight. Choose a textile patch instead when soft drape, tiny lettering, or photographic detail matters more.
Start with the jacket, cap, or bag, not the logo file. A patch can look right in an enlarged digital proof and still feel like a stiff badge on a lightweight running shirt. For teams, clubs, and businesses in the United States, the useful comparison is the finished, attached patch, including its edge, backing, and behavior during everyday wear.
Decide when to choose pvc patches over textile options
Choose PVC when the patch needs a molded surface that can be wiped clean and the design uses clear, separated shapes. Embroidery, woven construction, and printing are better starting points when texture, flexibility, or fine image detail is the main requirement.
A PVC patch is a molded polyvinyl chloride emblem that forms artwork from colored material rather than stitched thread. Raised areas can give lettering and symbols physical depth, but that depth occupies space. More relief is not automatically more readable.
| Patch type | Choose it for | Main trade-off | Example use |
|---|---|---|---|
| PVC | Bold shapes, raised detail, and a wipe-clean face | Can feel heavier and stiffer than a textile patch; fine details need simplification | Example: a removable club emblem on a gear bag |
| Embroidered | Visible thread texture and traditional uniform styling | Small lettering and closely spaced details can merge in stitching | Example: a work jacket chest emblem |
| Woven | Fine lettering and flatter textile construction | Less raised texture than embroidery or molded PVC | Example: a detailed cap badge with a short tagline |
| Printed | Photographs, gradients, and complex color transitions | No molded relief; care depends on the specified material and print process | Example: an illustrated event patch |
| Chenille | Large, fuzzy varsity lettering | Poor fit for tiny artwork or a wipe-clean equipment badge | Example: a letter on a heavyweight school jacket |
| Leather | An engraved or debossed look on suitable garments and accessories | Material and finish affect cleaning, color range, and flexibility | Example: a restrained brand mark on a structured cap |
That comparison is a starting point, not a durability ranking. A well-specified embroidered patch can be the sensible choice for a work jacket, even when the jacket goes outdoors. The PVC patch options make more sense when the molded surface solves an actual use problem rather than simply looking different.
Mistake 1: Put PVC on a garment that cannot support it
An oversized or stiff PVC patch can make a lightweight garment sag, pucker, or stand away from the body. This happens when the patch's footprint and thickness are selected without considering the fabric underneath.
The finished result is easy to recognize. The logo looks flat on a desk, but the shirt pulls downward when worn. On a soft cap, the patch can resist the crown's curve and lift at the ends. A flexible PVC formulation helps, but it does not erase the difference between a molded badge and a thin fabric emblem.
Example: a run club wants a 3-inch-wide badge on a lightweight performance shirt. I'd start with a light textile option, not a thick, raised PVC design. Put that same emblem on a substantial equipment bag with an existing loop panel, and PVC becomes a much more reasonable candidate.
Check the mounting area before choosing the material
Look for stretch, lining, seams, pockets, and curvature. A jacket shell may be sturdy while its chest pocket is not. A cap front may have enough body for a patch but still offer too little flat space between the visor and crown seam.
The fix: evaluate the patch at actual size on the exact garment and reduce its footprint or relief if it fights the fabric. If soft drape remains the priority, switch to a lighter textile construction rather than trying to solve the problem with stronger adhesive.
Mistake 2: Mold artwork that needs thread or print
Tiny lettering, narrow gaps, and fine illustrations can lose definition in molded PVC. The mistake begins when artwork that works on a screen is treated as production-ready at patch size.
On the finished patch, enclosed letters can look crowded, narrow outlines may overwhelm the symbol, and nearby color areas may become difficult to distinguish. The issue is not simply color count. Each feature needs enough physical space to form clearly, and the design must still read after the patch is reduced to its intended dimensions.
Example: a club crest contains a mascot, founding date, circular motto, and shaded landscape inside a 2-inch badge. Making every element raised will not rescue the layout. Remove secondary copy, enlarge the emblem, or move the design to another construction.
In our production experience, separating essential information from decorative information is more useful than arguing over the smallest possible letter. The club name might be essential. A long slogan around the perimeter often is not. For fine textile detail, woven patches for small lettering deserve a look; photographic art usually belongs in a printed process.
The fix: simplify the PVC artwork into readable shapes and check it at actual size, not only zoomed in. If removing detail changes the identity of the design, choose woven or printed construction instead.
Mistake 3: Order the wrong backing for the attachment
A backing mismatch leaves a good-looking patch lifting, sliding, or unusable on arrival. It happens when “iron-on,” “adhesive,” or “hook-and-loop” is selected without checking the garment and the intended installation method.
Hook-and-loop backing is a removable fastening system that uses a hooked surface mating with a loop surface. A hook-backed patch needs a compatible loop receiving area. It does not attach securely to an ordinary nylon jacket simply because the jacket feels slightly textured.
Sew-on construction is often the right call for permanent attachment to suitable workwear or bags. The installer still needs access behind the mounting area, and sewing through a pocket can close it. On waterproof outerwear, needle holes can also affect the garment's weather barrier.
Heat attachment needs more caution. Do not assume that a PVC face, adhesive system, garment coating, and heat press are compatible. The patch supplier must specify an appropriate attachment system, and the garment maker's care restrictions still apply. A household iron is not a universal fix for an unspecified backing.
Ask what the installer actually receives
Confirm whether the order includes only the hook side or also a loose loop piece, if needed. For sew-on use, confirm the sewing channel and access for stitching. Temporary adhesive may help with placement when specified, but it should not be silently substituted for a permanent attachment.
See your artwork as a custom USA patch before you buy. Free digital mockup in 12 hours — 5-piece minimum per design. We do not produce until you approve.
GET A FREE MOCKUPThe fix: name the garment, attachment method, and receiving surface in the order specification. Have the installer confirm compatibility before approving the backing.
Mistake 4: Raise every detail on the patch
Too much relief makes a PVC patch busy, bulky, and harder to read. This happens when dimensional effects are added to every line instead of being reserved for the important parts of the design.
A molded badge can have a flatter, stepped treatment or more sculpted contours. Neither approach improves the design by itself. If the border, background texture, lettering, mascot, and tiny accent marks all compete for height, the finished patch loses its visual hierarchy.
Example: a business wants its initials raised above a recessed background on a tool bag patch. That is a clear use of relief. Adding a deeply sculpted texture behind those initials may create shadows and recesses without making the business name any easier to recognize.
I'd skip elaborate relief for a small cap badge. Bold lettering on a restrained background usually earns its space better. A larger display emblem on a substantial bag gives sculpted artwork more room, though the extra depth still needs to fit the attachment and cleaning plan.
A digital mockup should distinguish the base, raised elements, and intended edge. It cannot let you feel the finished thickness. If the order depends on a precise tactile result, ask what physical sampling options are available and how those affect the quote and schedule.
The fix: give the main symbol or lettering priority and keep secondary areas quieter. Approve the relief specification along with the artwork rather than treating depth as a production detail to settle later.
Mistake 5: Ignore the border and sewing path
A poorly planned perimeter can leave stitches crowded against lettering or pointed edges that catch during use. The problem starts when the outside silhouette is approved without allowing room for attachment.
A molded PVC border is not the same thing as a merrowed border. A merrowed border is a stitched overlock edge that wraps the perimeter of a suitable textile patch. PVC uses its molded edge, and a sew-on version can include a recessed sewing channel when specified.
That channel needs a clear route. Lettering pushed to the edge may look efficient in the artwork but leave the installer choosing between sewing through the design and placing stitches uncomfortably close to the perimeter. Neither is a good finishing plan.
Example: a motorcycle club wants a narrow banner with sharp, extended tips on a jacket. The shape may be possible, but the tips deserve extra attention because they project beyond the main body. Rounding them slightly or using a less fragile outline can make the patch more practical without changing the club's identity.
For curved mounting areas, paper templates help expose problems early. A flat proof does not show how a long border will sit across a cap crown. Keep the template at the specified size and hold it against the actual garment.
The fix: reserve a clear perimeter for the selected attachment and soften unnecessary protrusions. Show the molded border and sewing channel on the approval artwork when the patch will be stitched down.
Mistake 6: Confuse a wipe-clean face with an easy-care assembly
PVC's face can wipe clean while dirt remains in deep recesses, hook backing, or the seam around the patch. This mistake comes from evaluating the face material separately from the complete attached product.
Molded PVC does not have the exposed thread texture of embroidery, which is useful when surface dirt is a regular concern. But a heavily textured patch can still hold residue in its contours. Hook backing can collect lint, and the garment underneath may have much stricter care requirements than the patch.
Example: an outdoor club uses removable patches on equipment bags. A relatively simple molded face may be practical to wipe down after use. A permanently attached patch on a technical shell needs a different conversation because the shell's coating, stitching, and wash instructions all matter.
Don't improvise with solvents or high heat. Follow the supplied care instructions for both patch and garment, and use the more restrictive requirement when they differ. If the patches are headed for a commercial laundry, share that process before ordering instead of assuming ordinary home-care advice applies.
The fix: choose shallow, accessible detail when easy cleaning is a priority and specify the actual cleaning routine before production. Treat the face, backing, stitching, and host garment as one assembly.
Mistake 7: Treat PVC as a technical performance certification
An ordinary PVC patch should not be assumed to be reflective, flame-resistant, chemical-resistant, or suitable for a regulated uniform. Those requirements need specific verification beyond choosing a material name.
On the finished product, this mistake can be deceptively quiet. The patch looks normal, but a bright yellow section does not necessarily reflect light, and a weather-resistant face does not make the jacket waterproof. Appearance is not documentation.
Ready to spec type, size, backing, and quantity? Open the quote form for a free 12-hour mockup and USA shipping after approval.
GET A FREE MOCKUPOutdoor use also covers very different conditions. A patch on a weekend gear bag does not face the same exposure as one left in direct sunlight on equipment every day. Cleaning chemicals, abrasion, storage temperature, and the attachment method can all affect suitability.
Example: a facilities team wants patches for high-visibility workwear. The buyer should check employer requirements and the garment manufacturer's restrictions before adding a badge. Covering an important visibility area or modifying protective apparel without review is not something a nicer-looking mockup can solve.
In our production experience, the useful question is not “Is PVC durable?” It is “What must this particular patch withstand, and what evidence does the buyer need?” Specific requirements give the production desk something to evaluate. Broad adjectives do not.
The fix: list any required performance properties separately from color and artwork, and request applicable verification before approval. If a requirement cannot be confirmed, do not represent the patch as meeting it.
Mistake 8: Approve the quote before comparing the full order
The lowest patch price can become the more expensive order if it leaves out the required backing, receiving pieces, installation, or delivery needs. A quote is only comparable when the specifications match.
On the finished order, the mismatch may show up as loose patches that the team cannot install, a smaller emblem than expected, or missing loop pieces. Molded construction can involve setup considerations that differ from stitched or printed production. Size, complexity, relief, quantity, and backing all deserve a line in the comparison.
If a straightforward embroidered badge already does the job at a lower quoted cost, use it. PVC should earn its place through the surface, appearance, or attachment plan. Buying it just because it sounds tougher can add expense without improving the garment.
If the material decision is still open, request a free digital mockup with your garment details and compare the layout with embroidered patch construction before choosing. Keep the proposed dimensions and artwork consistent so the comparison stays useful.
USA Customized Patches has a 10-piece minimum. A free digital mockup is available in about 12 hours, and production starts only after written approval. The typical production window is 7–12 business days; confirm the schedule for the actual order rather than treating it as an arrival guarantee.
We ship from Corona, CA, to all 50 states. Review the nationwide shipping information and separate production time from transit time when planning an event. Quotes are available 24 hours a day, 7 days a week, but quote availability does not mean manufacturing or carrier transit runs continuously.
The fix: compare complete written specifications and a quote in USD, including any applicable setup, backing, shipping, and installation costs. Approve the order only when the material choice, attachment, artwork, and deadline agree.
Check these specifications before approving a PVC patch
A useful approval checks the patch as an installed object, not just a logo. Confirm the following items in order so a late backing change does not undo an otherwise finished design.
- Identify the host item. Give the garment or bag model when available, its fabric, the mounting location, and any coating or care restrictions. Include a photo of the receiving area.
- Set the finished dimensions in inches. Mark width and height, then check an actual-size template against seams, pockets, curvature, and available sewing access.
- Confirm the artwork hierarchy. Read the main name at actual size, check open spaces inside letters, and remove secondary details that only work when enlarged.
- Specify the molded construction. Identify raised and recessed elements, the perimeter shape, and the sewing channel if one is needed.
- Name the complete attachment. State sew-on or hook-and-loop requirements, including whether a matching loop receiving piece is required. Confirm any other proposed system explicitly.
- Review color and proof limitations. A screen cannot reproduce every physical color or tactile property. Ask which details are represented by the mockup and which need further confirmation.
- Approve the commercial details. Check quantity, written price, production timing, ship-to address, and delivery expectations before giving written approval.
For a free digital mockup, send the artwork, intended dimensions, garment photo, and backing preference through the patch specification contact page. An unresolved detail is worth stating plainly, especially if you have not decided between permanent sewing and a removable attachment.
What this advice is based on
This advice rests on the patch production process, the digital mockup step, and the written order specifications. In our production experience, artwork scale, mounting conditions, and attachment details explain many avoidable mismatches between an approved image and a useful finished patch.
The recommendations are not laboratory test results or promises that one material outlasts every other material. A digital mockup helps confirm layout, color placement, dimensions, and specified construction. It does not prove wash performance, exact flexibility, chemical resistance, or compatibility with an untested garment.
If you only fix one thing, check the attachment on the actual garment before approving PVC. Bring the patch footprint, garment construction, and backing into the same decision. A simpler patch that sits correctly is more useful than an elaborate one your team cannot wear.